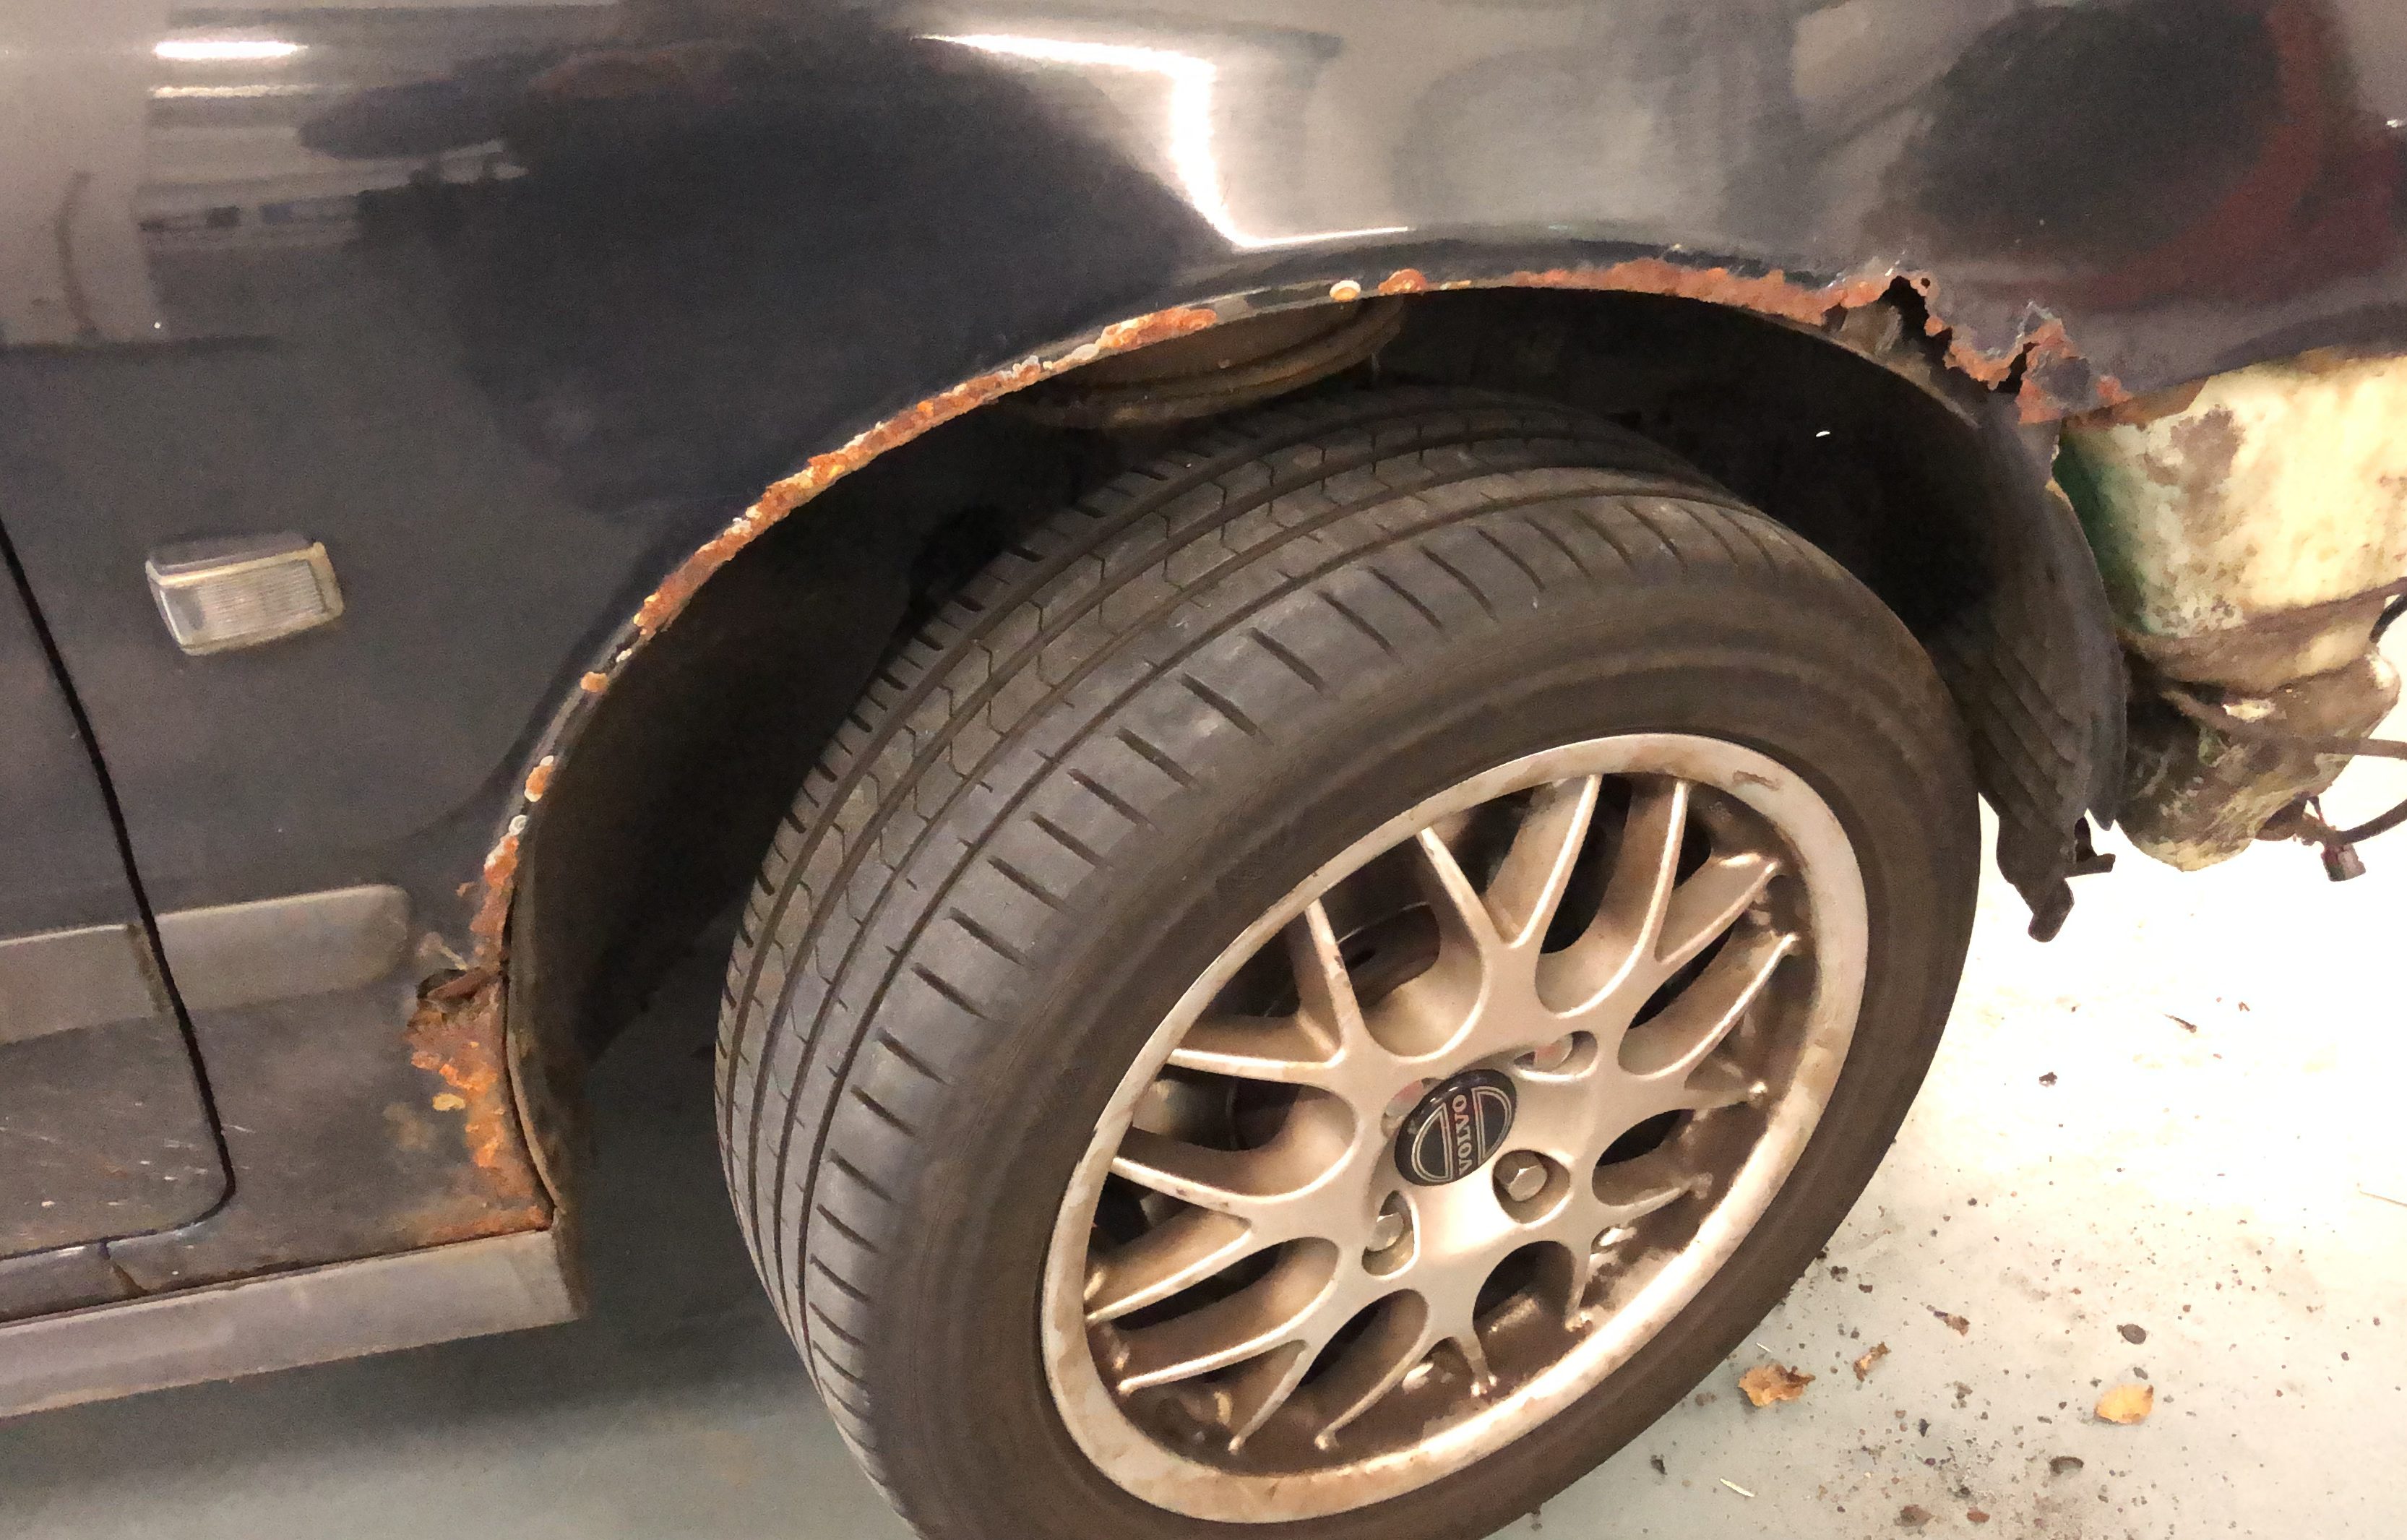
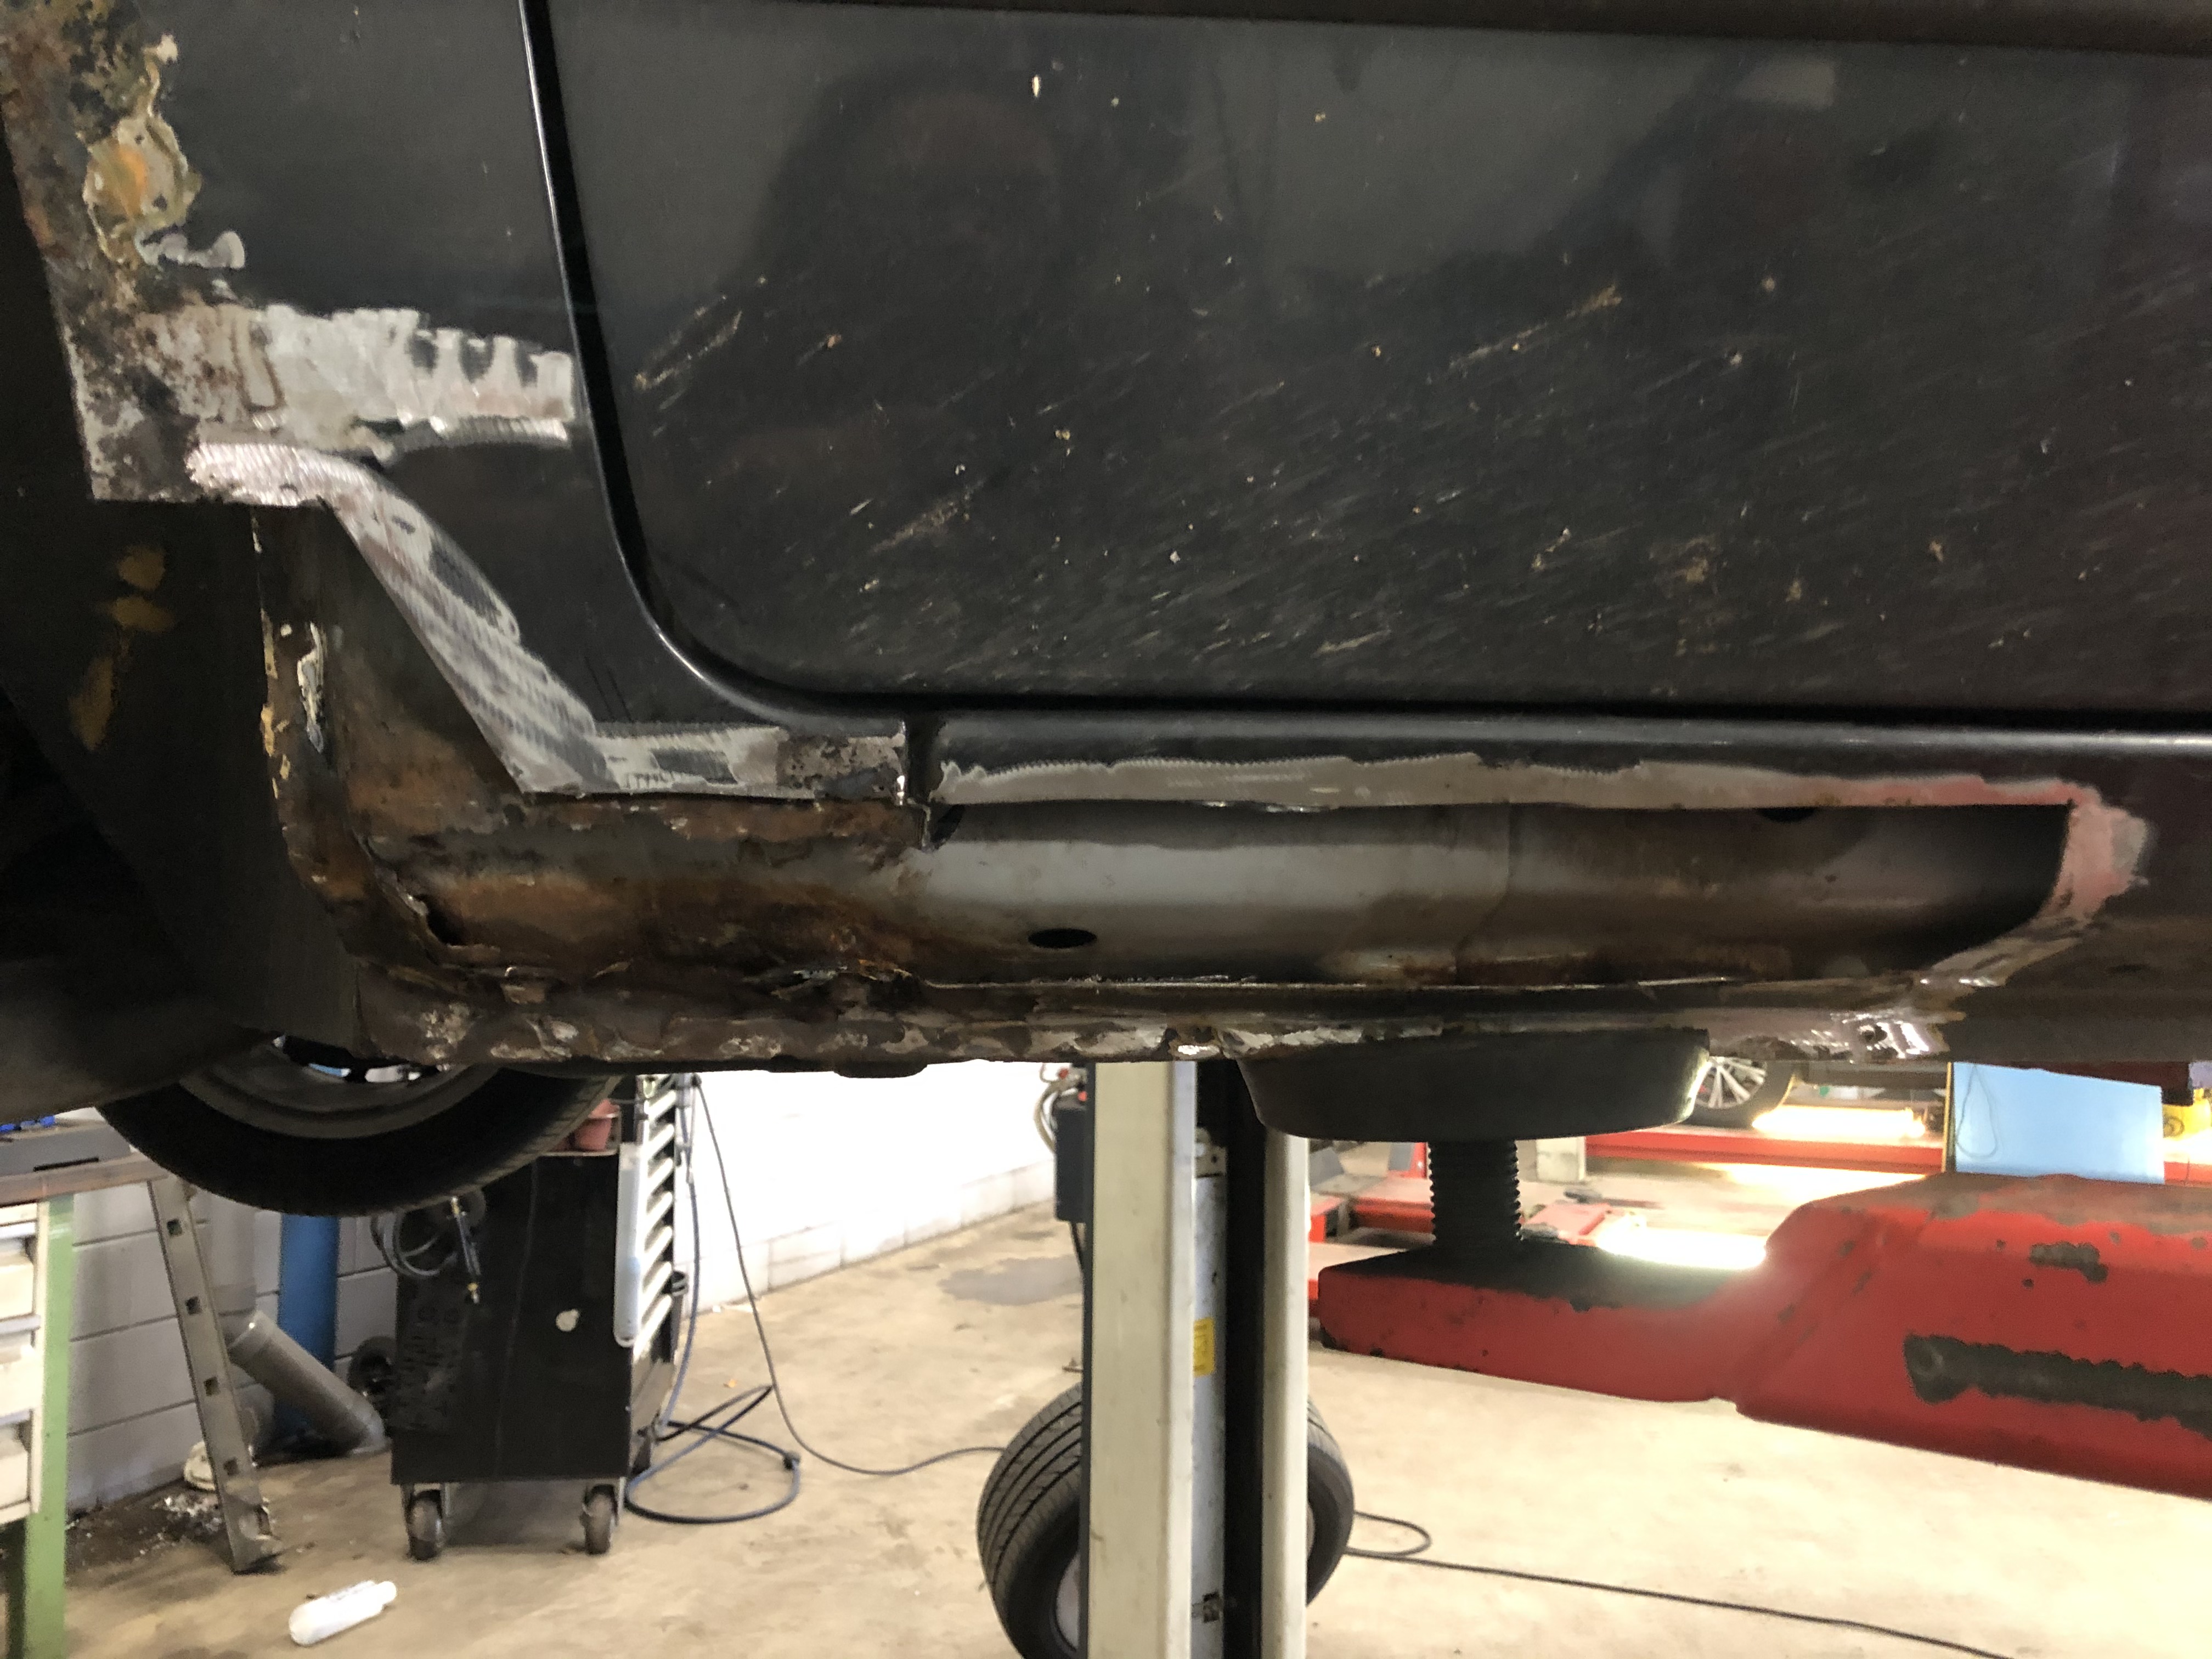
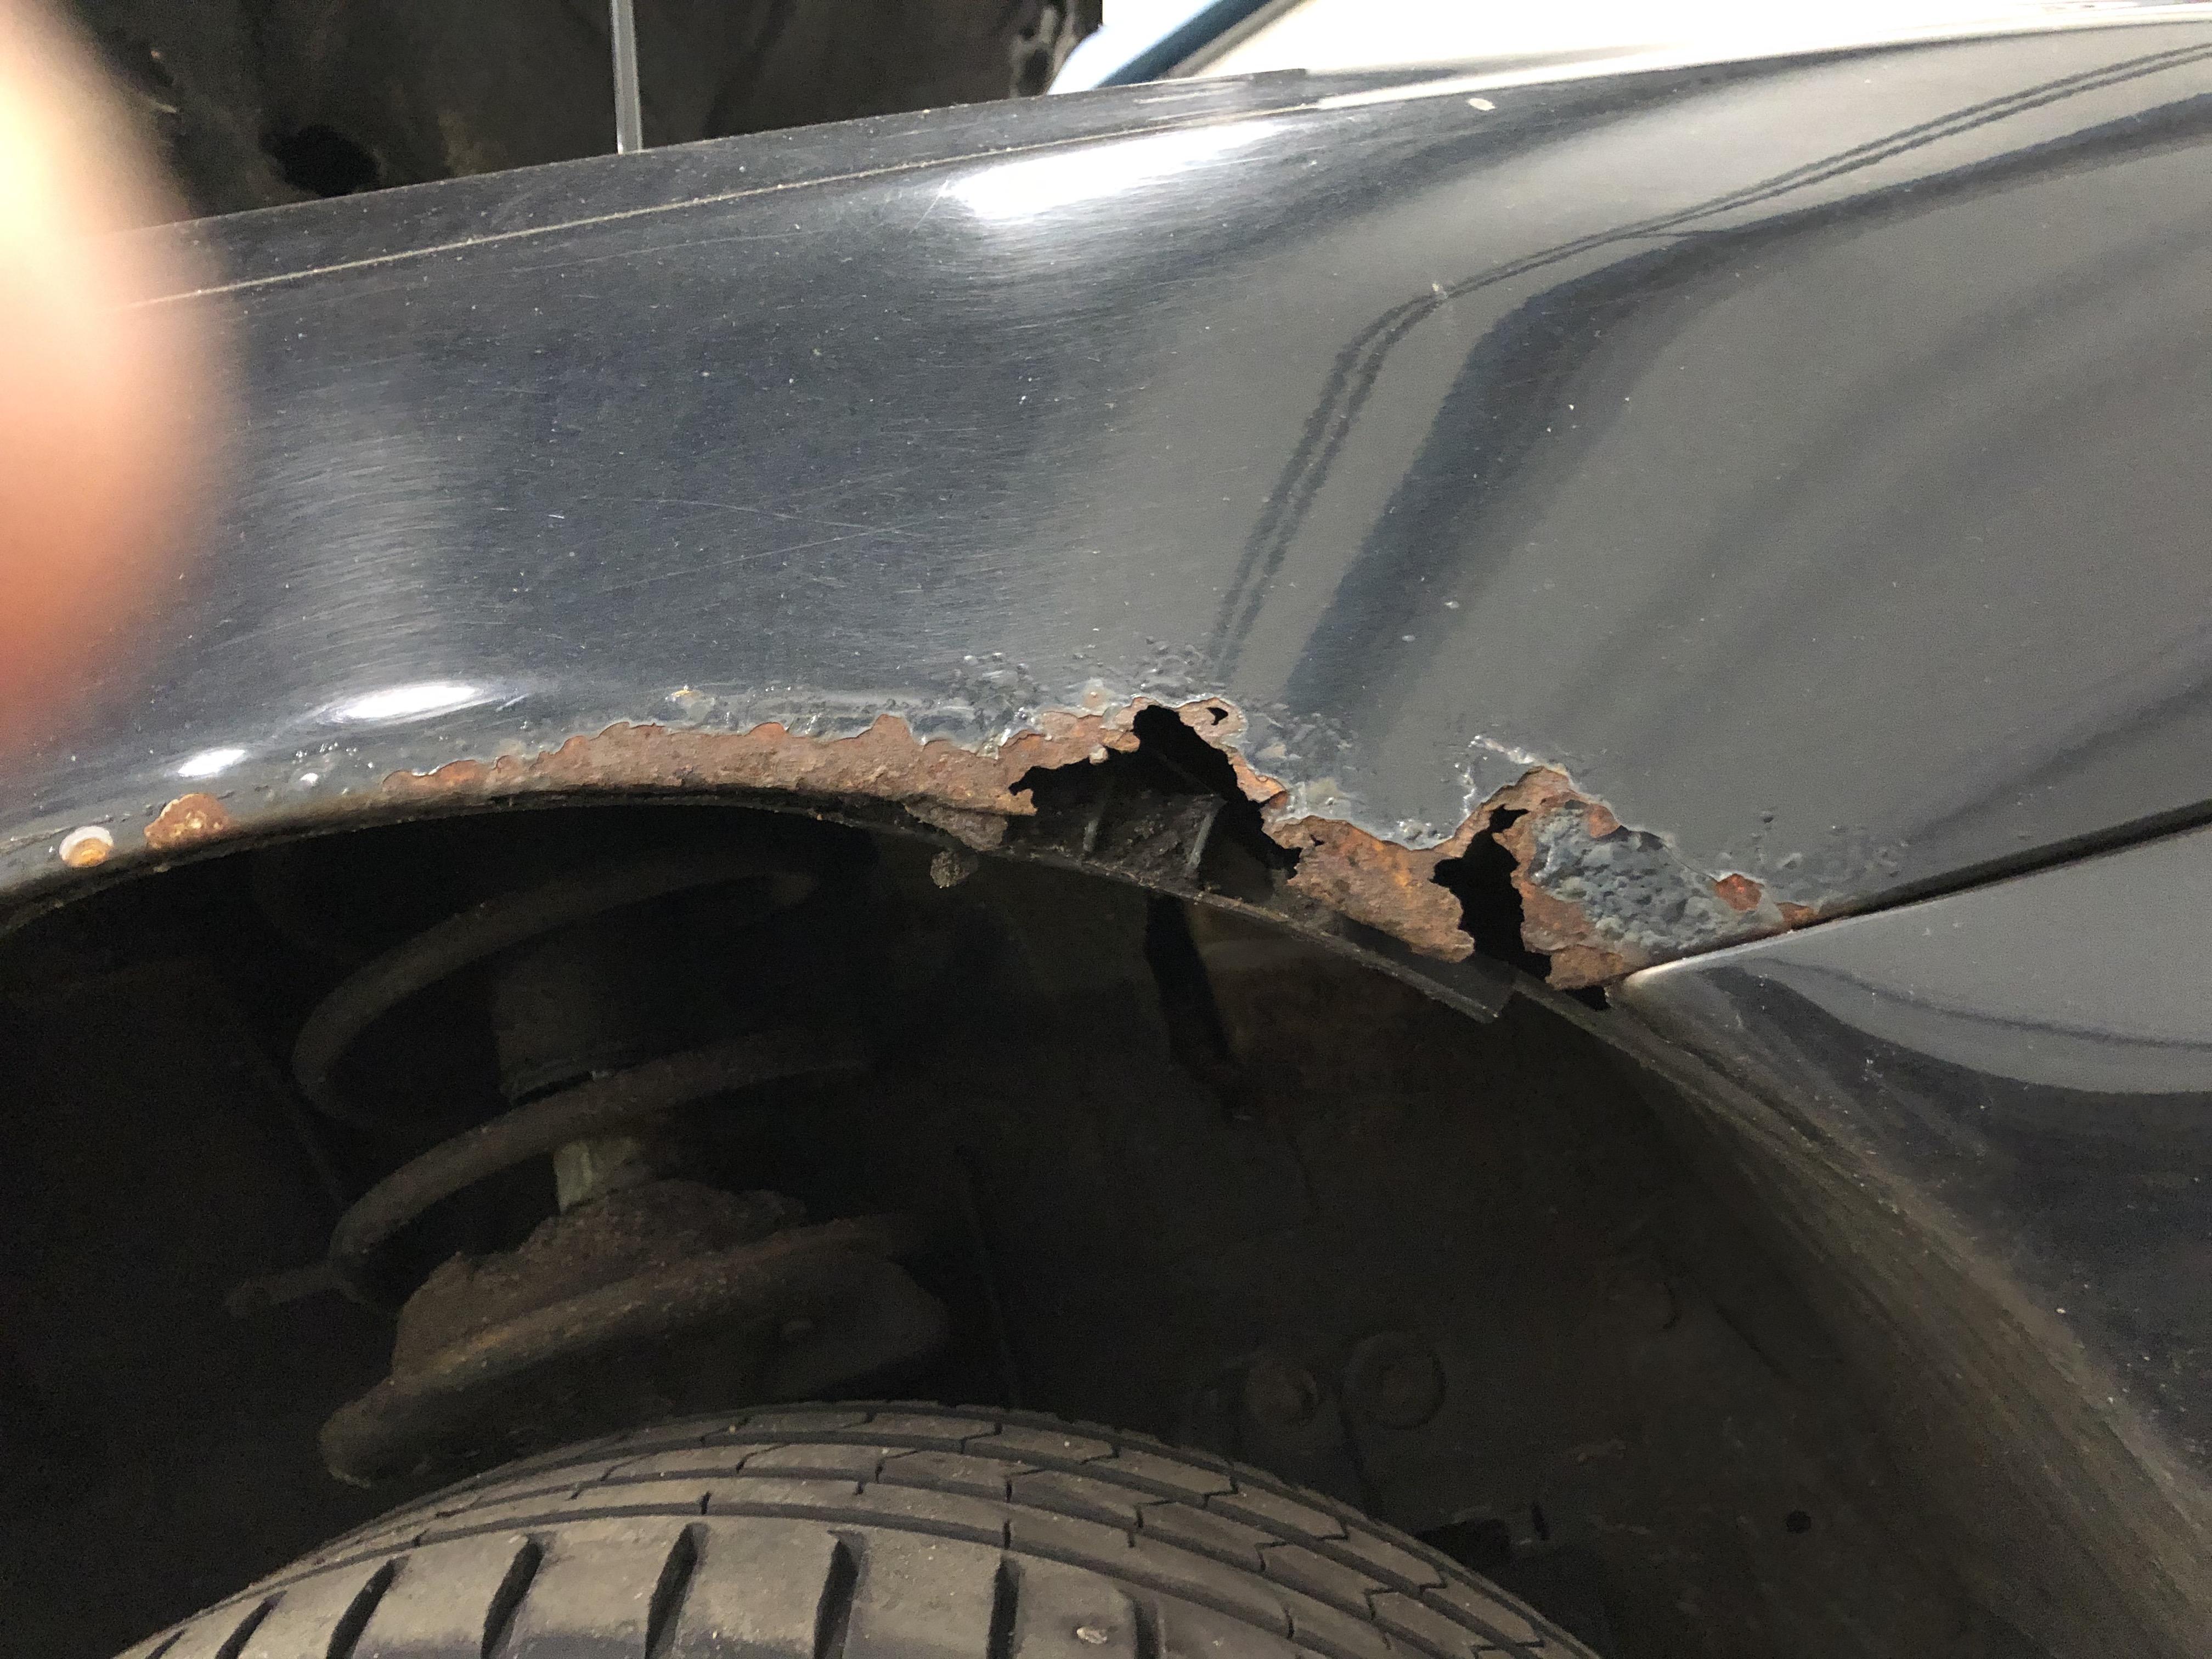
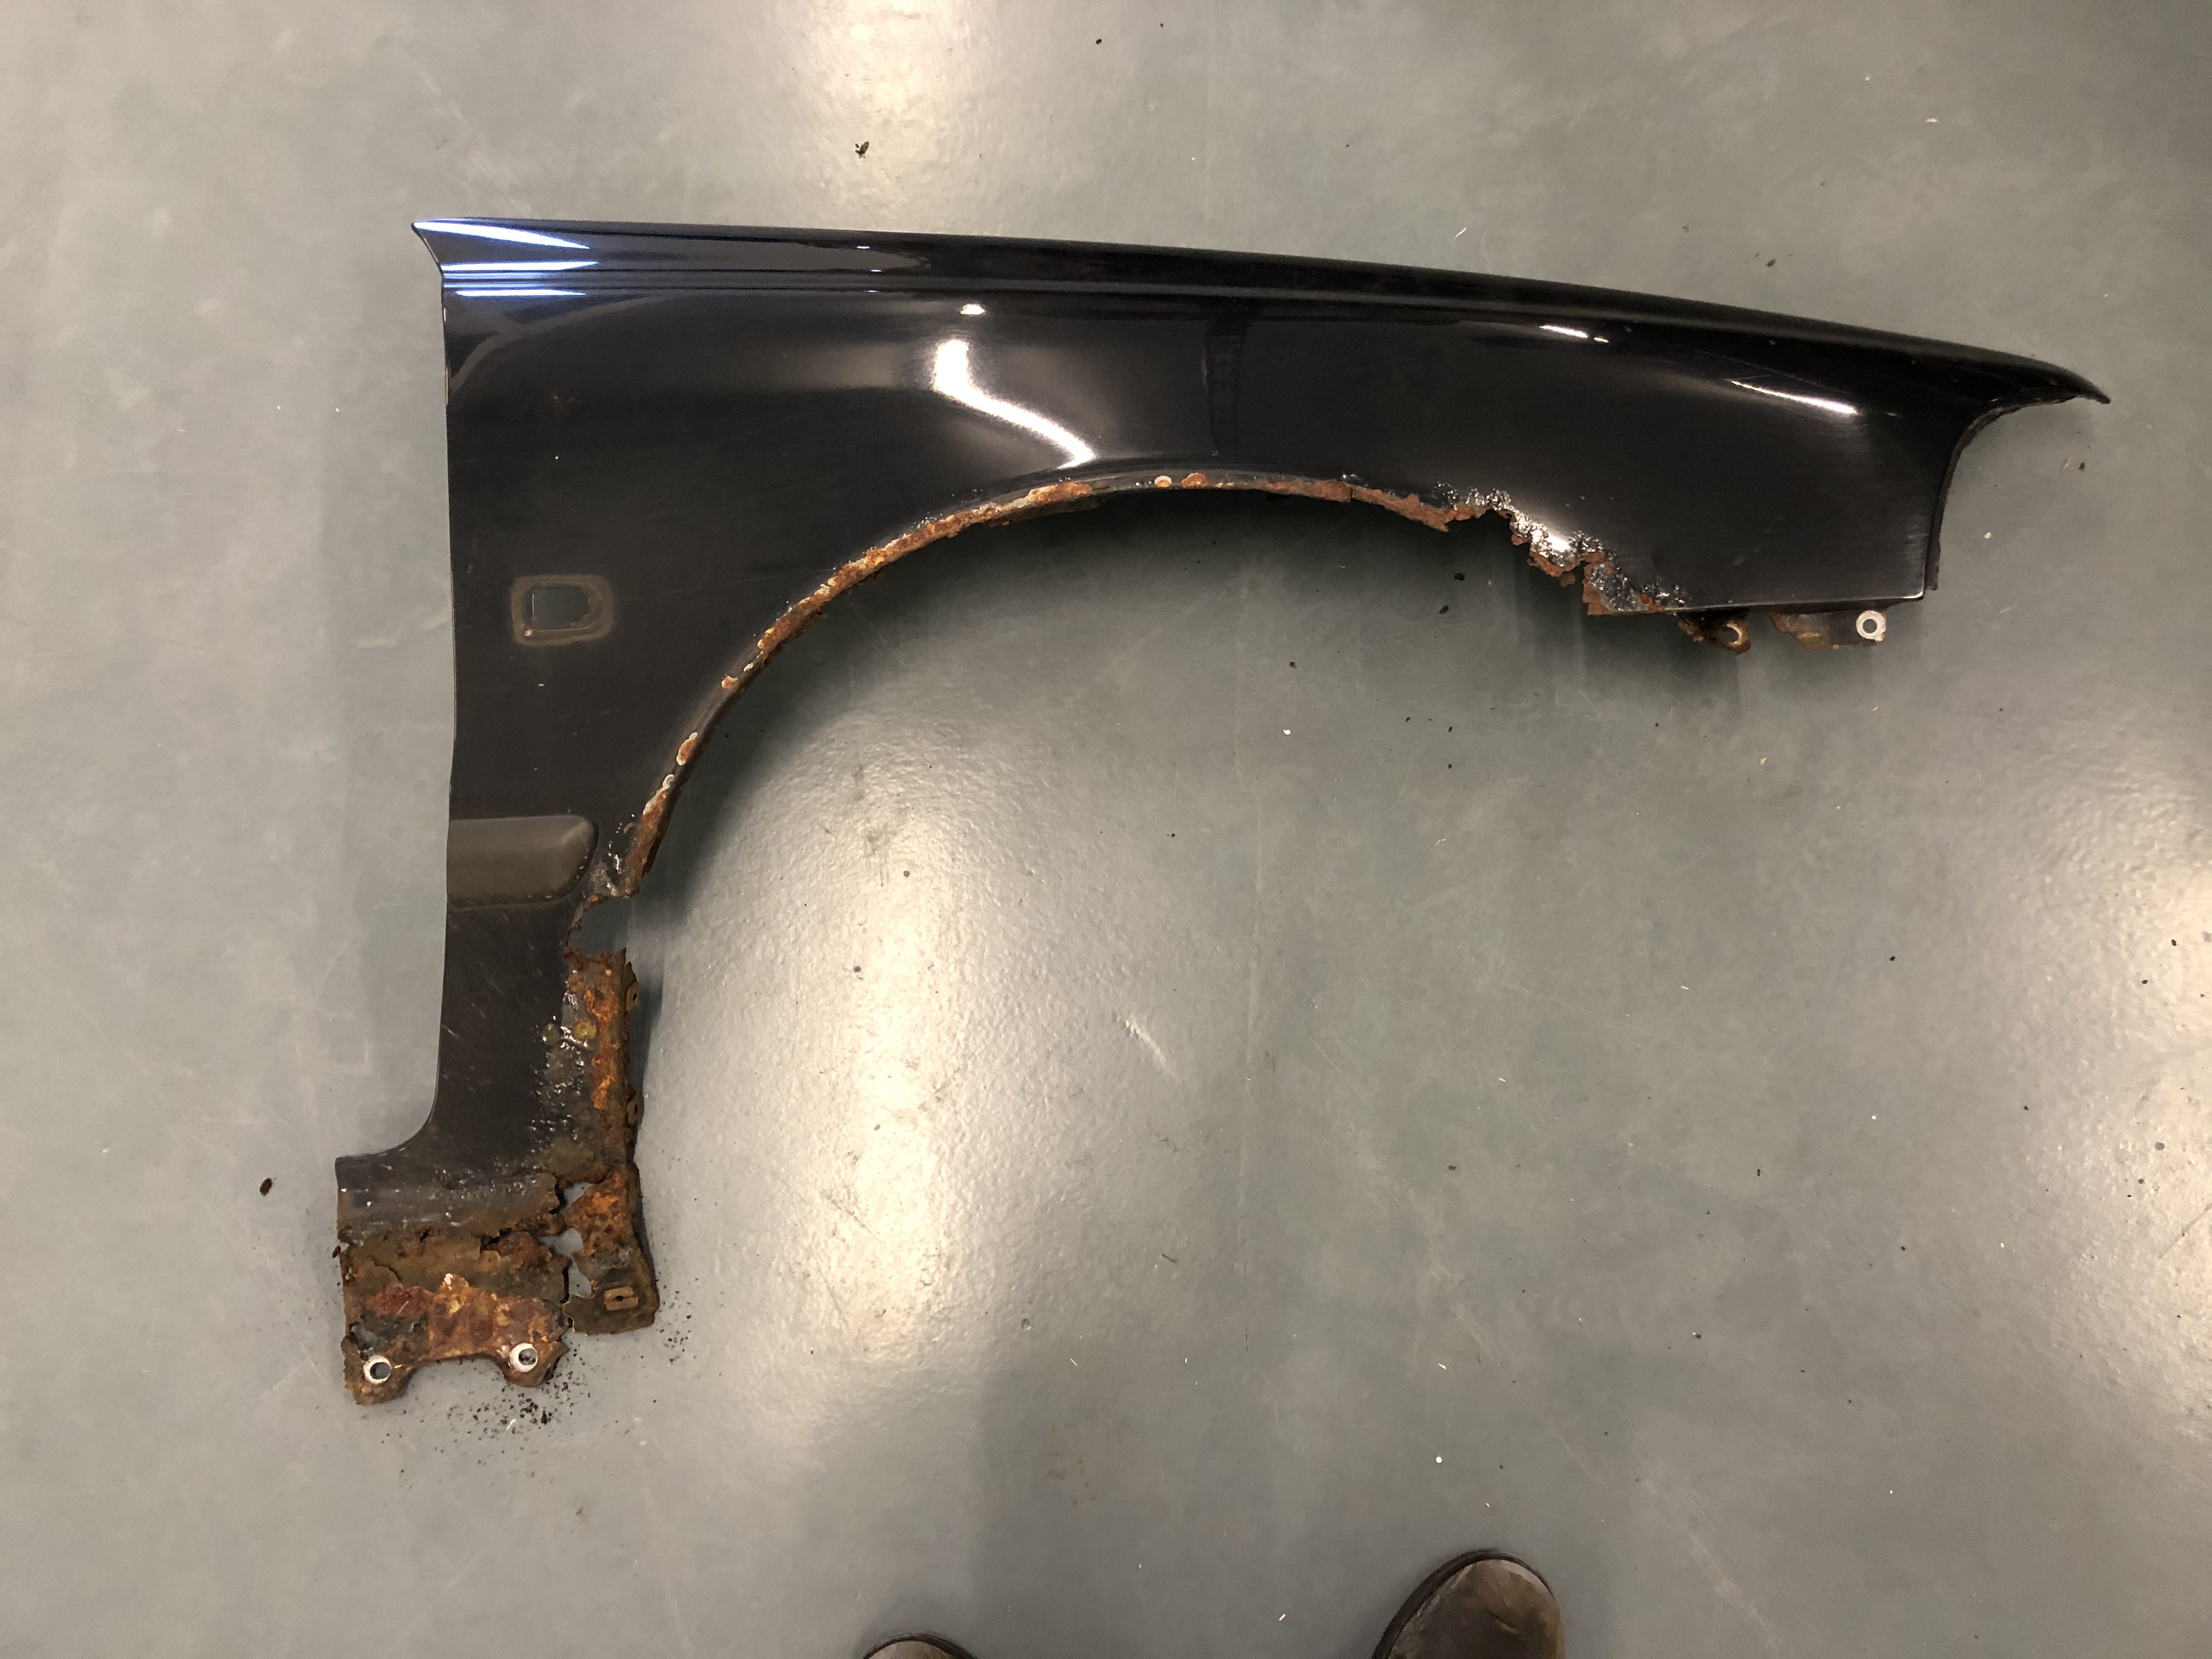
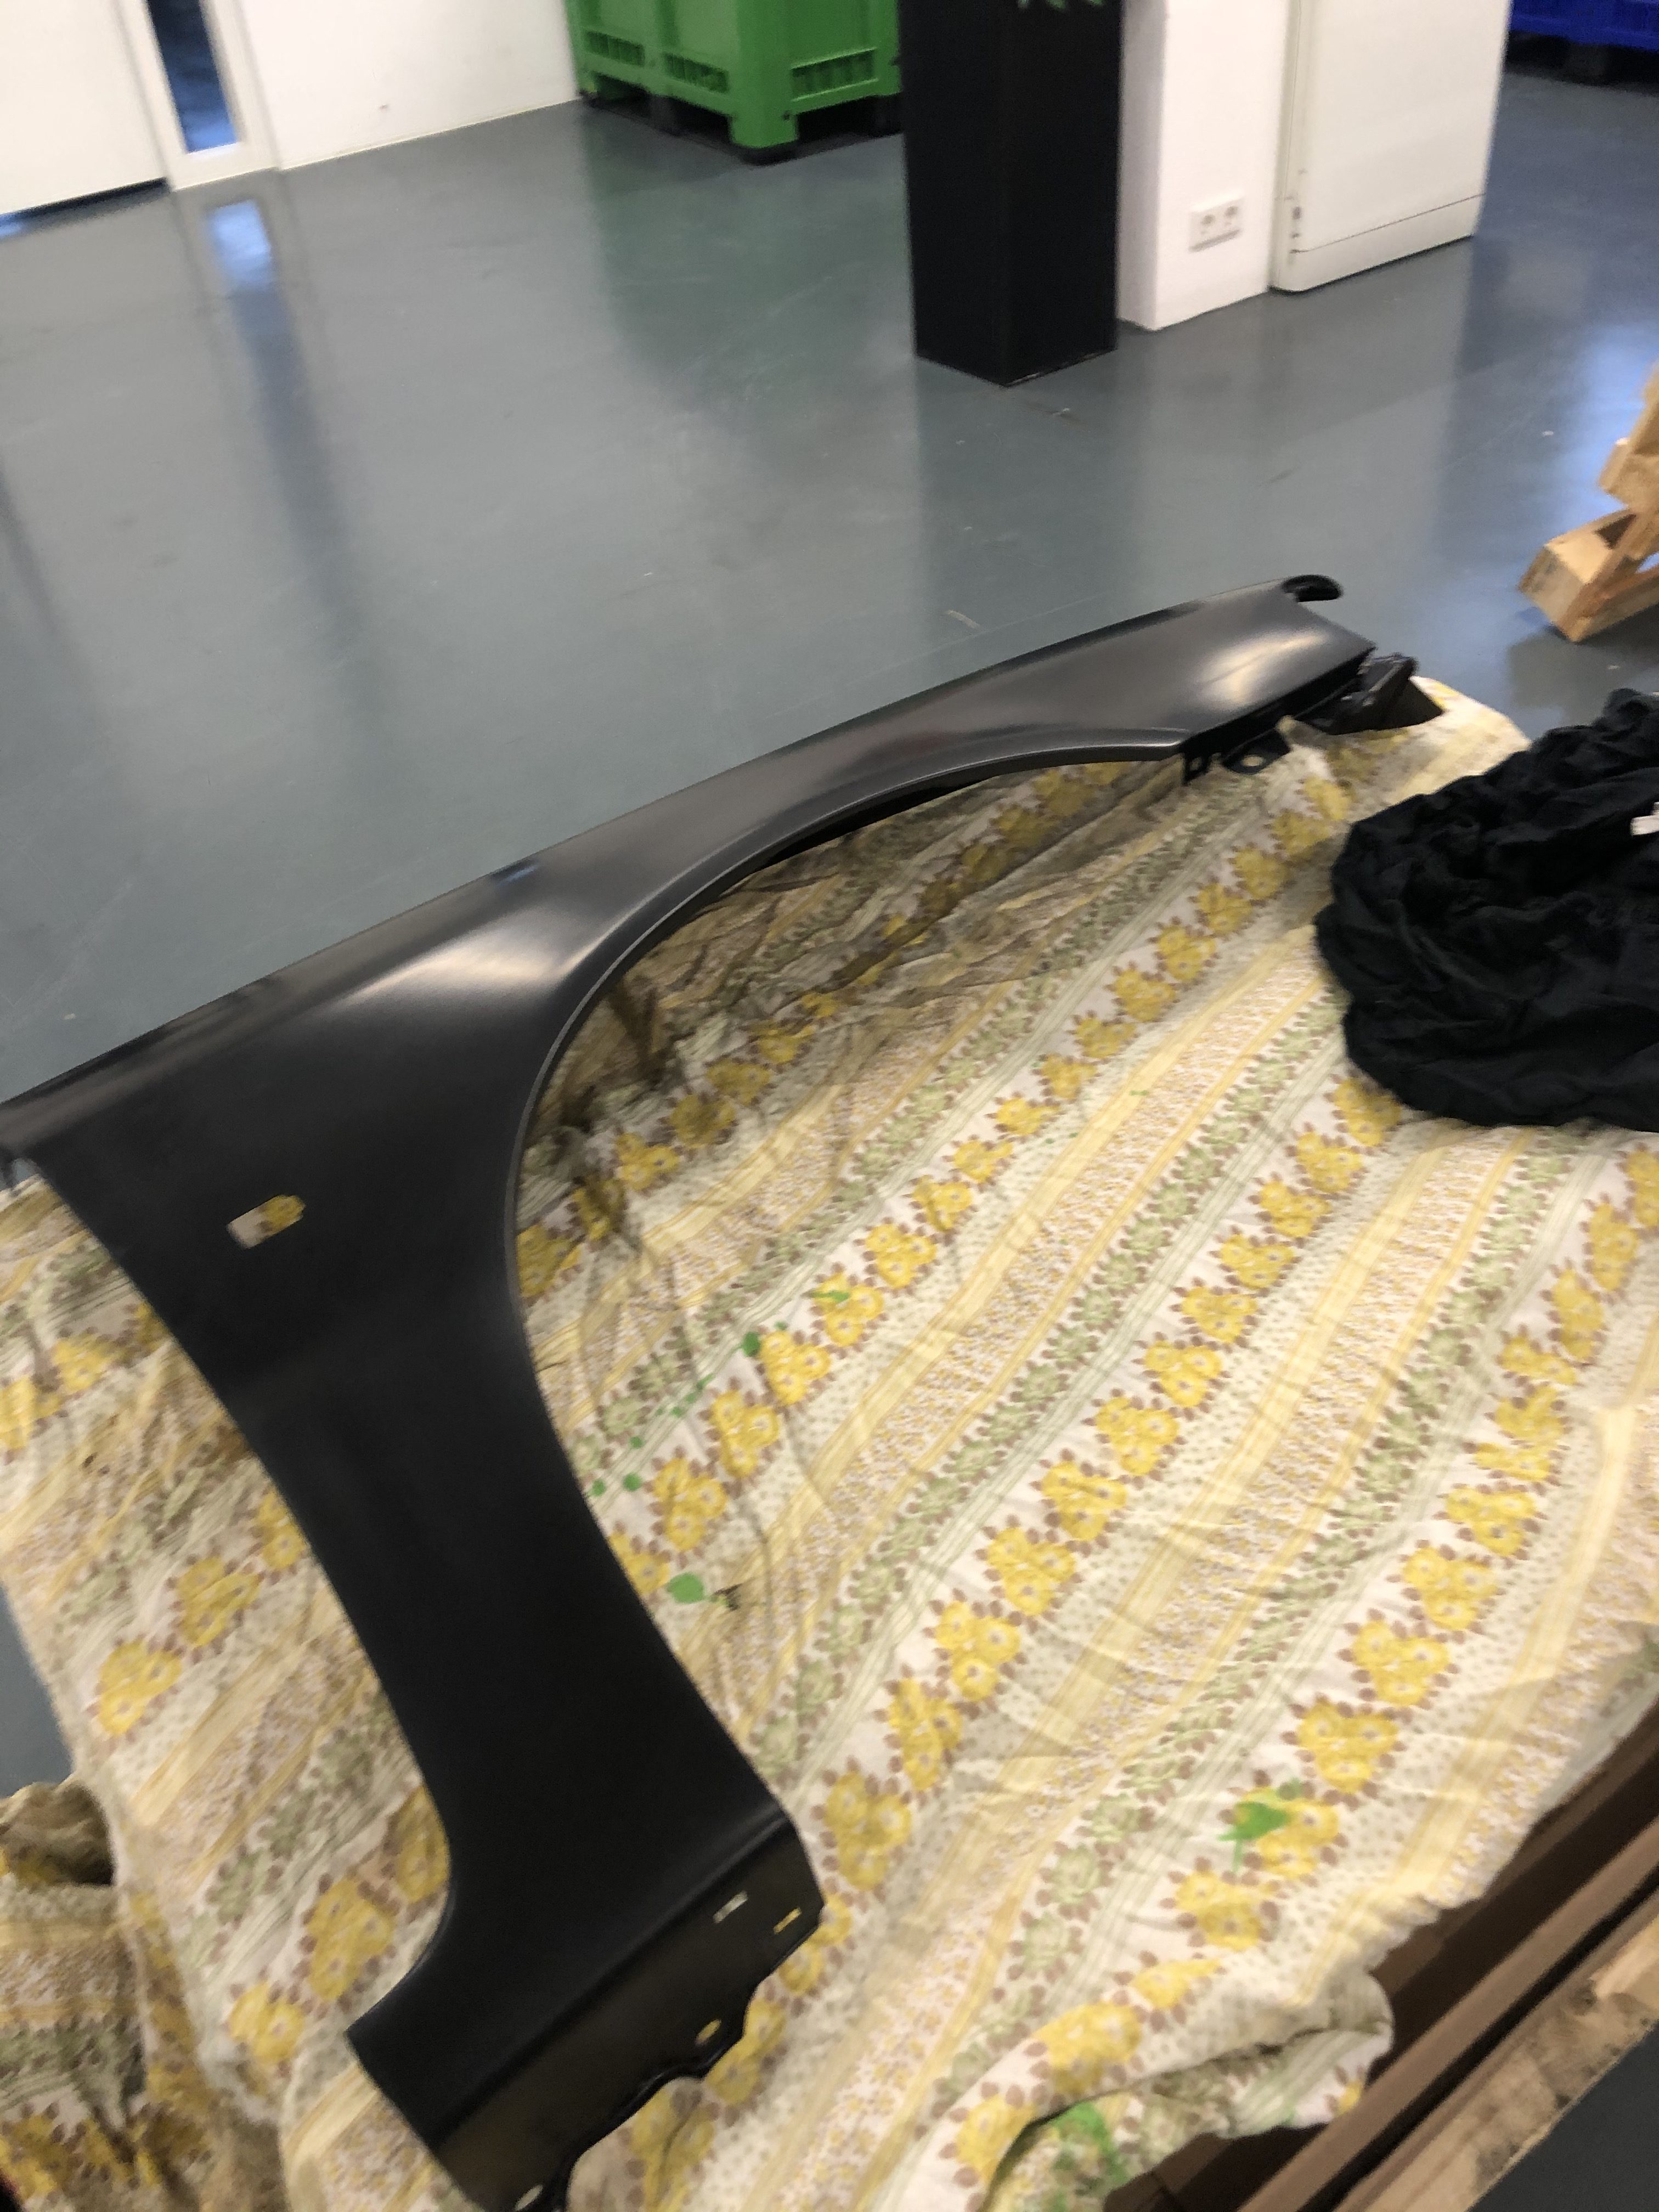
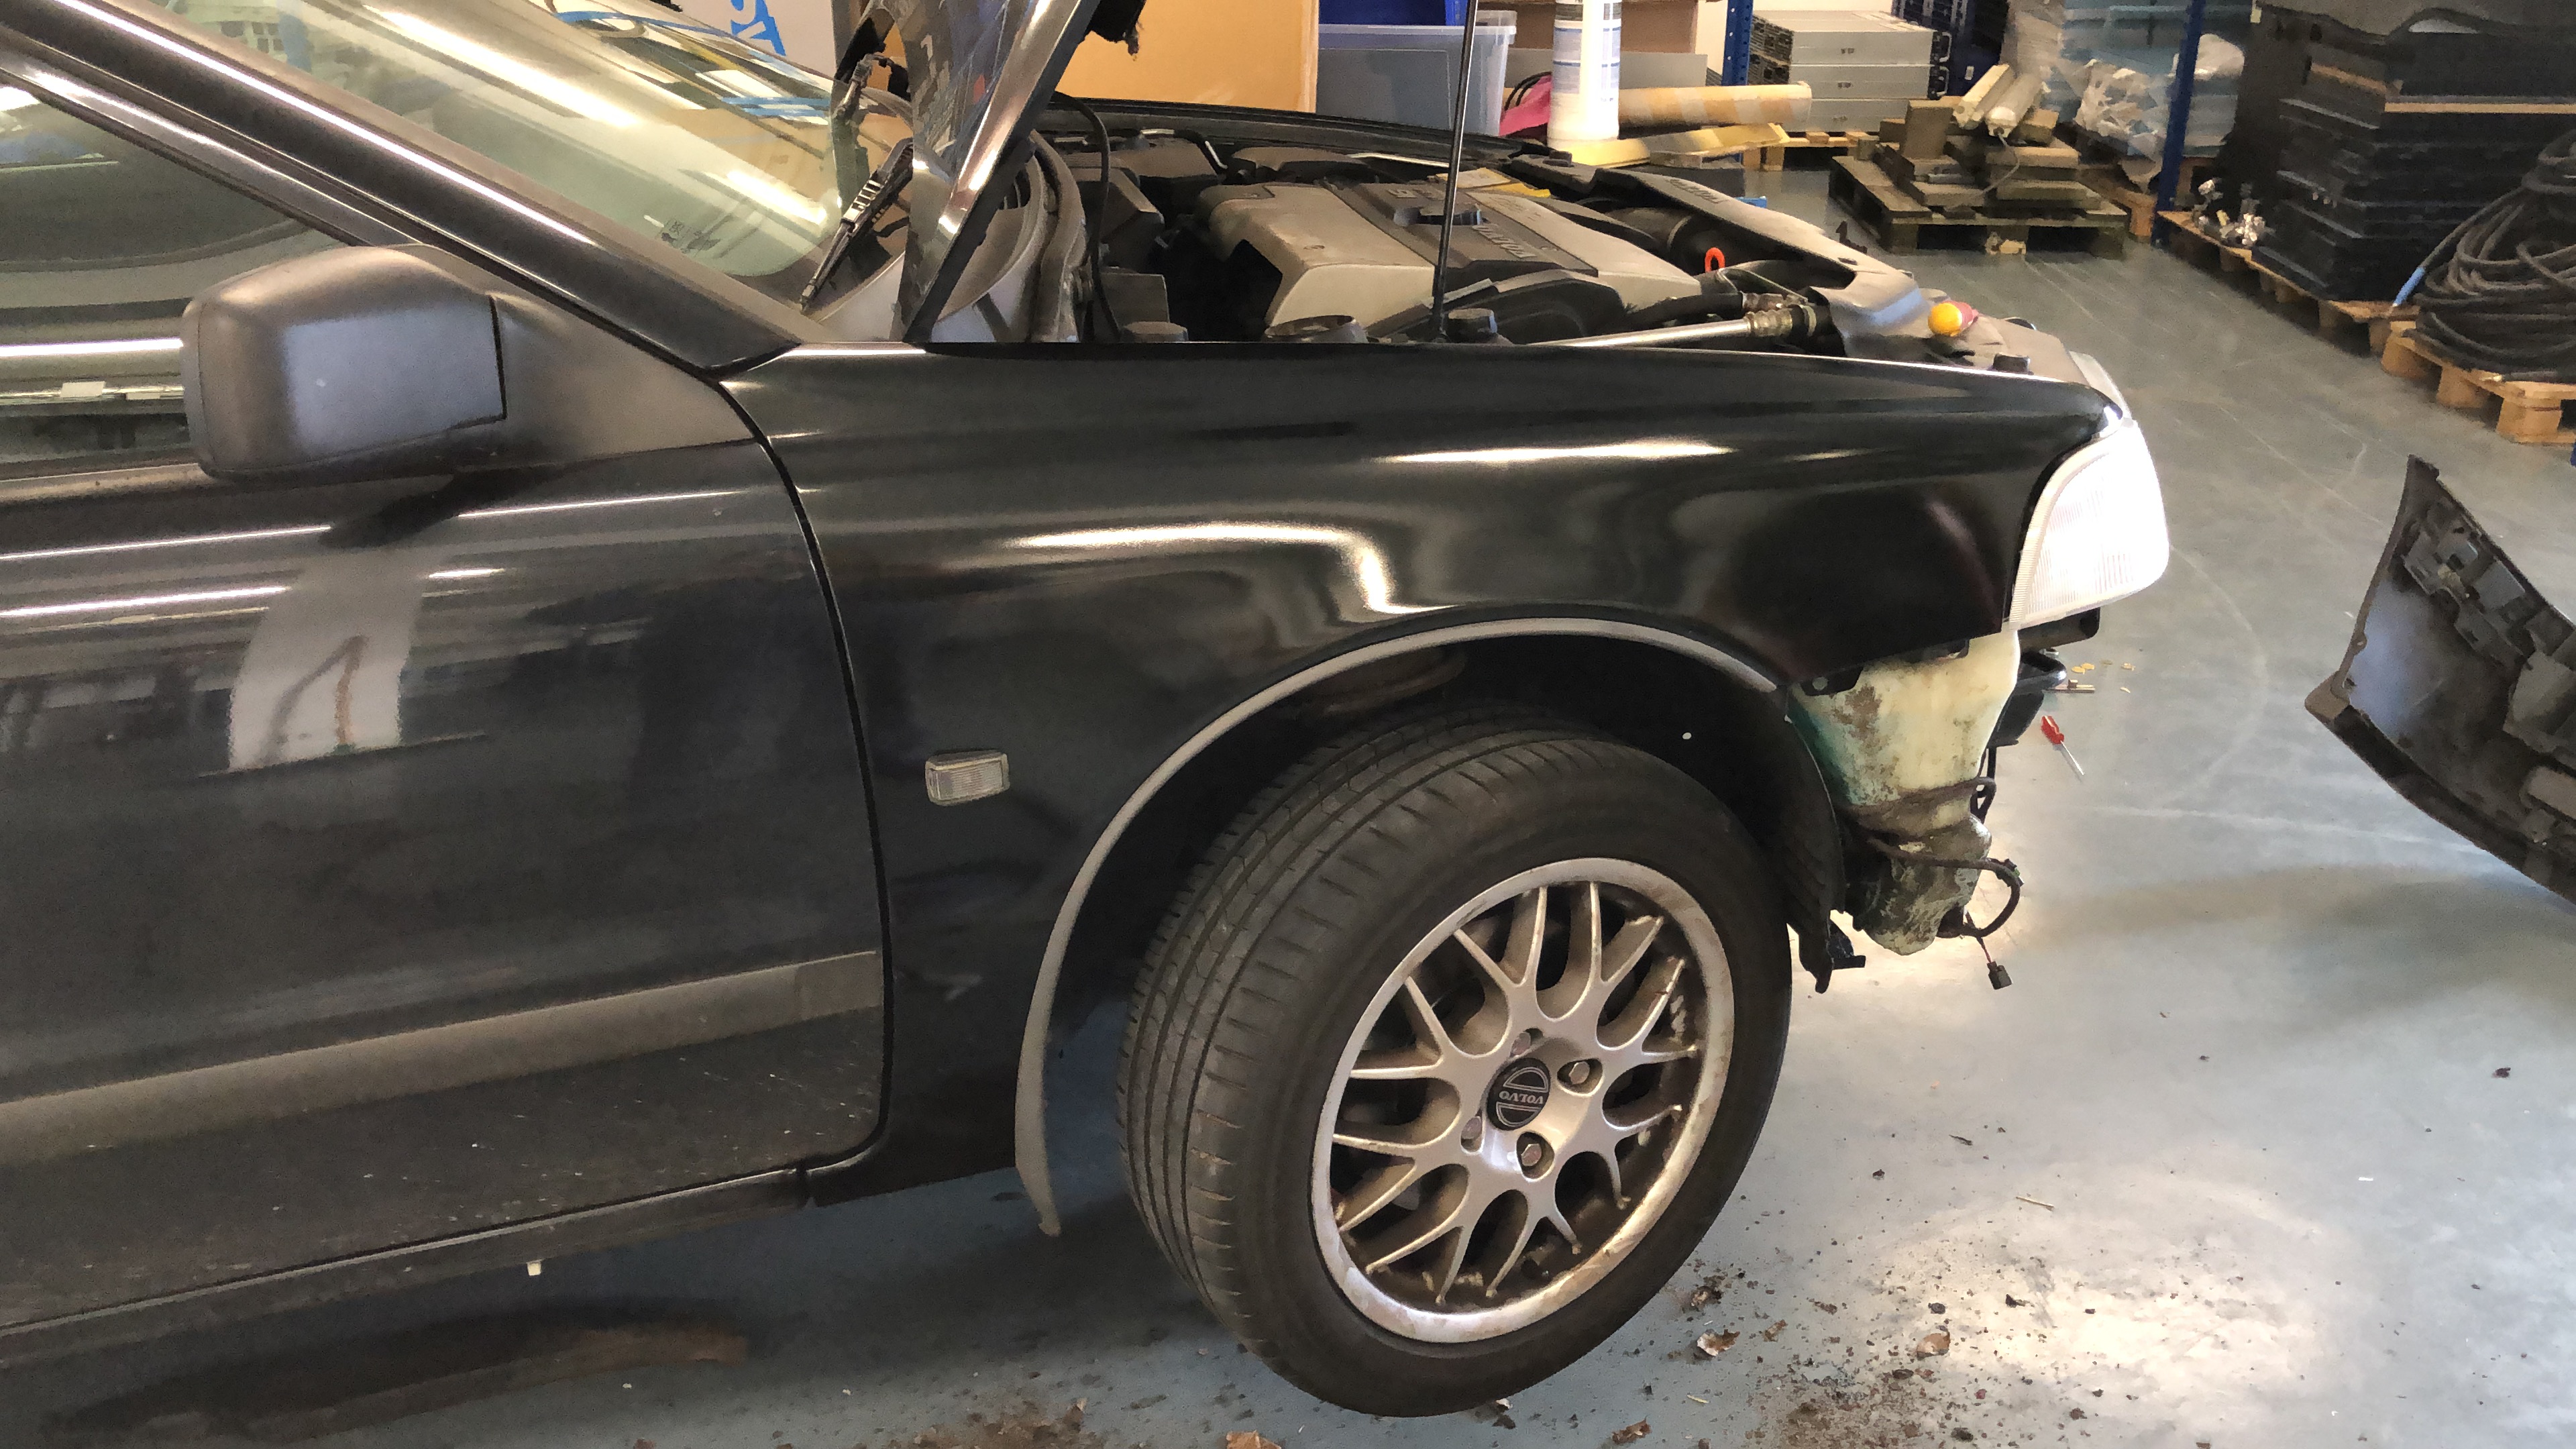
Just a quick update on the “getting rid of the rust” project. The sills are welded and I replaced one of the wings. I left the welding to a professional by the way. I can stick two pieces of metal together with a welder, but that’s not the same thing 🙂
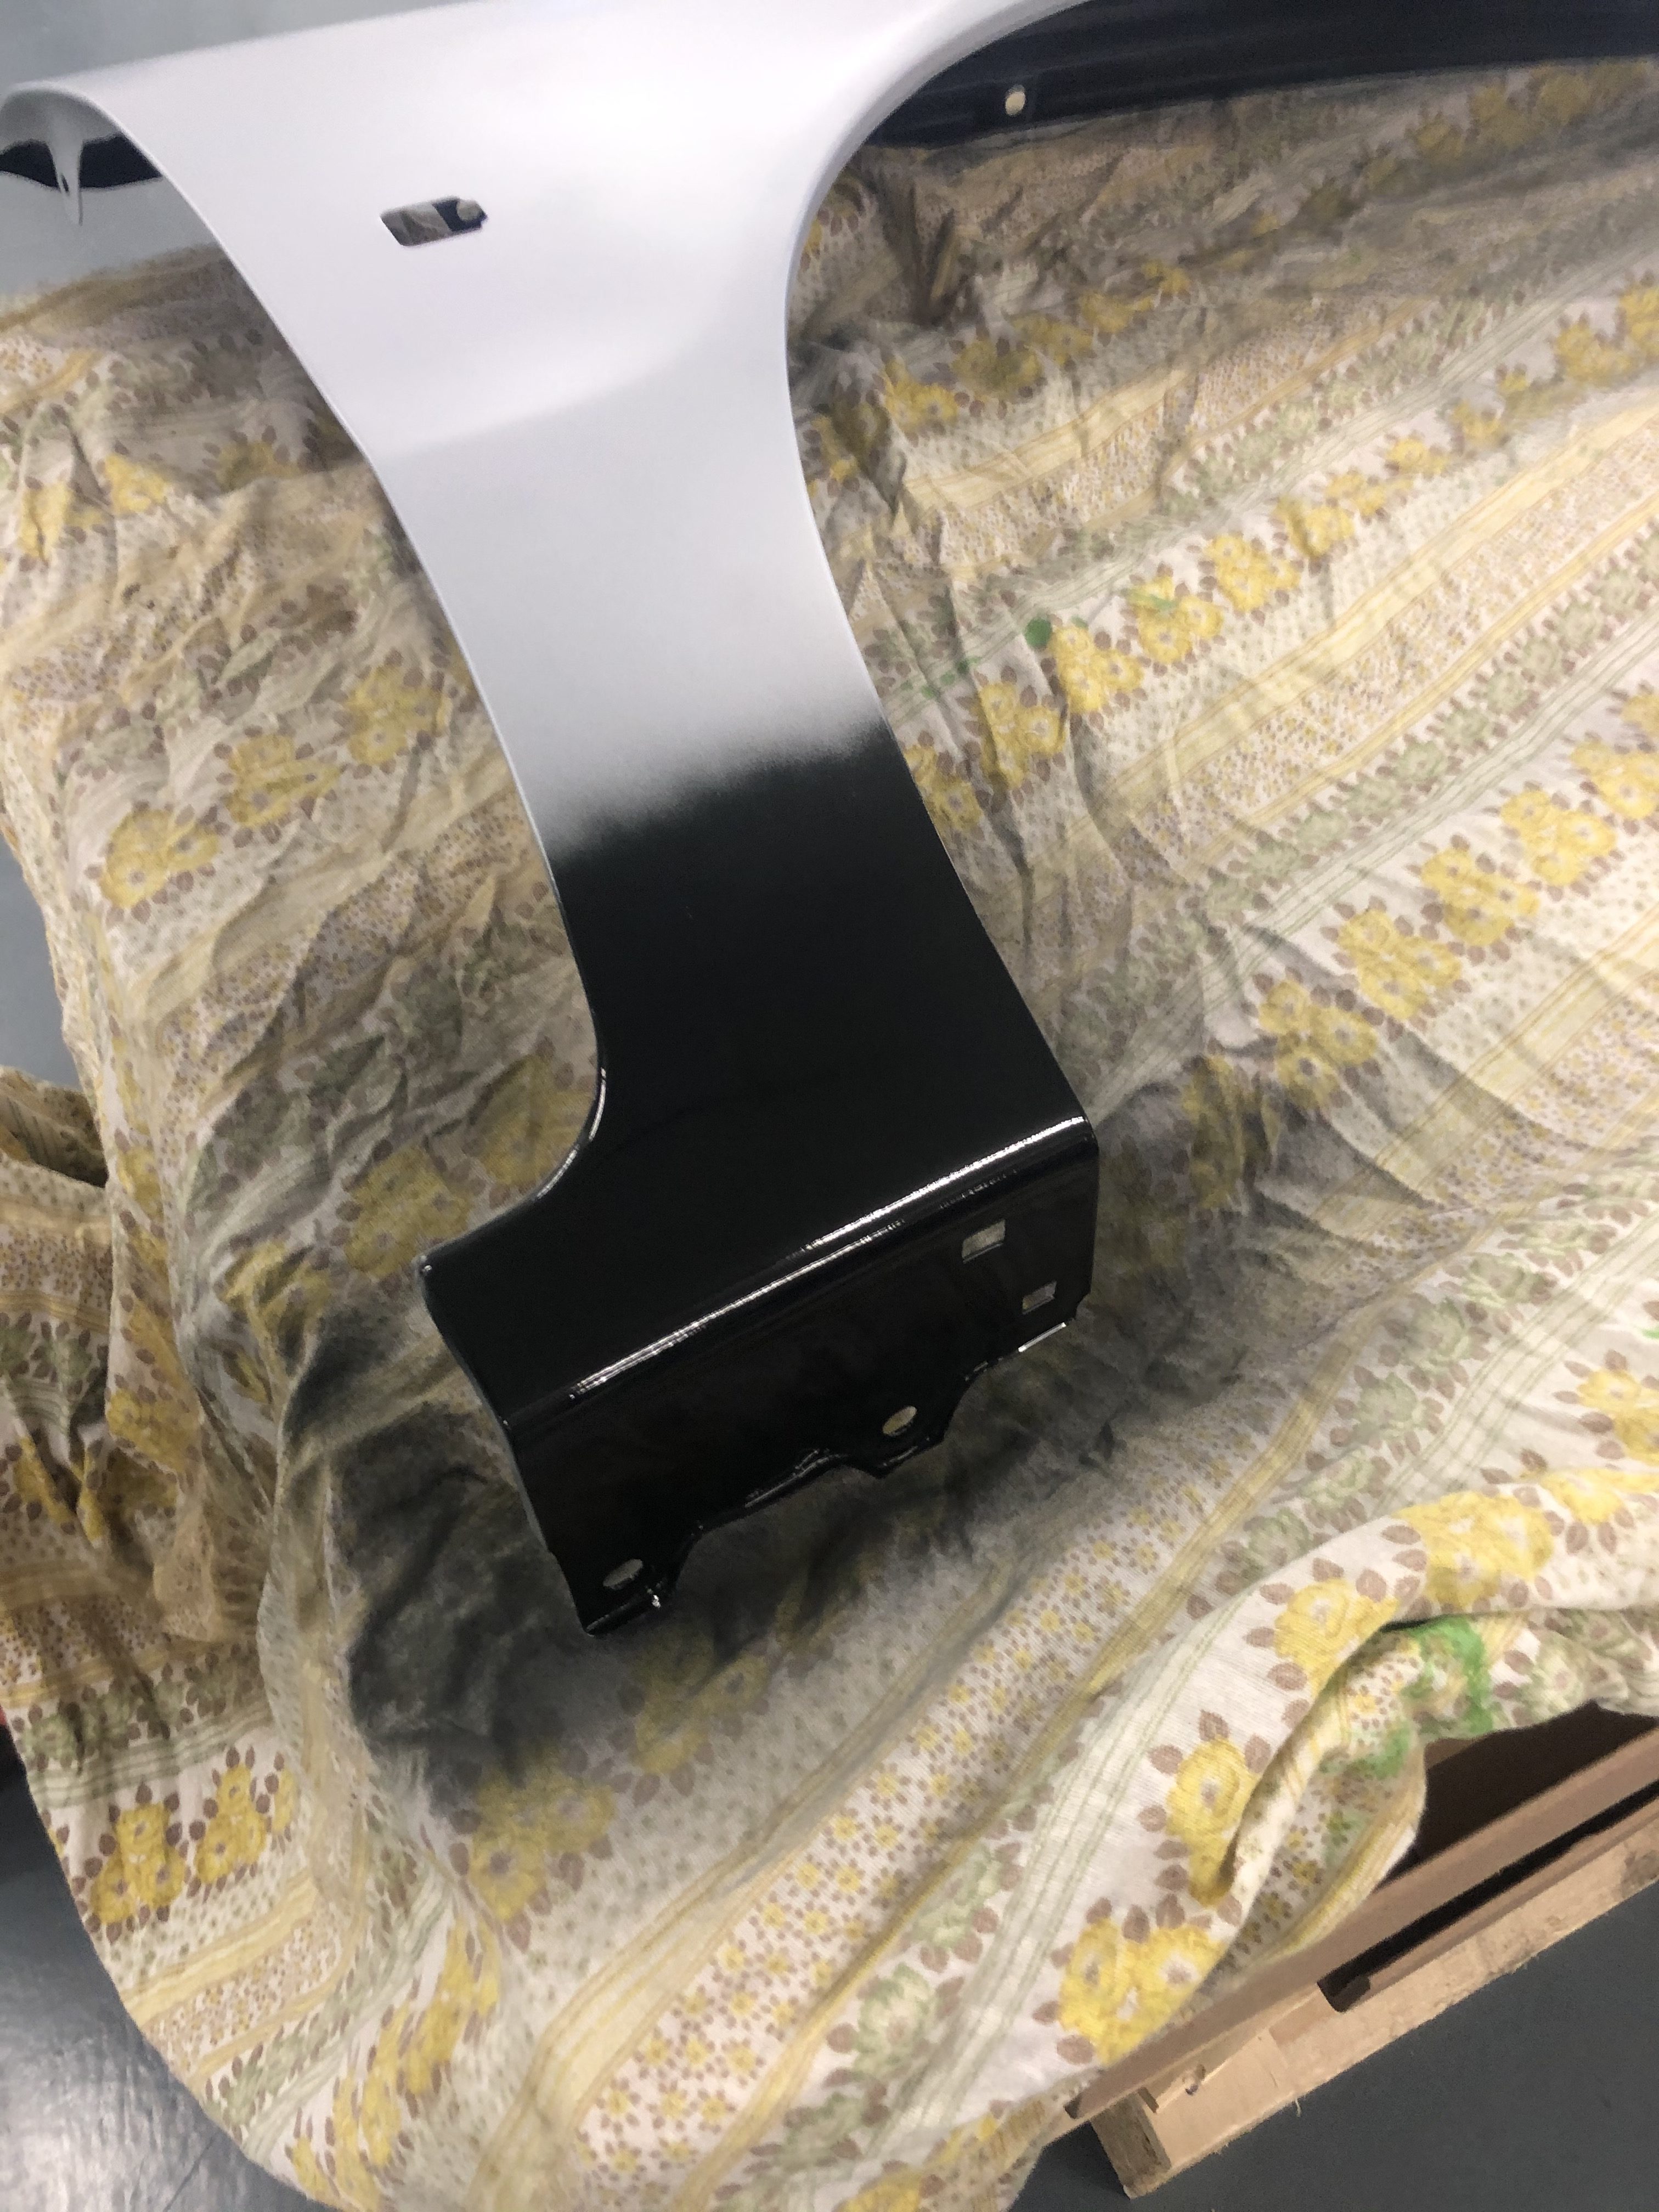
I decided to replace the front wing with a brand new one. Various manufacturers sell new wings dirt cheap (for like € 40) so it makes no sense to try to repair the old one nor to get one at the local scrapyard. I did have to spray paint it in the right color.
The only thing left to do before it will pass the next inspection is replacing the front bumper (the previous owner had a fender bender) and adjusting the headlights.
As mentioned in my previous post, we’re carbage running, so I needed a car. The criteria are simple:
It has to be from 1999 or before
It has to be worth € 500 or less
It has to bring us from The Netherlands to Ukraine and back.
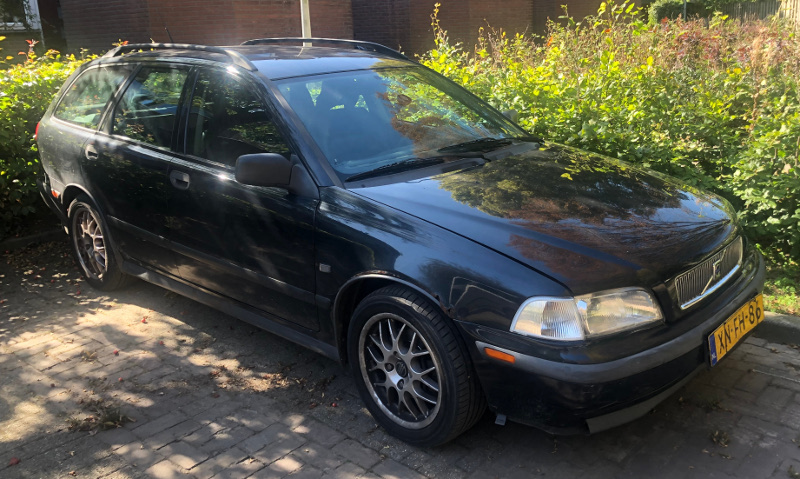
After a few weeks of searching the web, I found a ’99 Volvo V40 2.0T and bought it. As to be expected from a car that’s both cheap and old, it does indeed need some TLC. Regular maintenance is long overdue, the timing belt needs to be replaced, there is rust all over and a fender bender screwed up the alignment of the headlights. Apart from the maintenance and the timing belt replacement all of these issues would definitely be a problem at the next yearly inspection (which is due February ’20). And then there are some cosmetic issues like the upholstery coming loose/disintegrating, but more on that later.
We also picked a team name: Fred & Wilma. In memory of our cat Pebbles, who died earlier this year at the age of 20.
We decided we’re going to do the Carbage run next year. For those who don’t know: The Carbage run is a 5-day road trip in a car that’s at least 20 years old and is worth € 500 or less.
What does that have to do with making stuff, the topic of this blog?
Probably more than you might think. Apart from the fact that a 20-year-old might need some TLC before I trust it to bring us to Ukraine and back or even pass the yearly inspection, there is the tradition of pimping it up. Most (if not all) contestants will pimp their car with lots of lights, horns and a lot of useless crazy stuff too. There is € 500 to be won in the originality contest. But I’m quite sure most people just pimp their ride because it’s fun. It will definitely lead to some maker projects. Stay tuned!
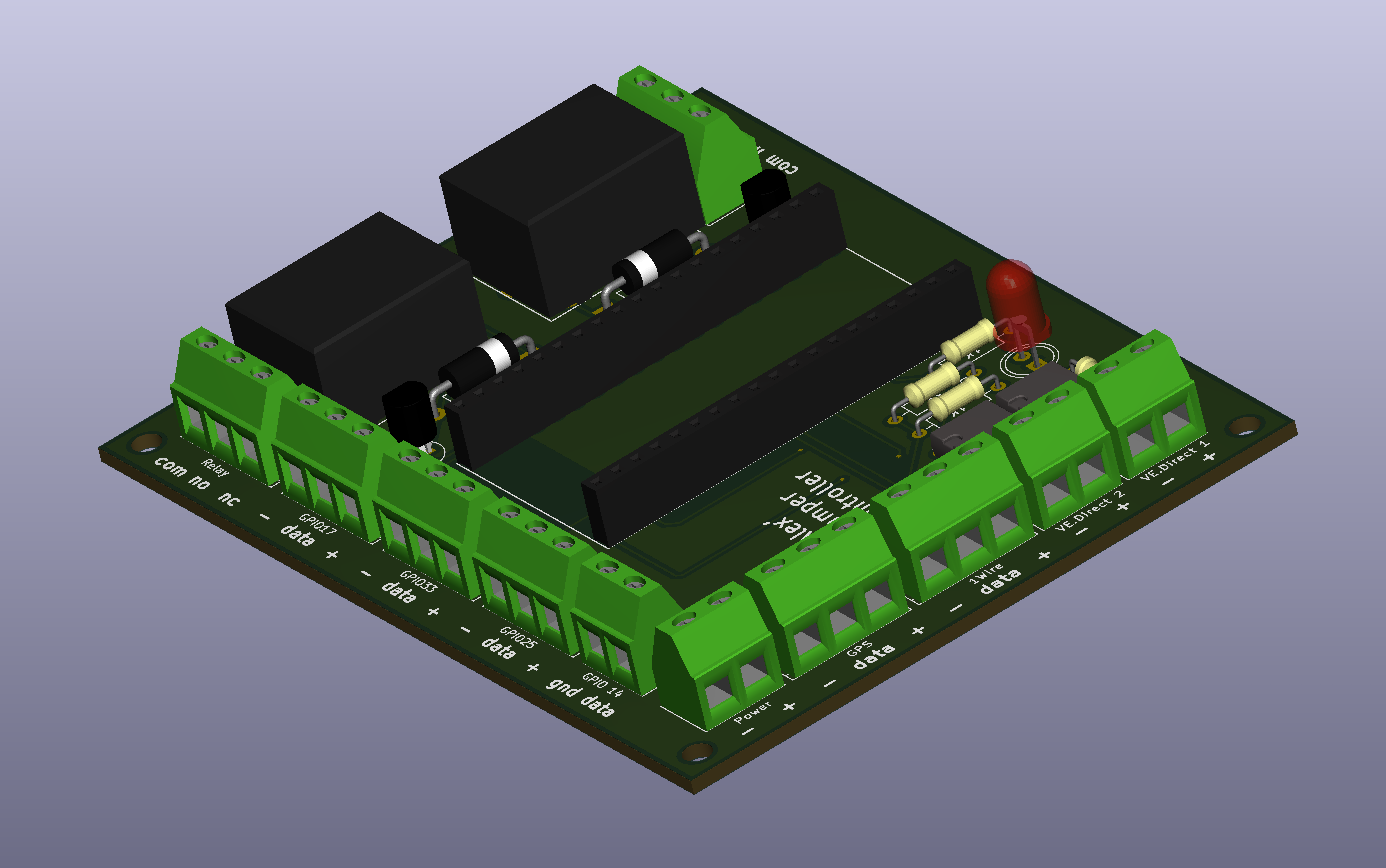
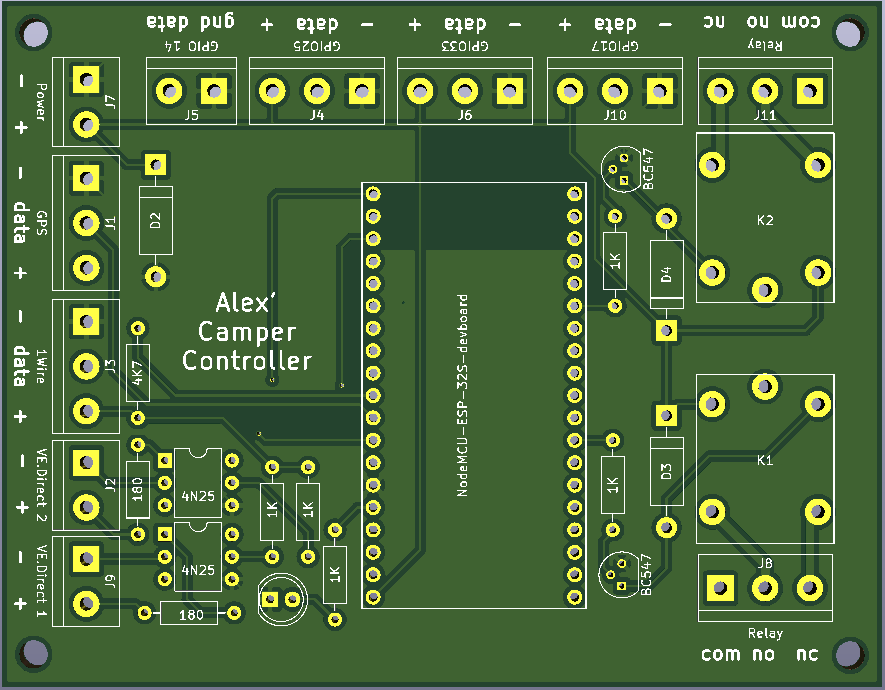
A couple of years ago I bought a coach and converted it into an RV. After the first season, I parked it and hooked up a battery charger to keep the batteries charged during winter. When the winter was over, I found out that the charger blew a fuse and my batteries were dead. I decided to add some monitoring. I bought a Victron BMV 702 battery monitor (which has both a display and a serial connection), hooked it up to an ESP32 microcontroller and started fiddling around with it. Soon the project exploded. I hooked up a couple of DS18b20 temperature sensors, my Victron MPPT solar charge controller (which has a serial connection as well) and a cheap GPS module I bought off eBay.
Hardware specs:
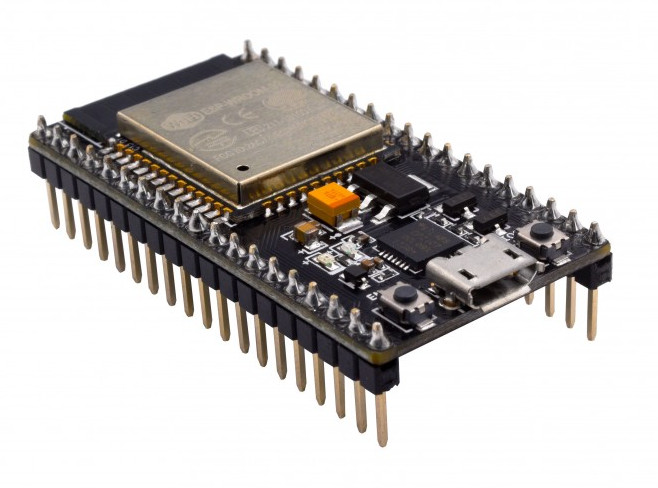
ESP32 dev board (NodeMCU-32S)
ESP32 microcontroller (with built-in WiFi)
USB connection for programming/debugging
Power input (5V)
2 Optically isolated serial inputs (for Victron VE.bus)
1 Non-isolated serial input (for GPS receiver)
“1-wire” I/O (for Dallas DS18B20 temperature sensors)
3 General purpose I/O’s (can be used as digital input or output, analog input, PWM output, RS232. I2C etc)
2 Onboard relays (dry contact outputs)
Software:
The software is written in C++ using the Arduino IDE.
Current software features :
Reading and parsing of VE.bus messages from a Victron BMV series battery monitor.
Reading and parsing of VE.bus messages from a Victron MPPT solar charge controller.
Reading various temperatures (inside, outside, hot water, etc.) using up to 10 Dallas DS18B20 1Wire temperature sensors.
Reading and parsing of NMEA data from a GPS receiver.
GPS location upload supports both GeoHash and Lat/Lon.
Reading a resistive tank level sensor.
Measurements can be uploaded to a server using http(s) GET.
Measurements can be written directly to Influxdb. Both http and https are supported.
Switching on the 24V to 12V DC/DC converter to charge the 12V battery if the 24V battery voltage is above a certain level. Switching of if the voltage drops below a certain level. The DC/DC converter is switched by one of the two onboard relays. 24V battery voltage measurements are read from the Victron BMV battery monitor.
Data upload is encrypted (HTTPS).
Over-the-air software updates (OTA). New software images are automatically downloaded on a seperate partition of the flash memory and verified. If verification is successfull, the ESP32 automatically boots the new image. Both upgrades and downgrades are supported.
Most settings (WiFi SSID and password, Influxdb hostname, username/password, what measurements to write etc) are configurable through the web interface.
Settings are stored on a separate partition of the SPI Flash File System (SPIFFS) and are therefore not lost after a software upgrade.
Measurement collection runs in a separate background task.
All measurements can be downloaded directly from the web interface in JSON format.
A portal is available for those who do not want to set up their own server for software updates etc. When using the portal for management, data can still be written to your own Influxdb instance.
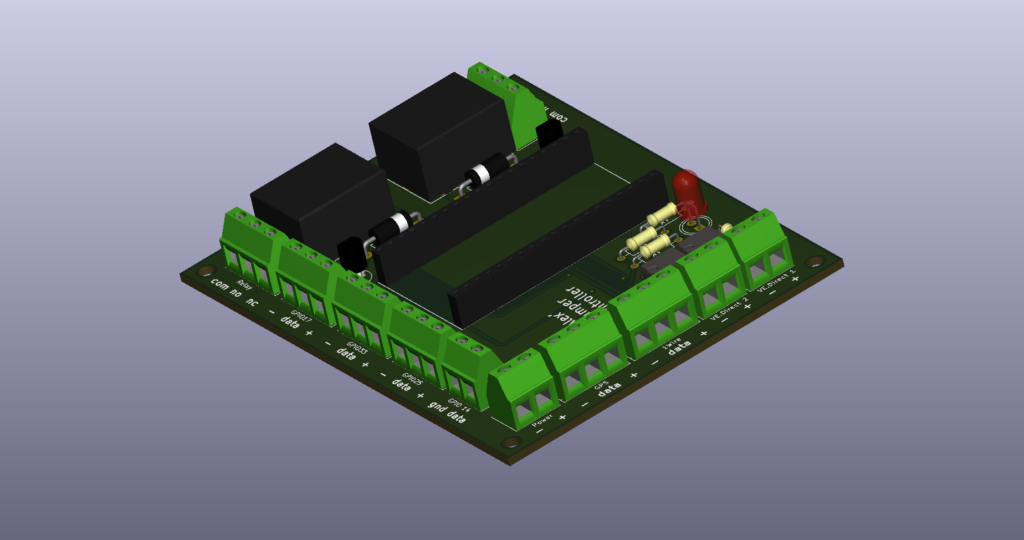
PCB:
PCB designPCB design 3D model
Todo’s:
None of the items on my todo list require any hardware updates. Luckily the ESP32 is flexible enough to facilitate all the things I thought of after I had the PCBs produced. Until now, at least 🙂 This is mainly because of the built-in matrix switch which allows you to assign any function (like UART RX, UART TX, digital in, digital out, analog in, PWM out) to any IO pin.
Add an extra temperature sensor to measure the temperature of the water heater. No extra I/O’s needed, extra sensors can be connected parallel to the existing ones since every DS18B20 sensor has a unique address.