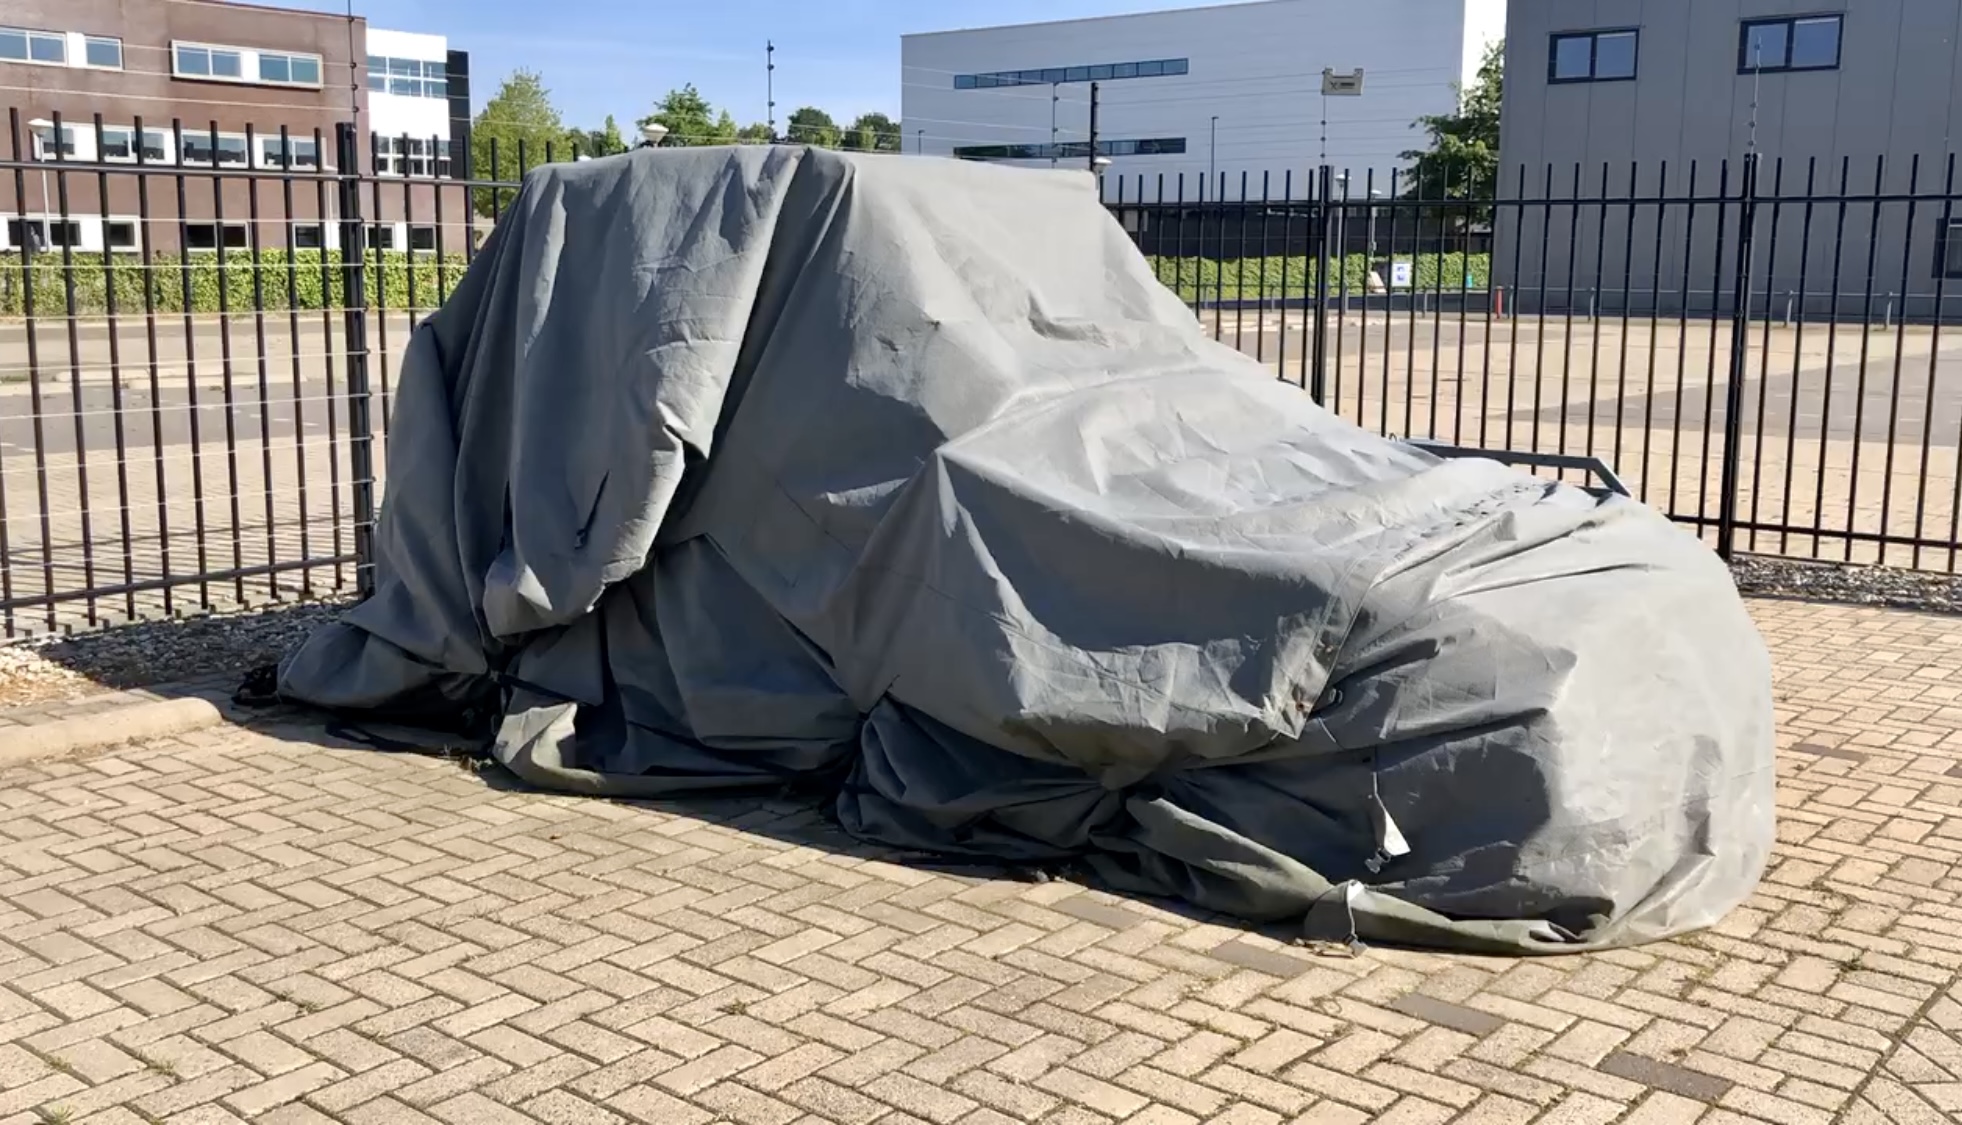
The last thing I wrote about the car is that the exterior was almost finished. Then COVID happened, the Carbage Run got postponed (twice) and the car sat under a cover for a little over two years.
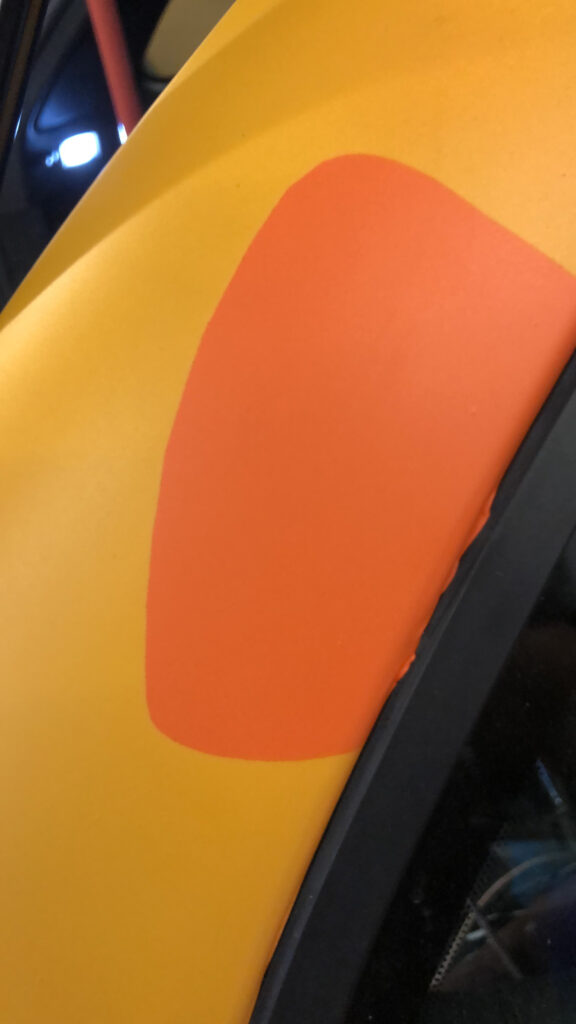
Vinyl wrap discoloration
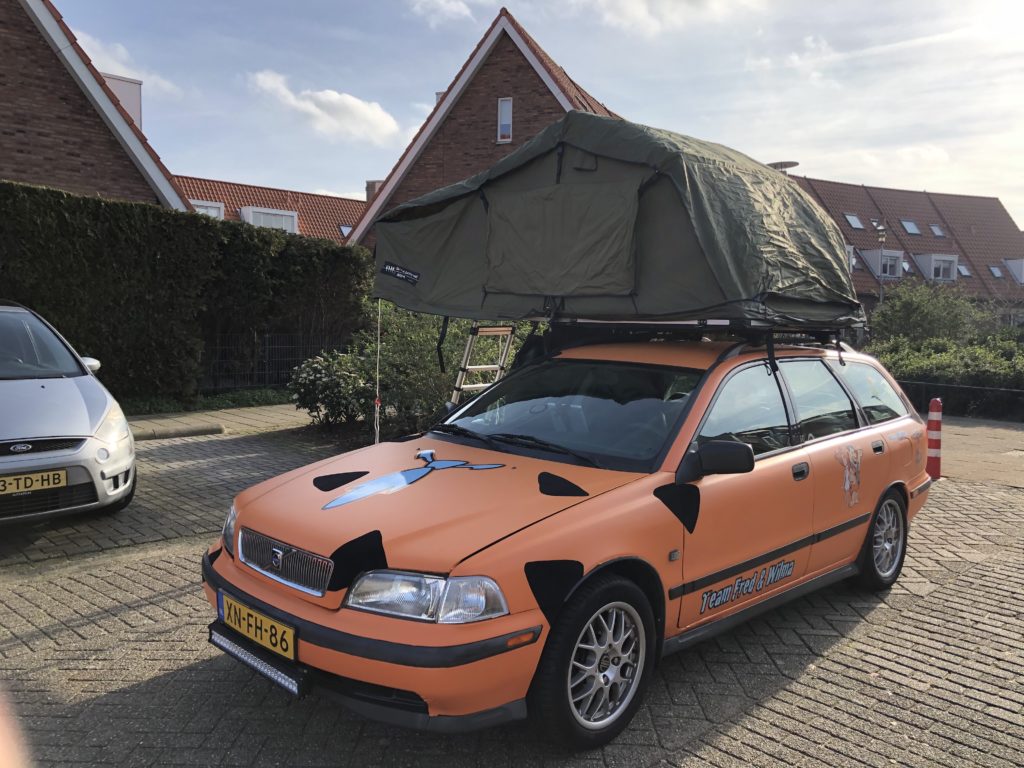
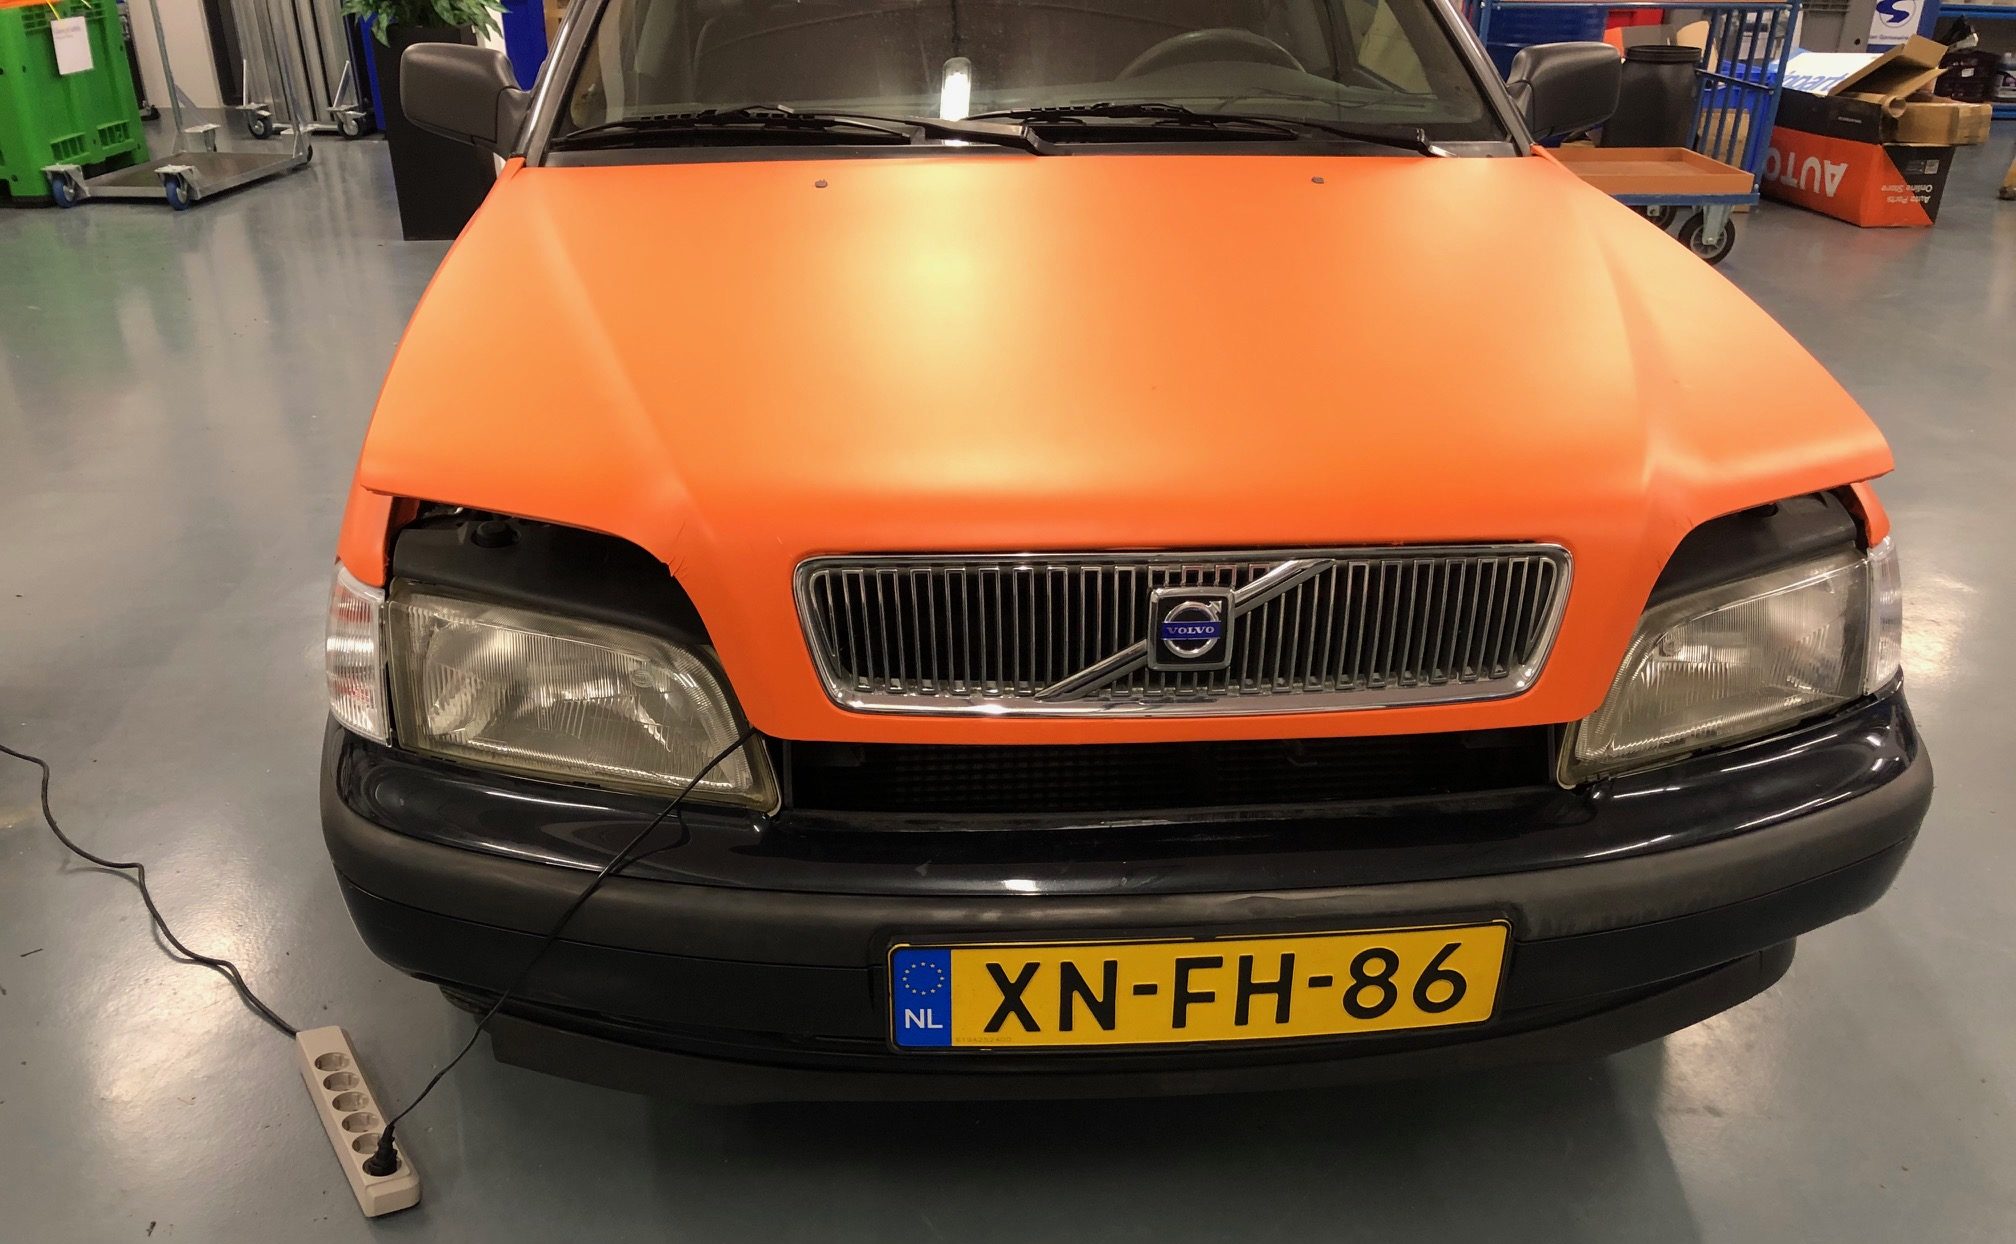
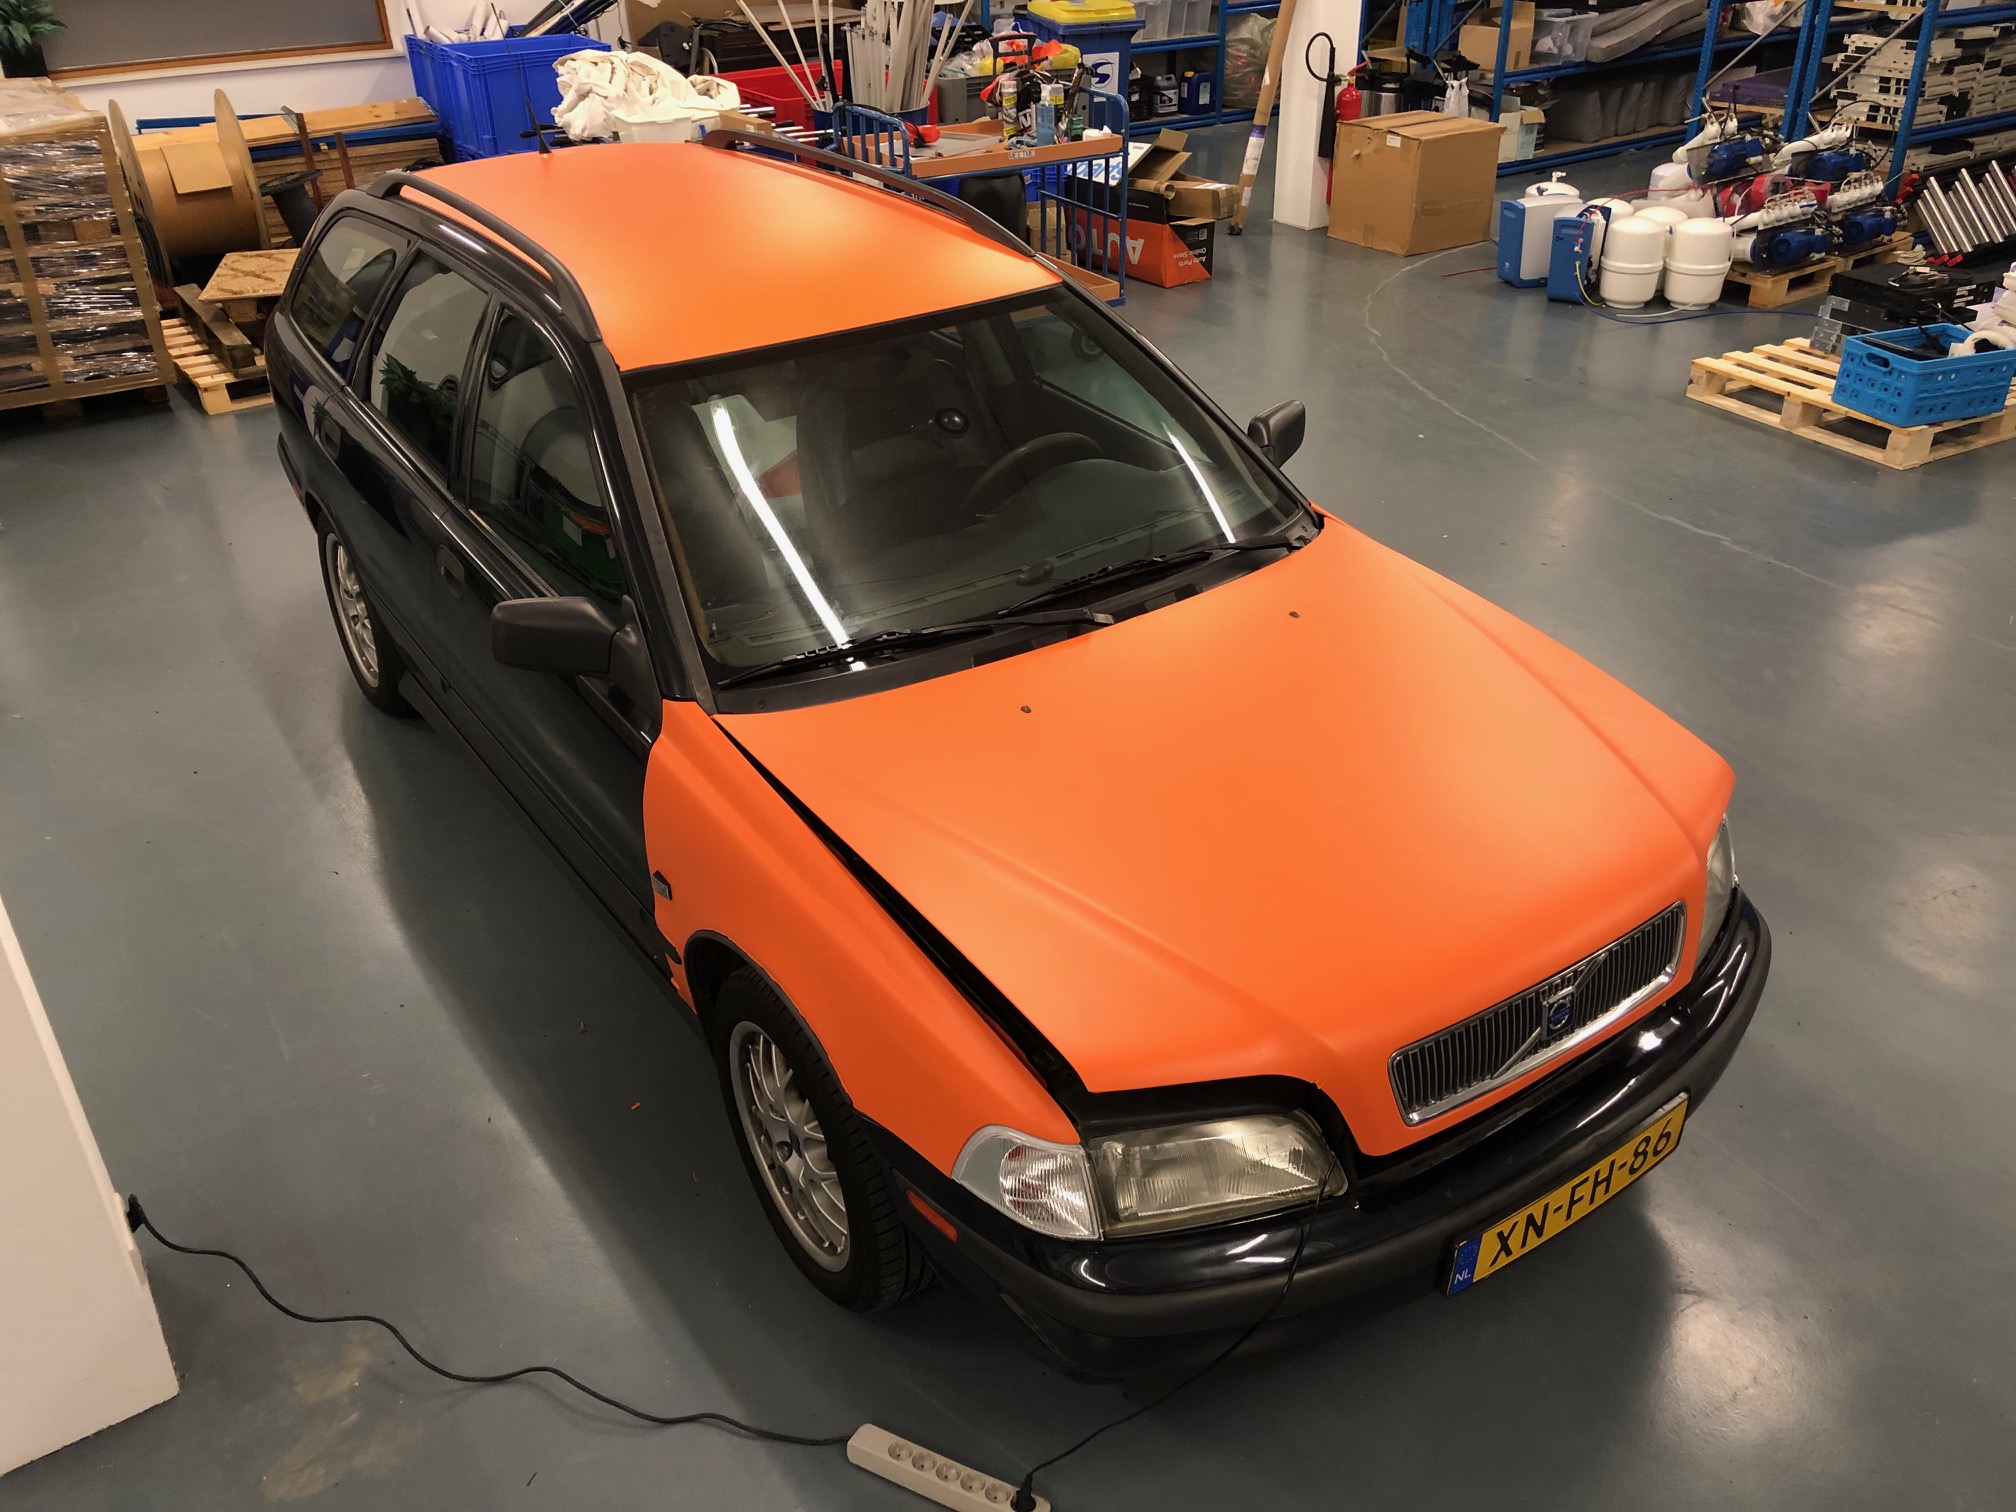
We were a bit disappointed (to say the least) when we found what these two years did to the vinyl wrap, even though the car was under a cover for the entire time. The once orange vinyl faded to yellow-ish, like the orange juice at a cheap hotel’s breakfast buffet. Some parts came loose and it shrank.
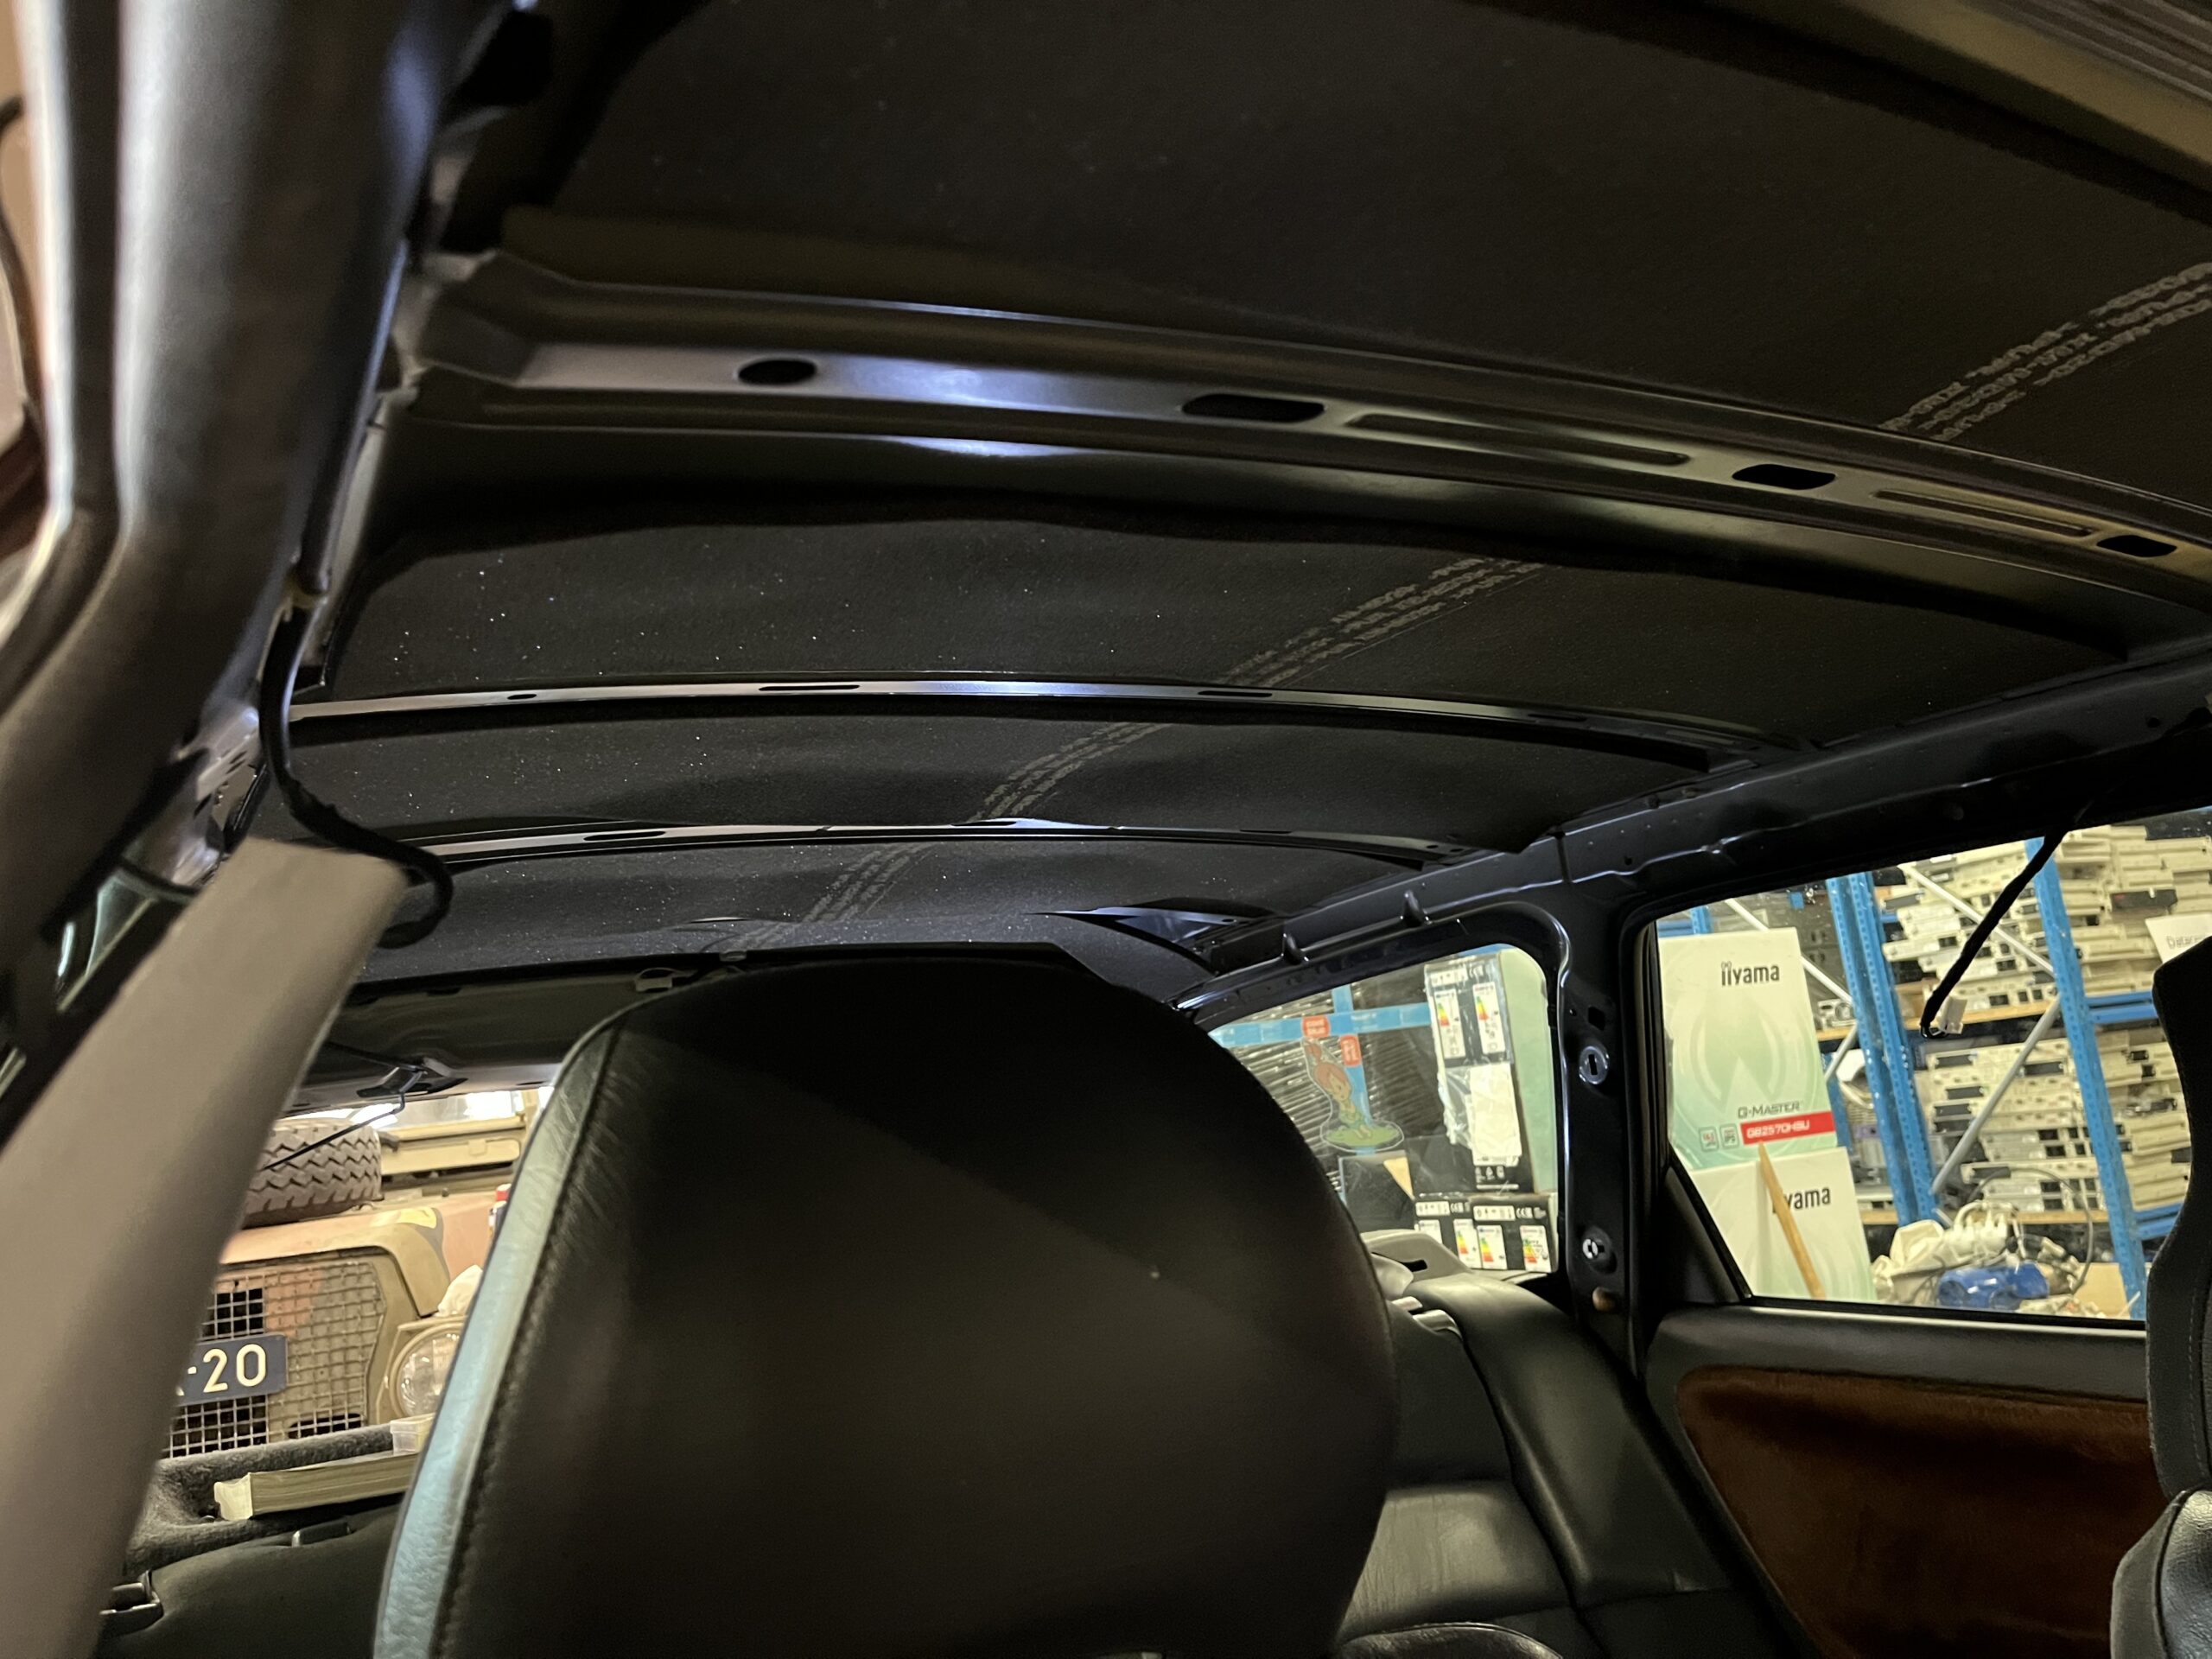
We also had a flat tire. It seemed it had been flat for quite some time and it needed to be replaced. The battery was obviously dead, too. The headliner also came loose. It didn’t just sag a little, it was completely loose. So we ended up removing it from the car, glueing it back on and mounting it again.
Headliner removedThe removed headlinerHeadliner glued back in place
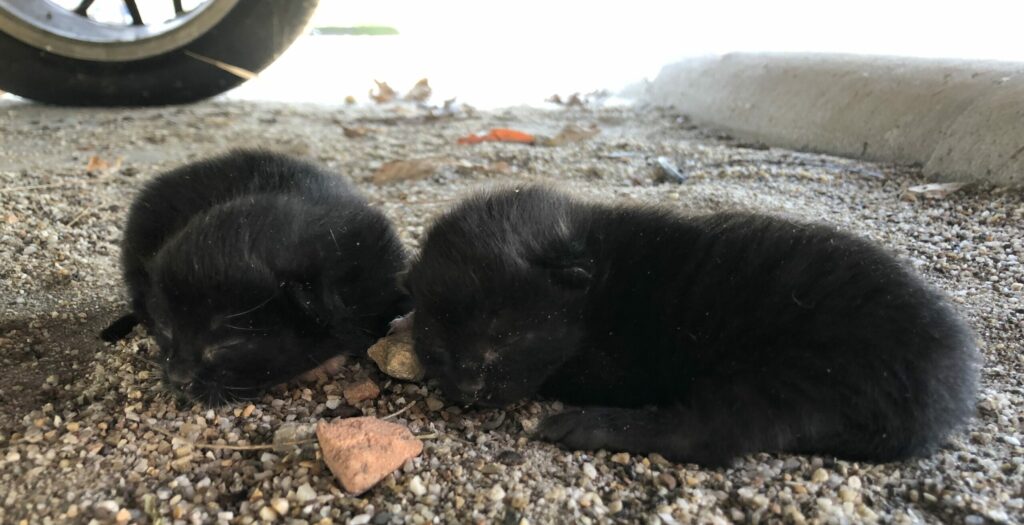
When removing the cover, we found two kittens underneath. Probably somewhere between one and two weeks old. Their mother came to get one of them, but she left the other. We called in professional help and we hope to be able to adopt him/her in about two months.
It has been quite a while since I last posted an update about our work on the Carbage run car. We did make quite some progress!
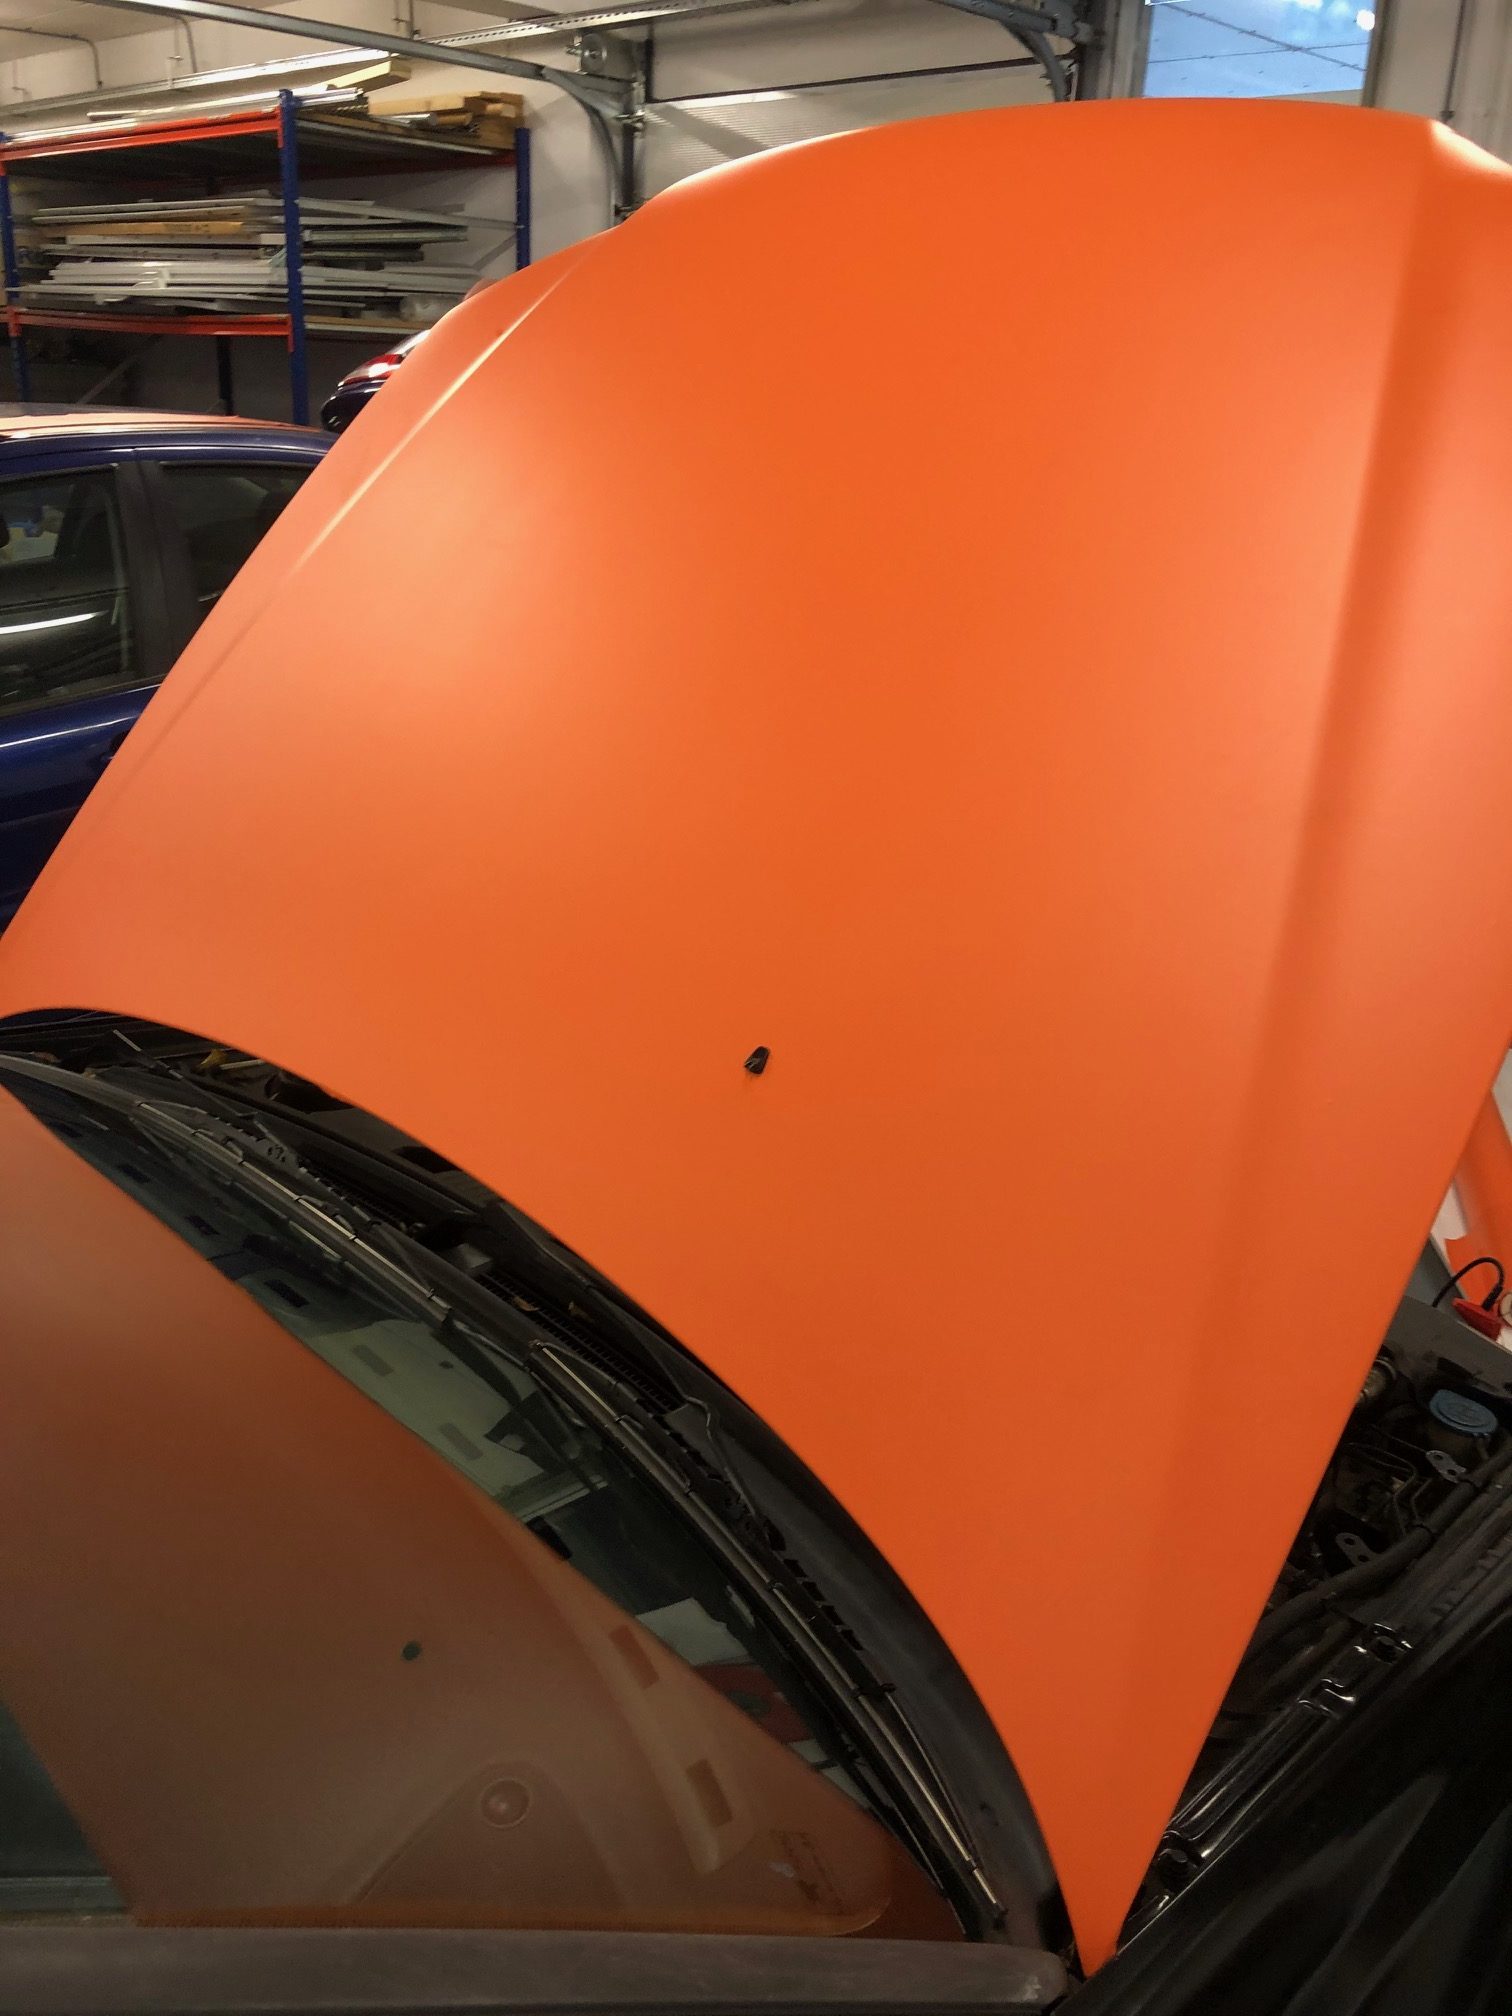
Vinyl wrap
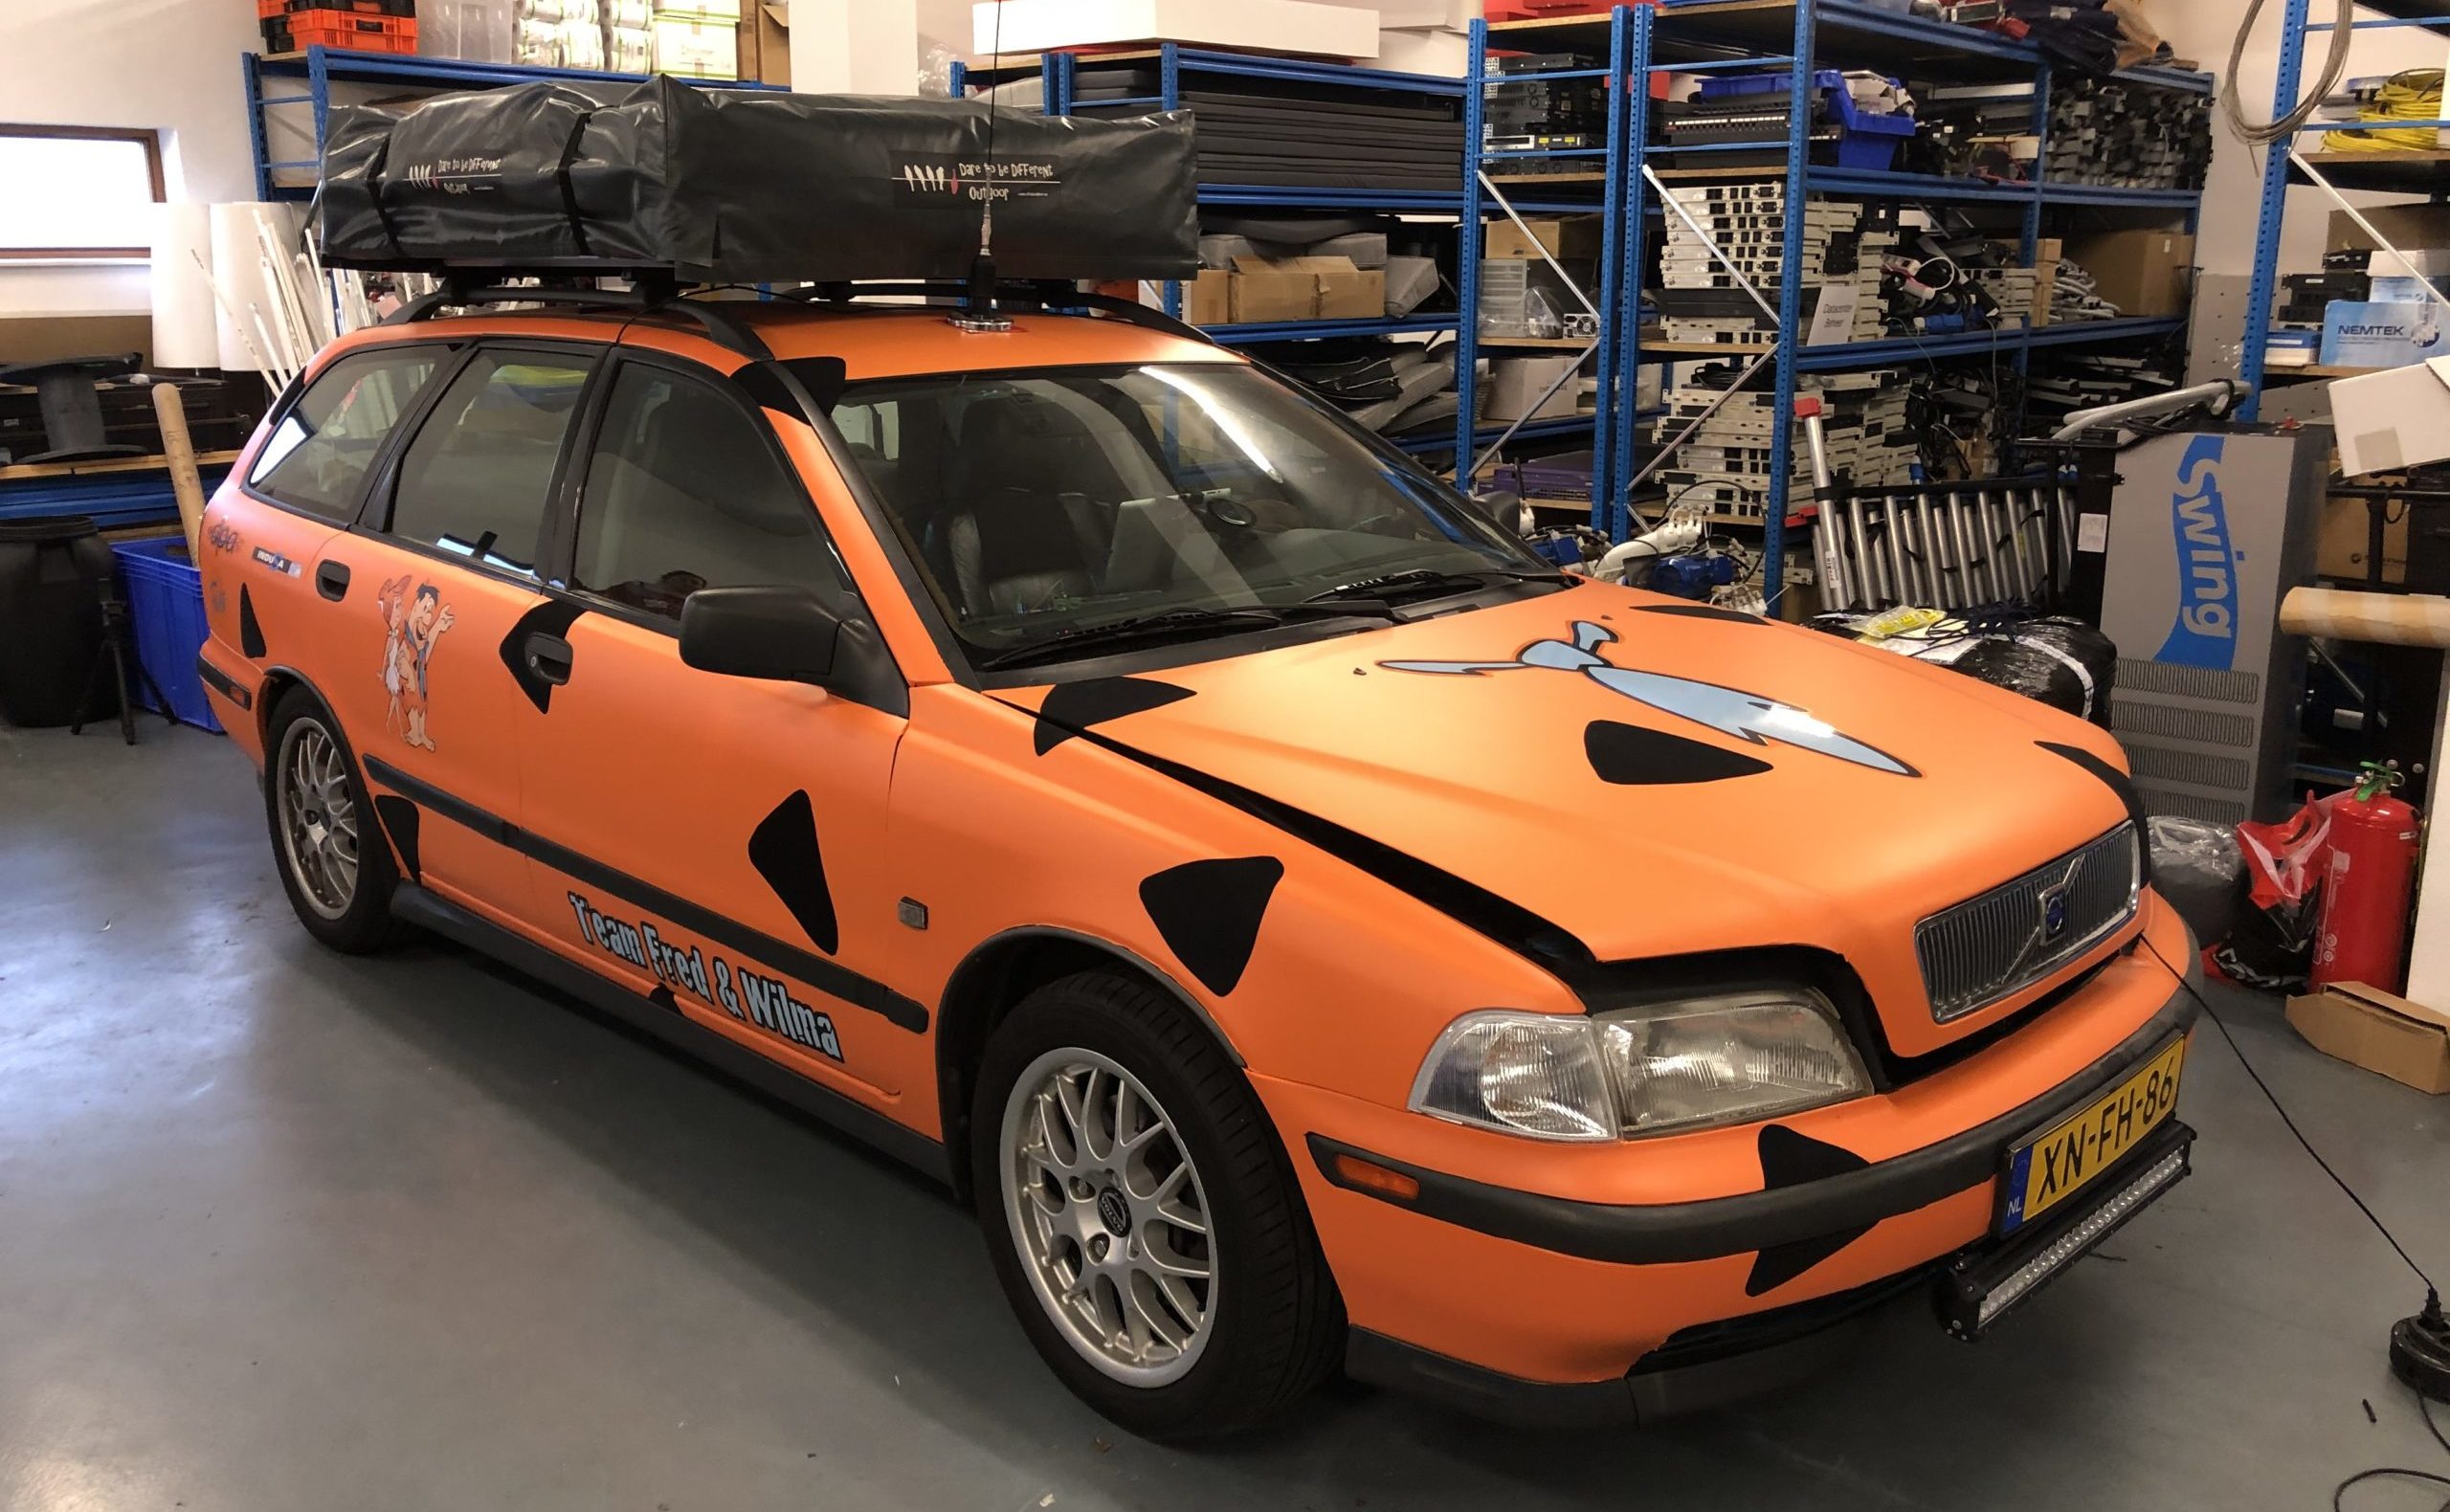
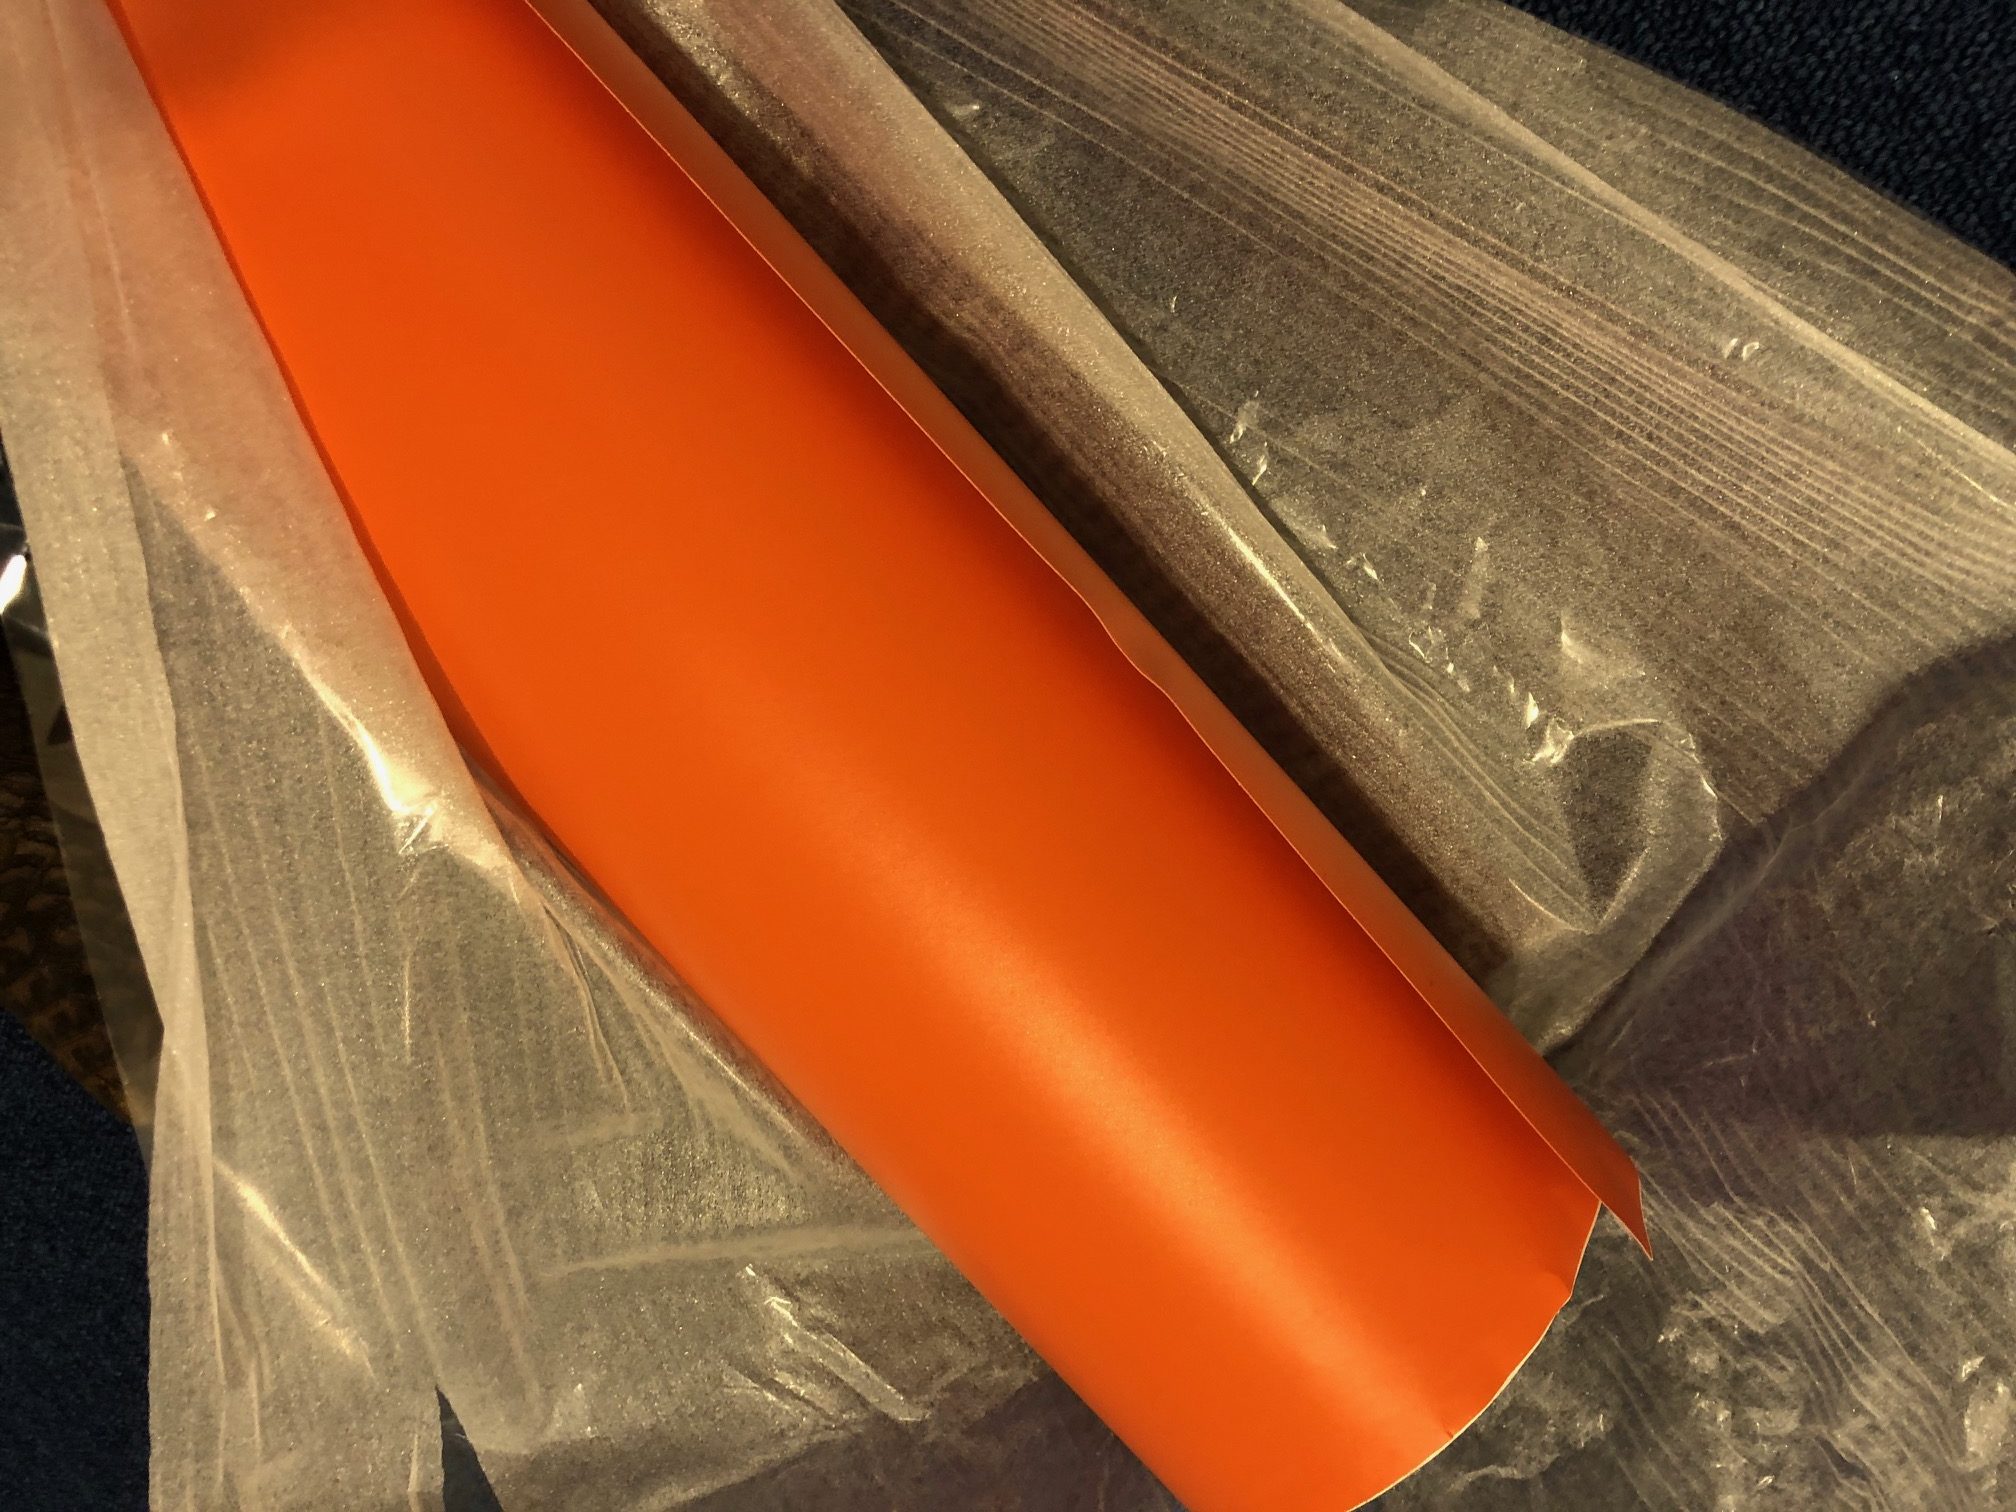
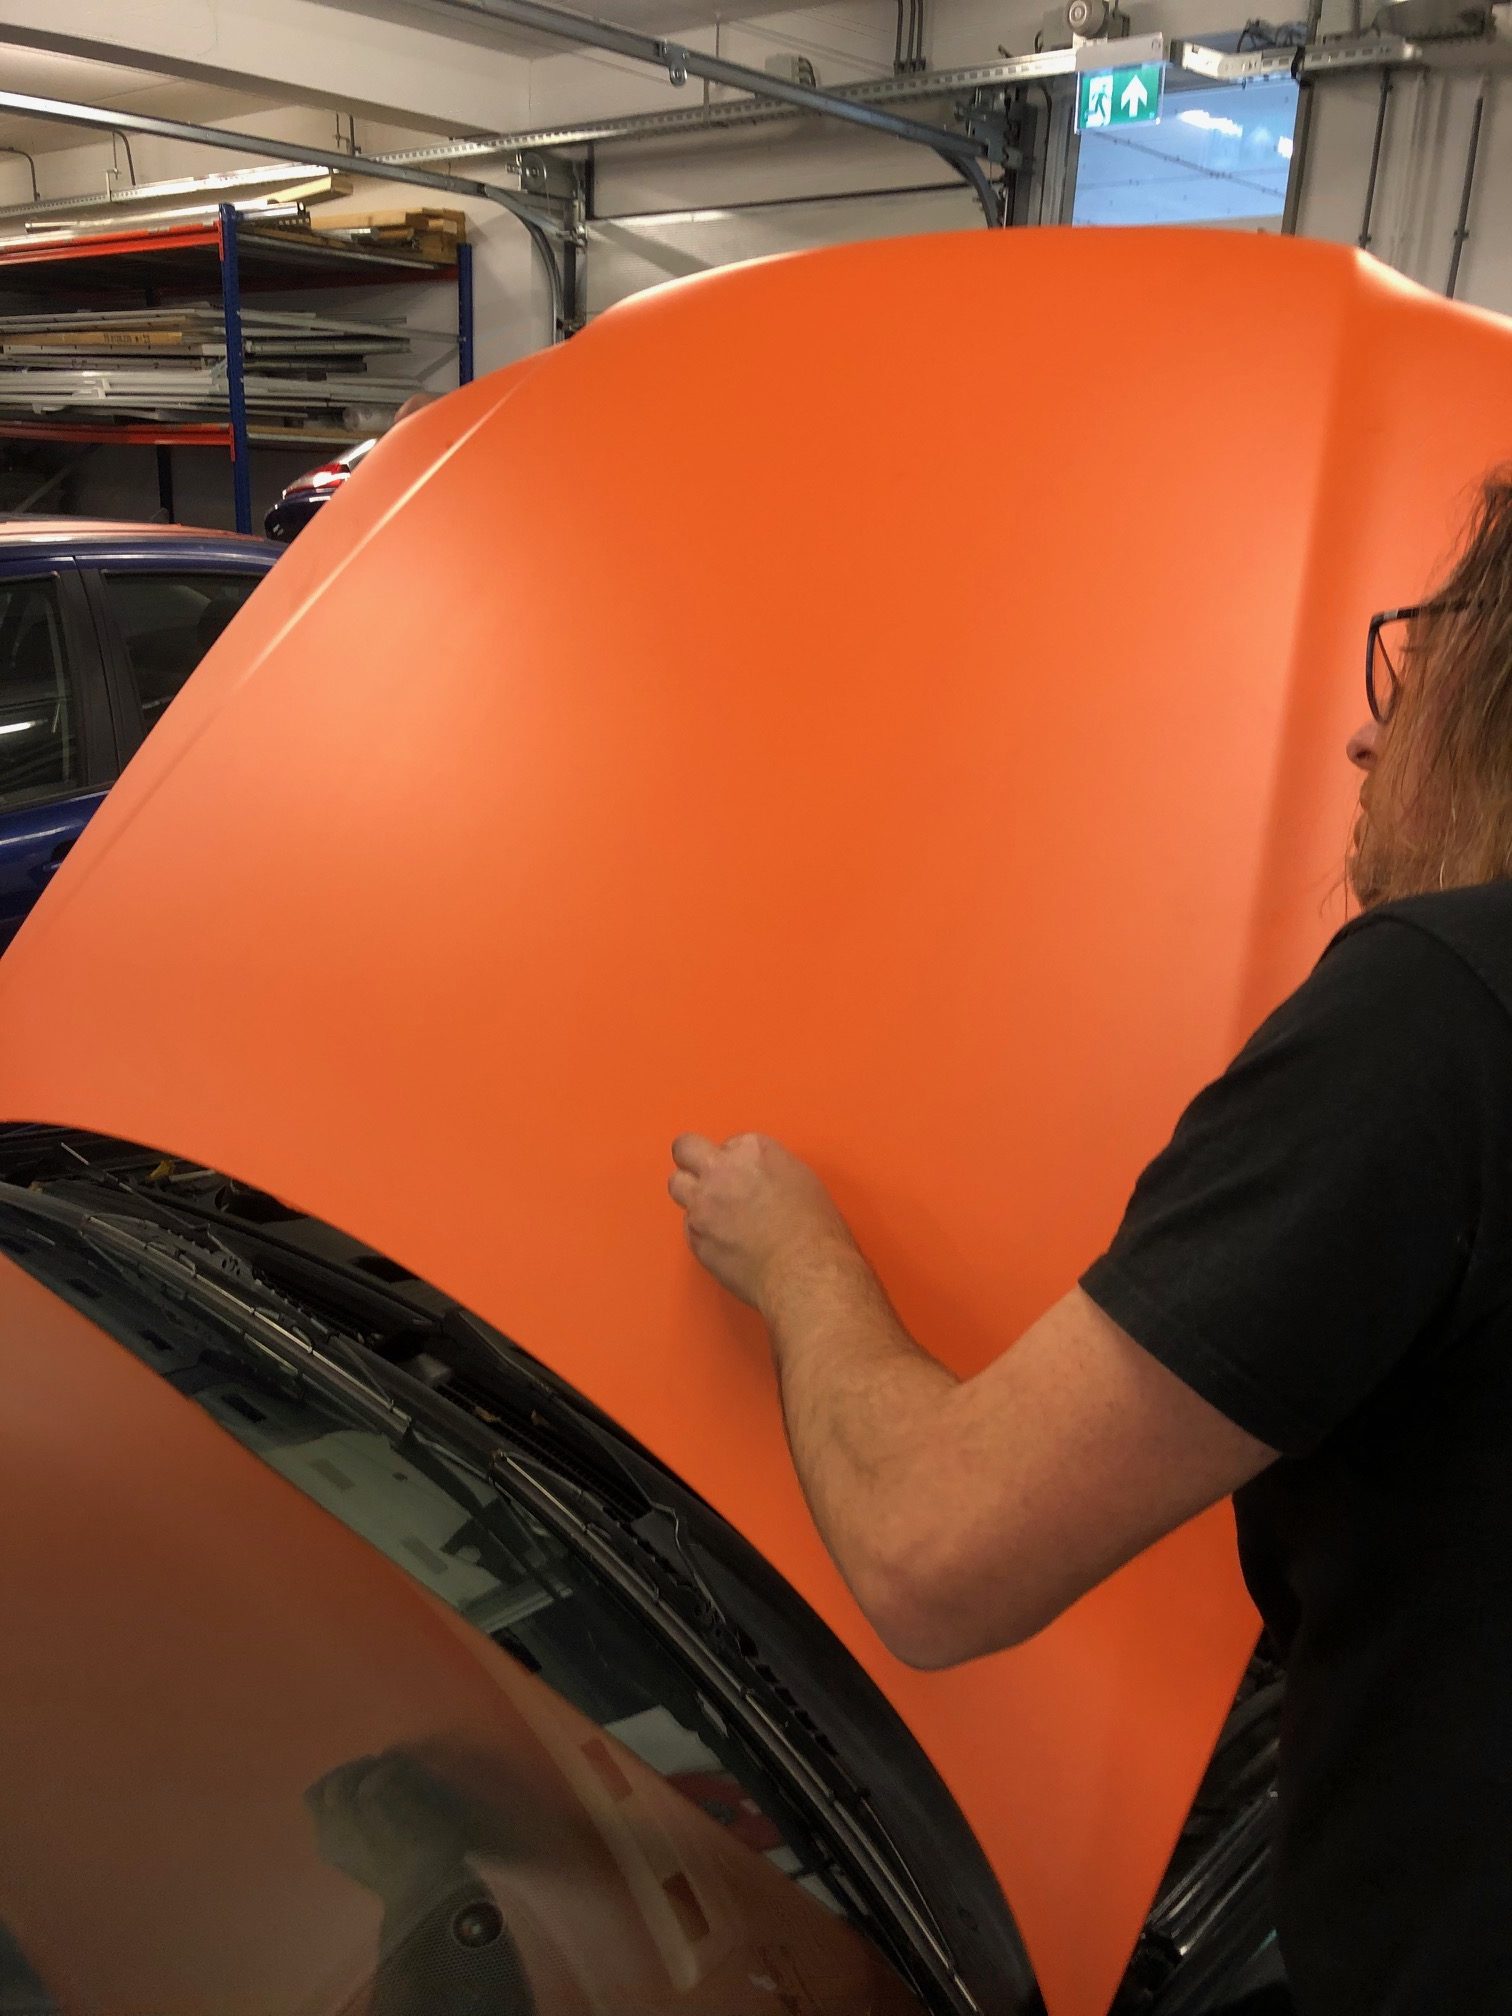
We finished the orange vinyl wrap. Although it all looks peachy on the pictures, the wrap job didn’t go quite as planned. Partly because we never wrapped a car before, but also because the vinyl wrap I bought was really bad. When I ordered it, I didn’t feel like spending €600 on some decent vinyl (3M, Avery, VViViD) so I went for cheap no-name stuff that “only” cost me just under €200. That turned out to be a mistake. The foil can not stretch enough to wrap it around bumpers, it gets shiny very quickly if you apply heat (it basically melts), the adhesive is very bad (we had to redo some parts because the foil literally came off) and it discolored after sitting outside for just a couple of days. And it wasn’t even sunny. In retrospect, the €400 I saved wasn’t worth the extra work, frustration, and sub-optimal result. If I am ever going to wrap a car again, I will definitely go for one of the brands mentioned above.
Stickers
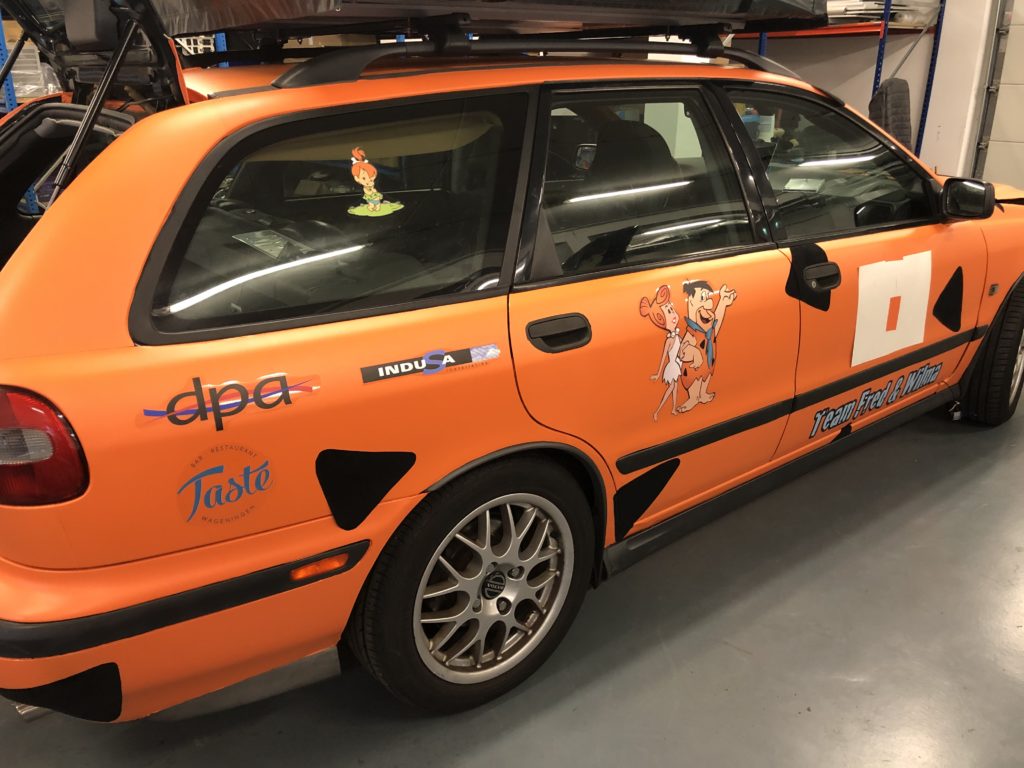
Unfortunately, we didn’t have much luck with the stickers either. I wanted to have the name of the team on the car, the image of Fred and Wilma, Fred’s tie on the hood and the logos of our sponsors on the side. I had the stickers printed on transparent vinyl by some online print shop. They said they couldn’t print white, but since there wasn’t really any white in the design, I went ahead and placed the order. When the arrived it all looked fine. Until I removed the back sheet. I turned out that the colors they printed were not opaque, so effectively the stickers could only be used on a white background. What’s the use of transparent stickers if they can only be used on white? After complaining about it I got a refund and ordered the stickers elsewhere. When they arrived, the colors turned out to be wrong. I don’t know what happened, but it looked like the white they printed was blue. When I called them and send them an e-mail with a picture of the result they apologized and reprinted everything. The next day I finally had the stickers I wanted.
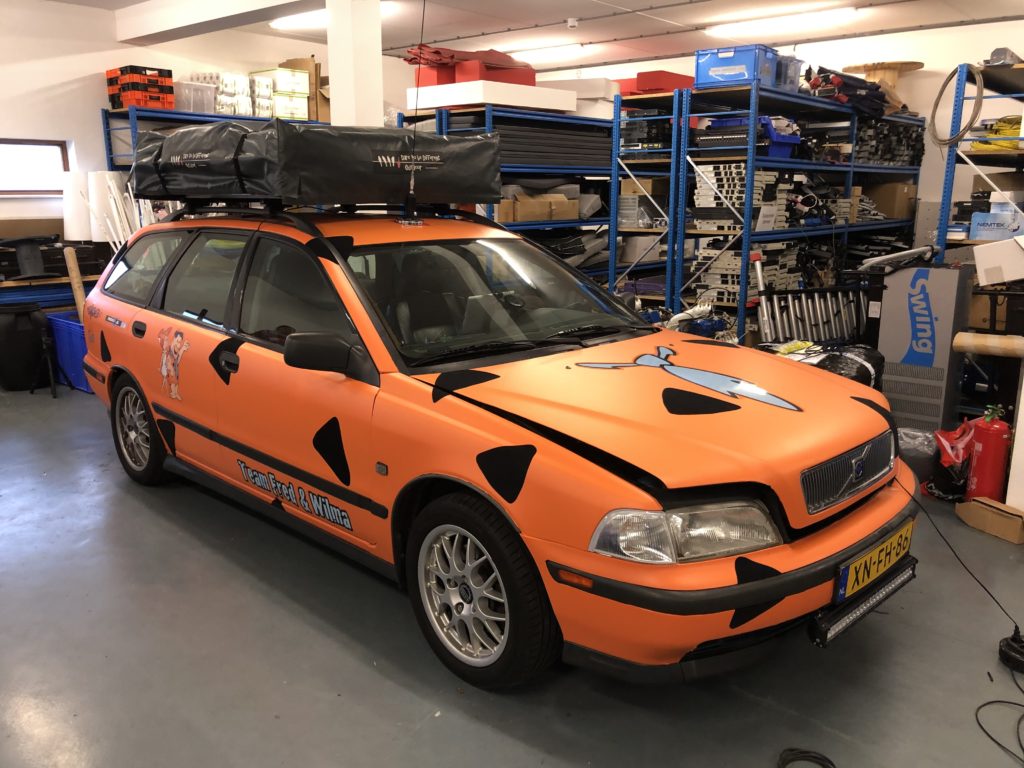
Rooftop tent
We wanted to have a rooftop tent on the car. During the Carbage run, we sleep at a different campsite every day and setting up and breaking down a regular tent every day is just too much hassle. A rooftop tent is ready to be slept in within 2 minutes. I checked Marktplaats (like the Dutch Craigslist) for a while. The rooftop tents on there were either too expensive, too far away or the seller was unresponsive (why place an ad if you are not going to respond?), but after a few months I found one that was exactly the type I wanted, it was not too expensive, not too far away and the seller responded quickly. I bought it the same day.
Black spots
In the meantime, I ordered some vinyl wrap for the black spots. I choose the velvet option and that turned out very nice. It feels soft and it has a really deep matte black finish. I think it is the same stuff they use for airbeds. It feels the same anyway. Emmie started working on it. Getting the shape and size right is one thing. Distributing them evenly while avoiding the stickers and covering up the worst imperfections in the orange vinyl wrap all at the same time turned out to be quite a job. One she did very well!
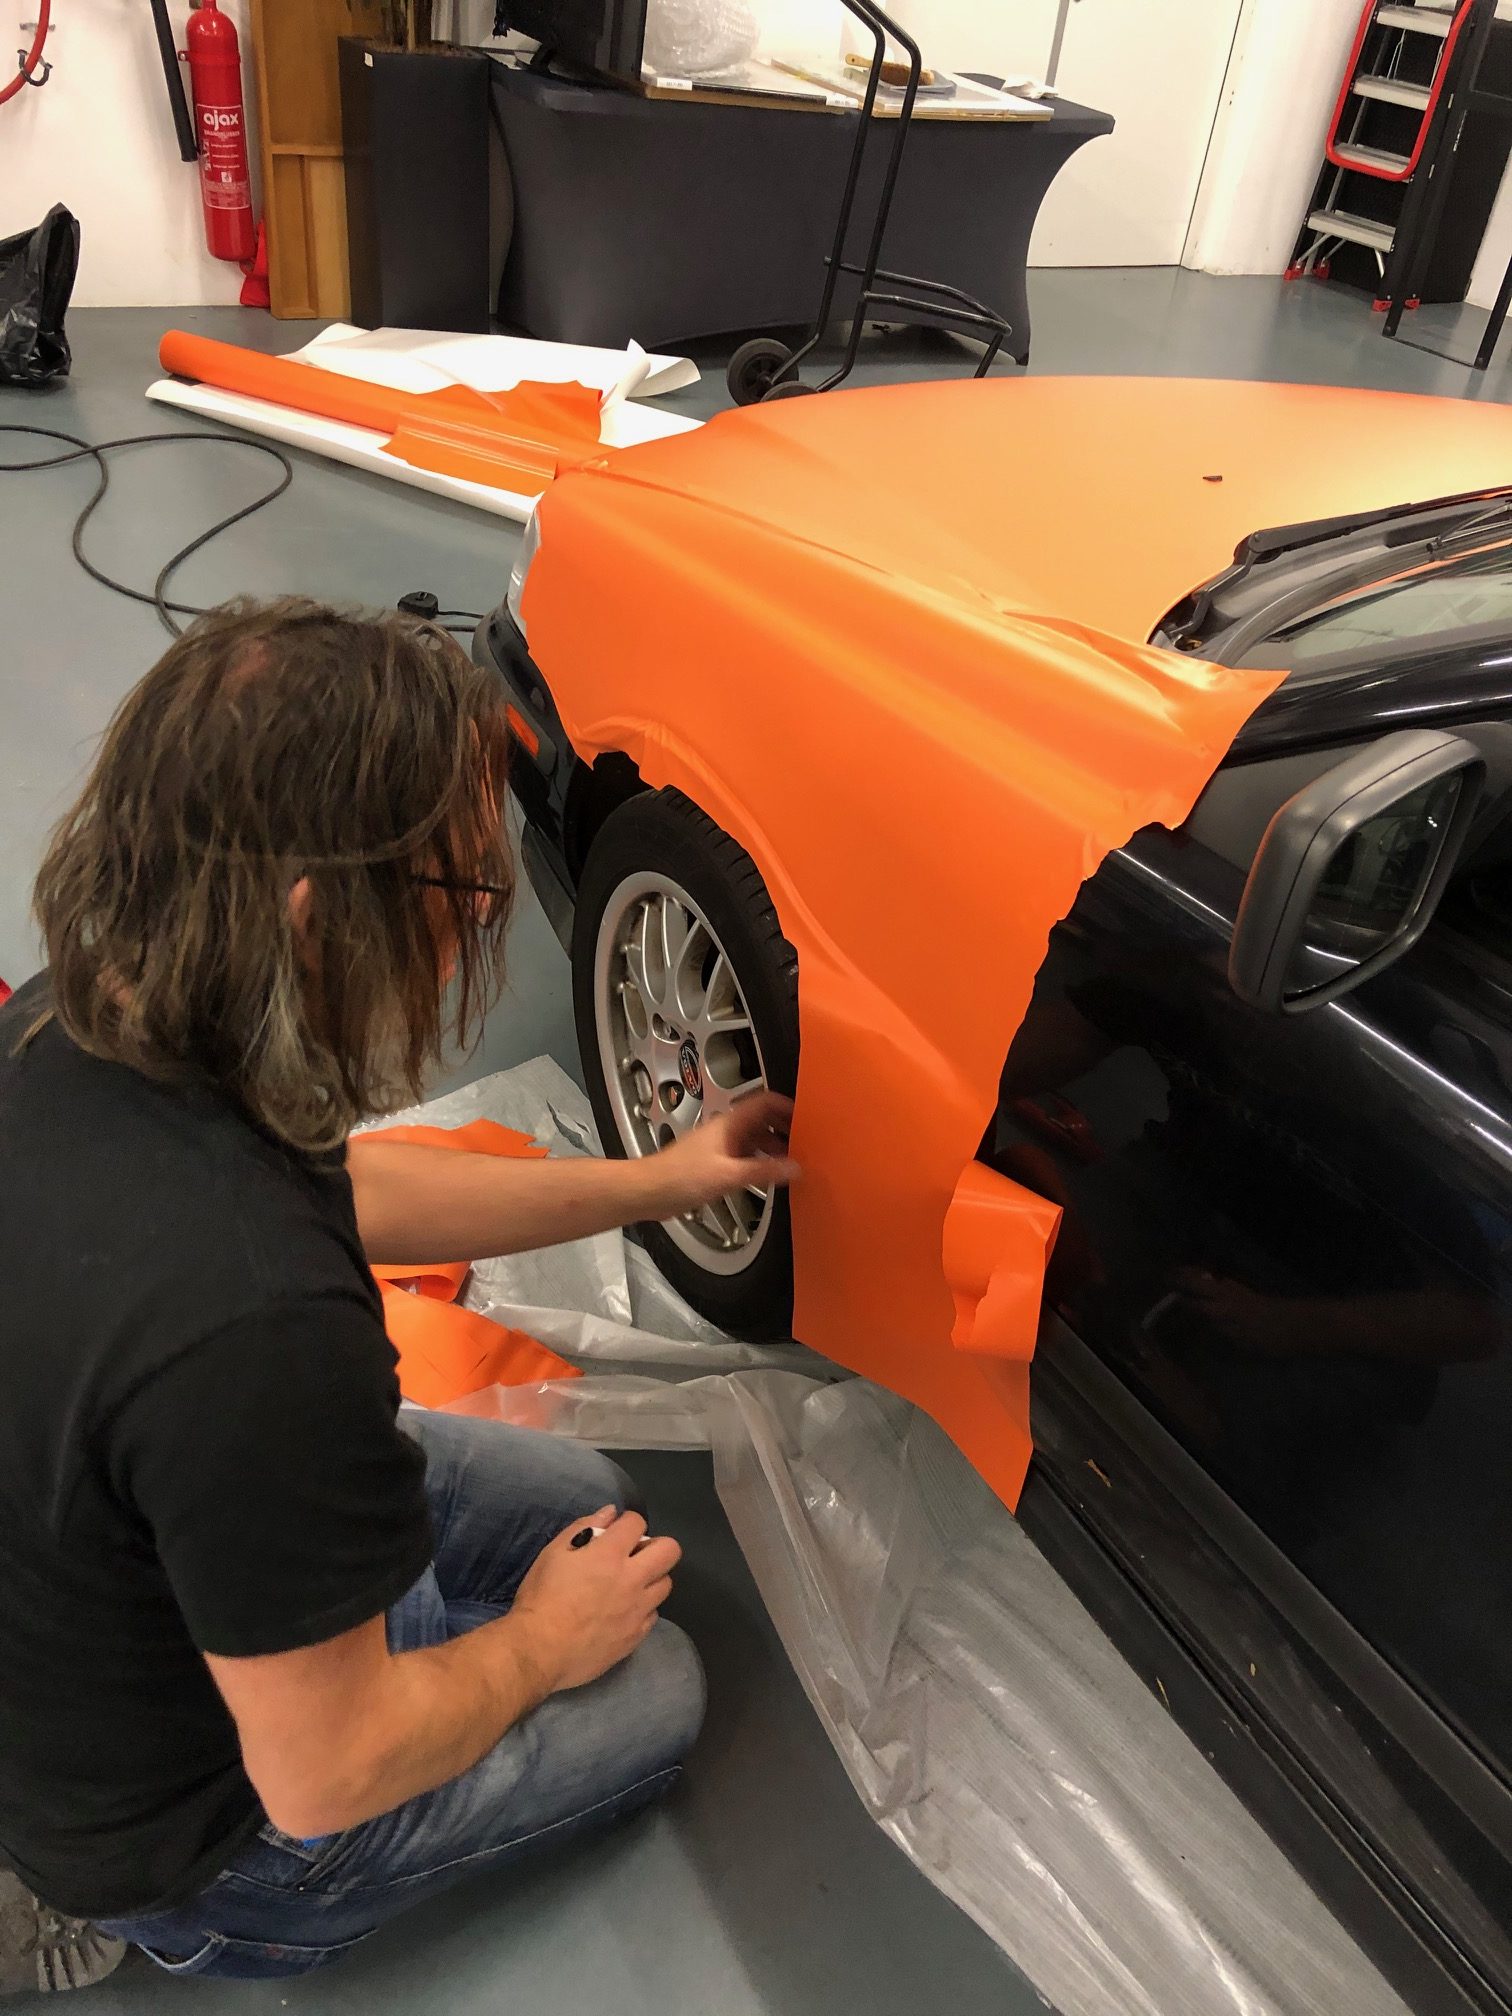
Ever since we decided on the team name (Fred & Wilma) for the Carbage run, we have been thinking about how to make the Volvo look more like the Flintstone mobile. We thought about wrapping it in wood grain vinyl wrap, but we couldn’t quite figure out which part should be wrapped exactly and, equally important, what to do with the rest of the car. After some time we decided to wrap the entire car in orange vinyl wrap and make black stains on it (like Fred Flintstone’s outfit). And some printed stickers to pimp it up a little but more on that later.
We never wrapped a car before so we watched quite some YouTube howtos. We ordered some vinyl, a squeegee, borrowed a heat gun and started fiddling around with it. We probably made it more difficult by buying some (relatively) cheap no-name vinyl wrap rather than 3M, VViViD or Avery, but we can’t say for sure because we’ve never tried those.
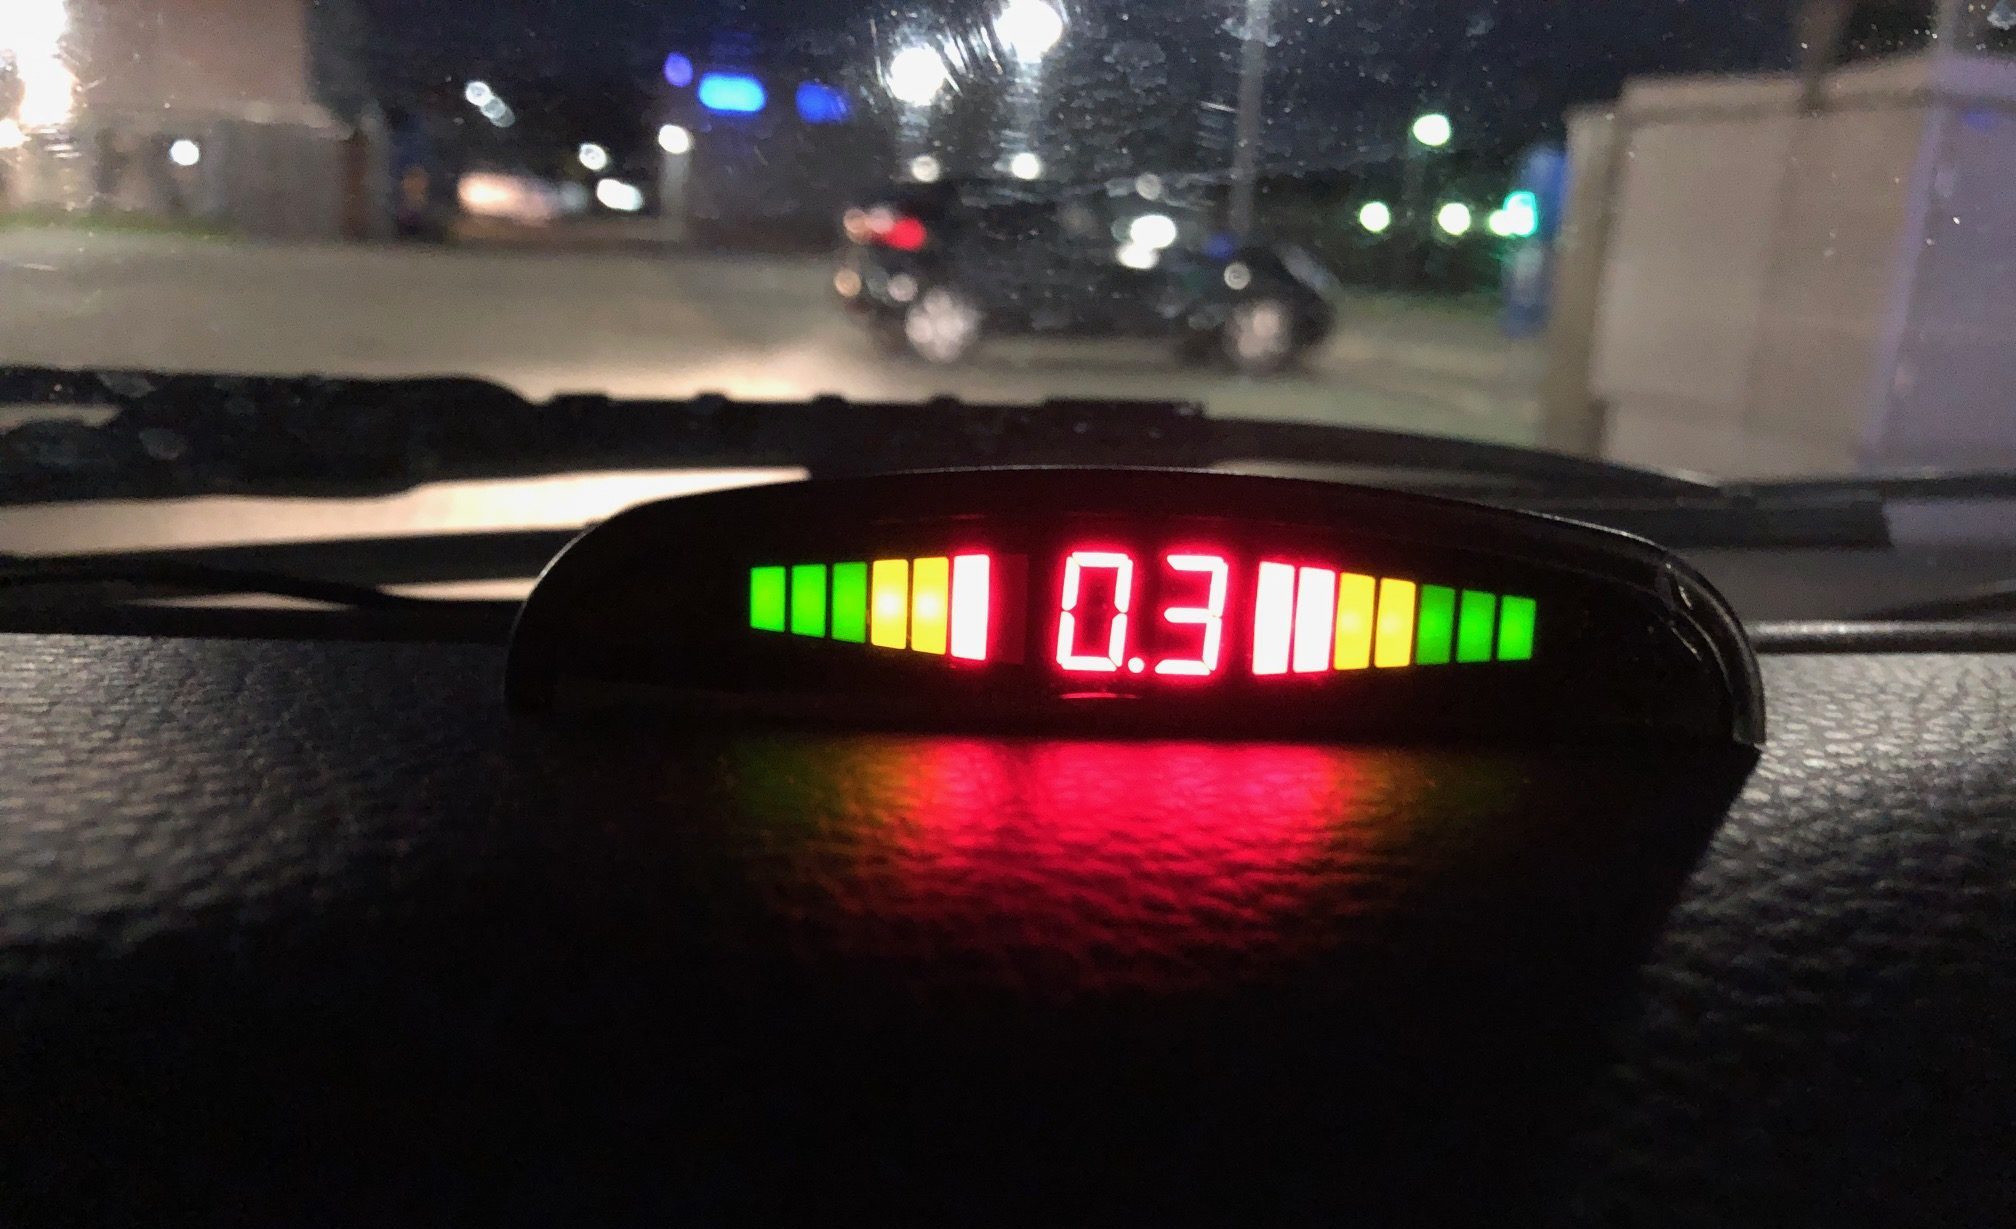
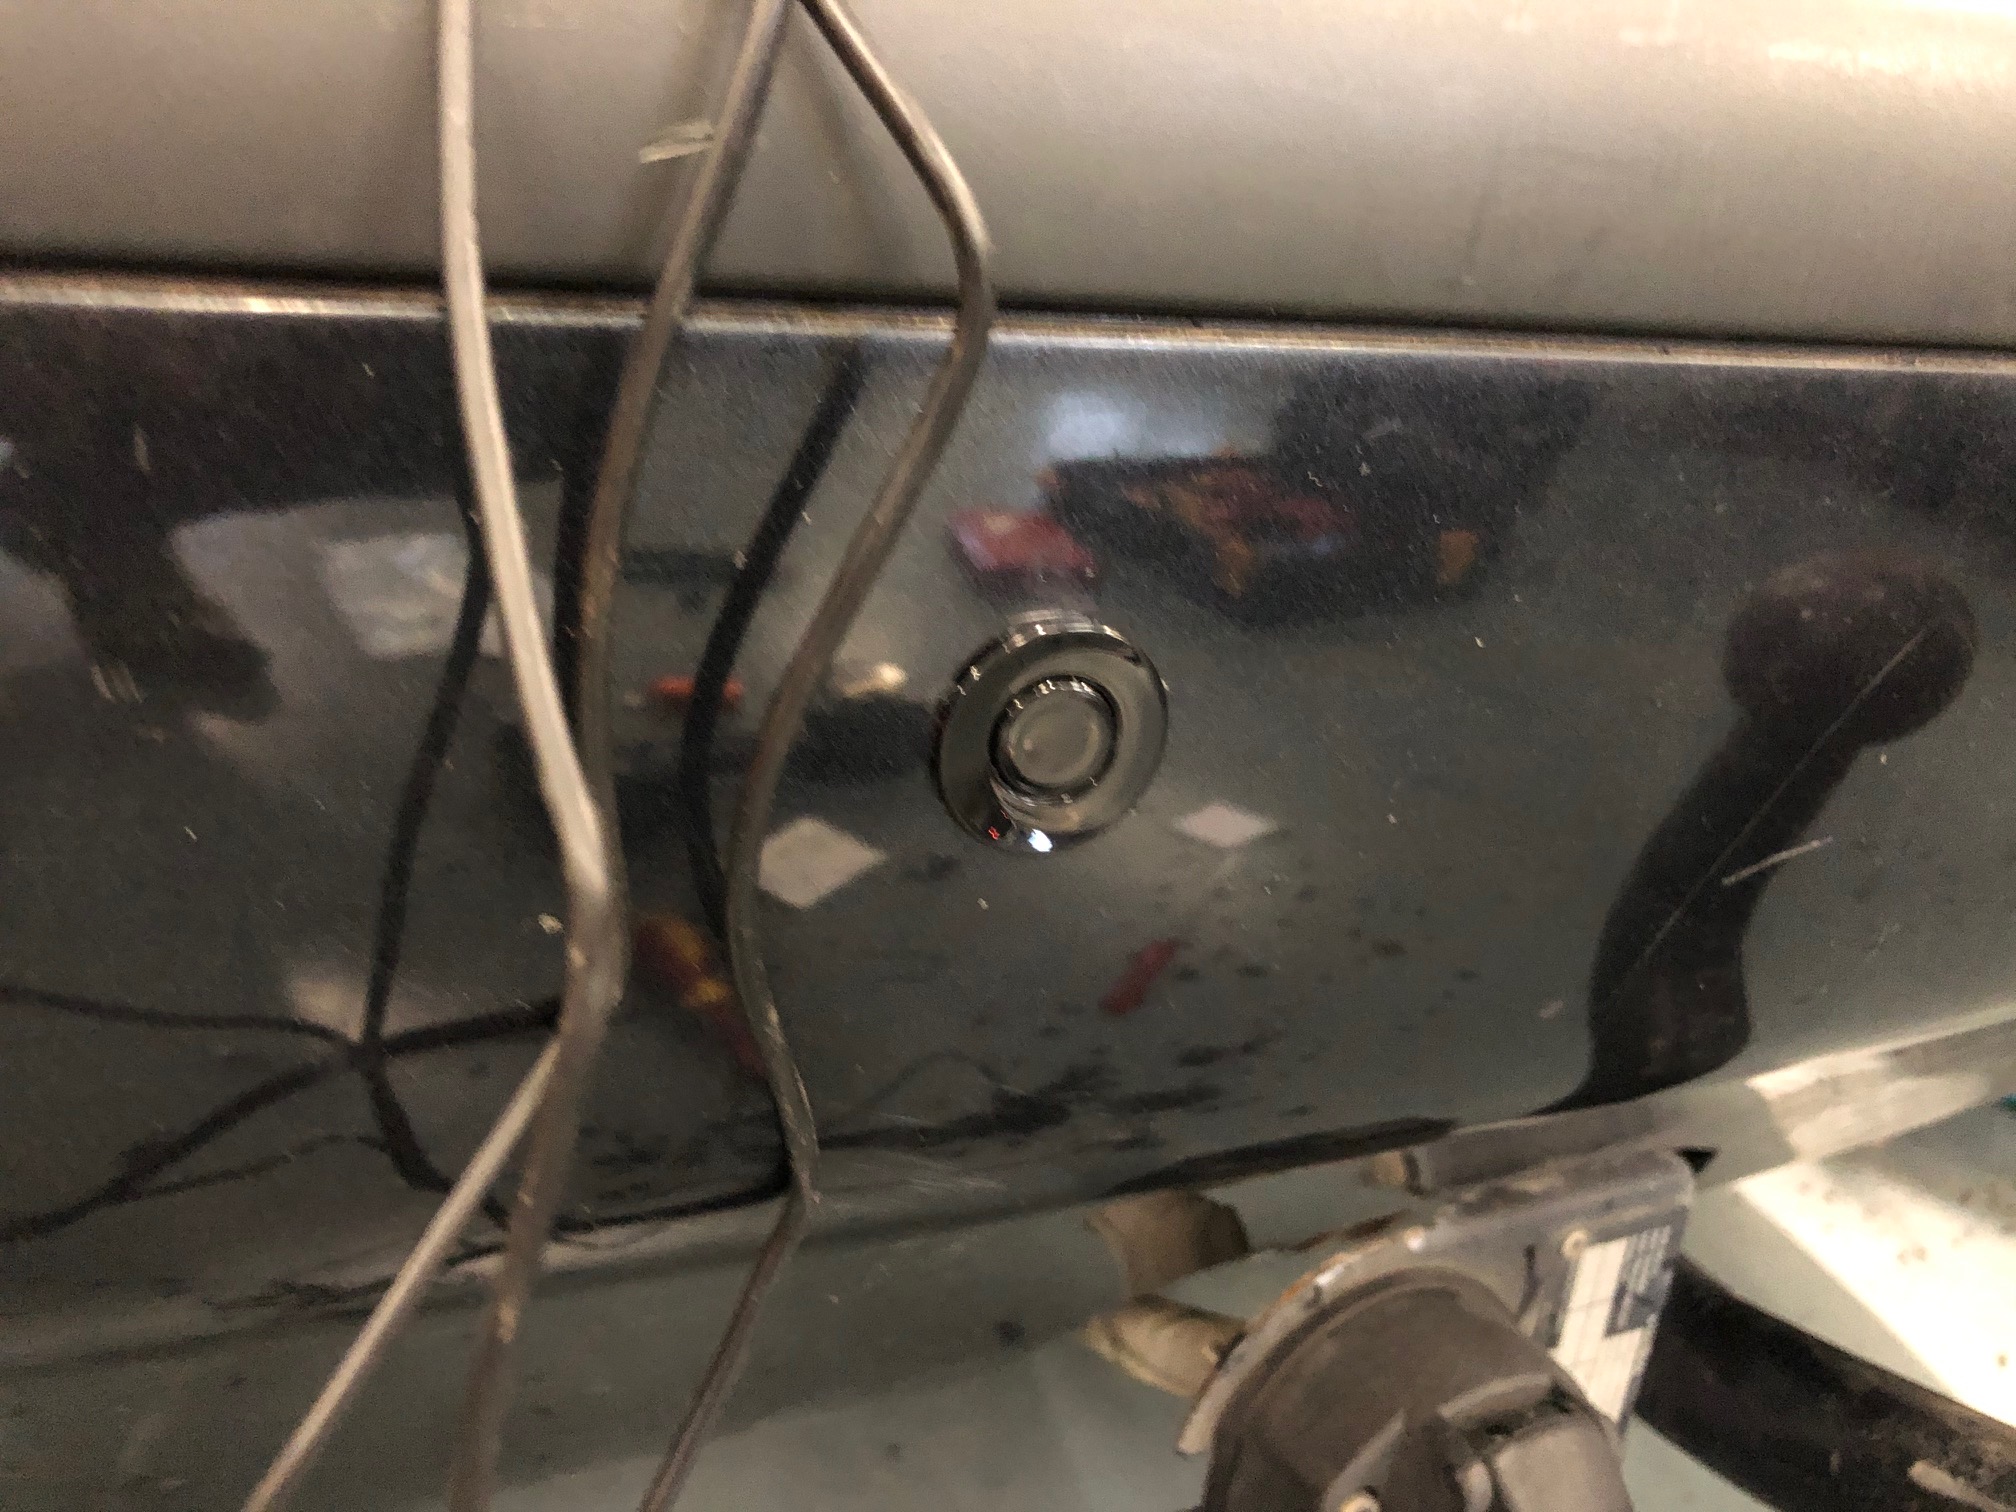
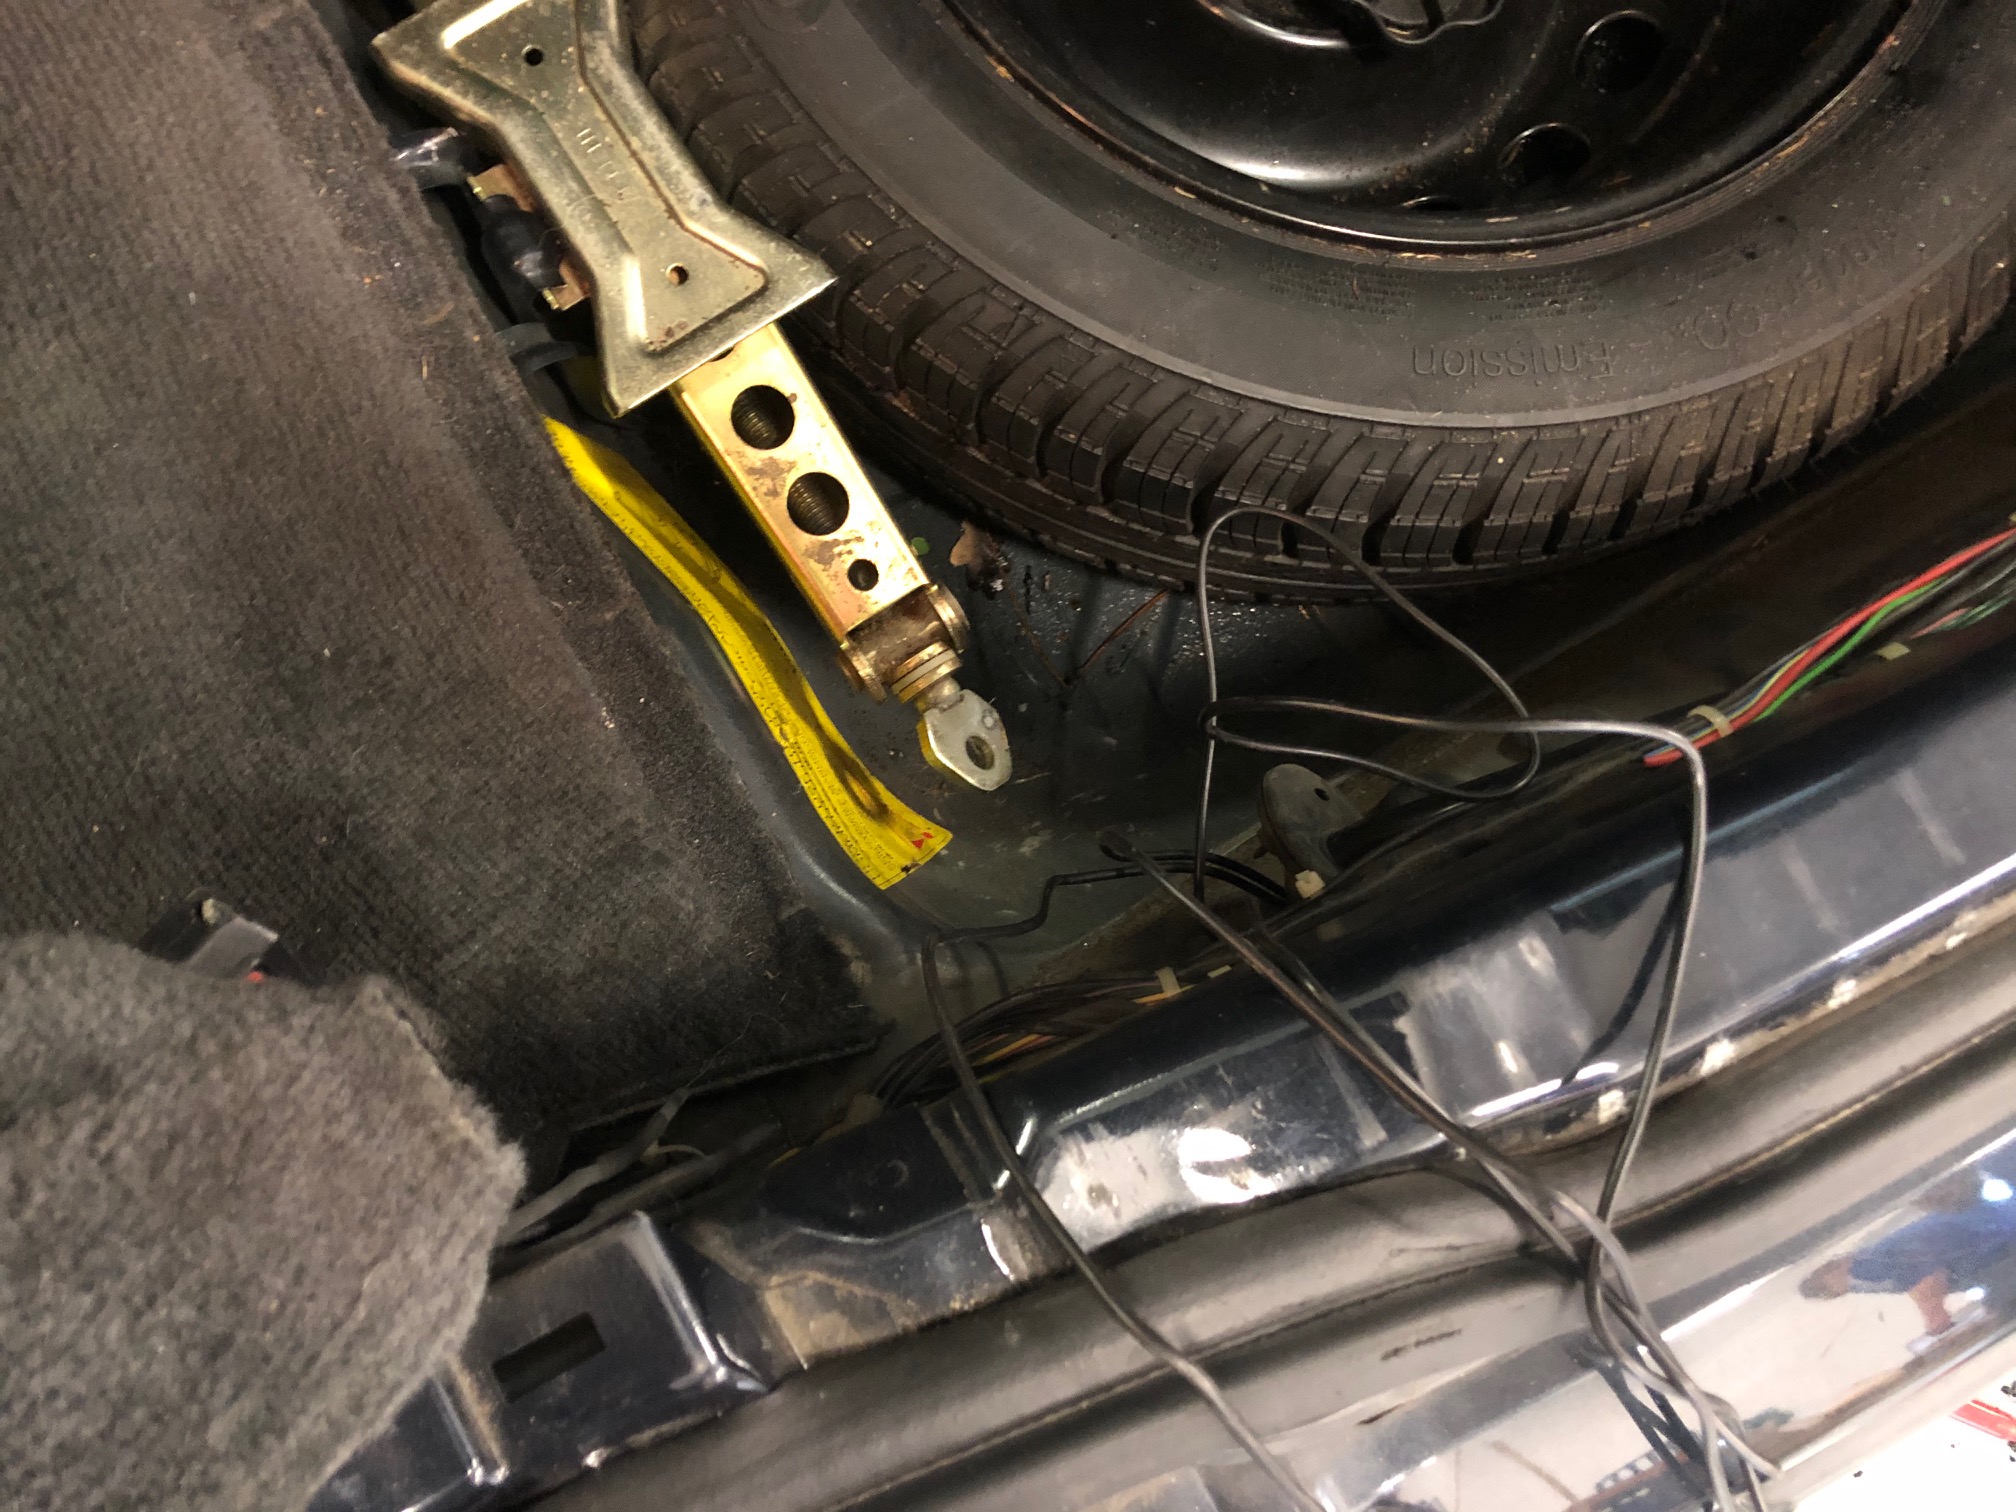
A few weeks ago, I was browsing on one of those Chinese websites (I’m not mentioning names) when I came across some parking sensors. A set of 4 sensors, controller, display unit and a hole saw to make the necessary holes in the rear bumper would set me back only €15. The ’99 Volvo I bought for the Carbage run didn’t have any parking sensors and I was curious about this set, so I decided to order it.
A few weeks later, the package arrived and I installed it. The hardest part was to find a suitable route for the sensor cables. The rear bumper is filled with this foamy material, which makes it hard to get the cables through. Once that was done, I hooked up the controller to the reverse light wires. In that way, the sensors are only active when the car is in reverse. I put the display unit on the dash (I have yet to find a suitable place for it) and that was basically it. It just worked. So this is going to be a short post about €15 well spent 🙂
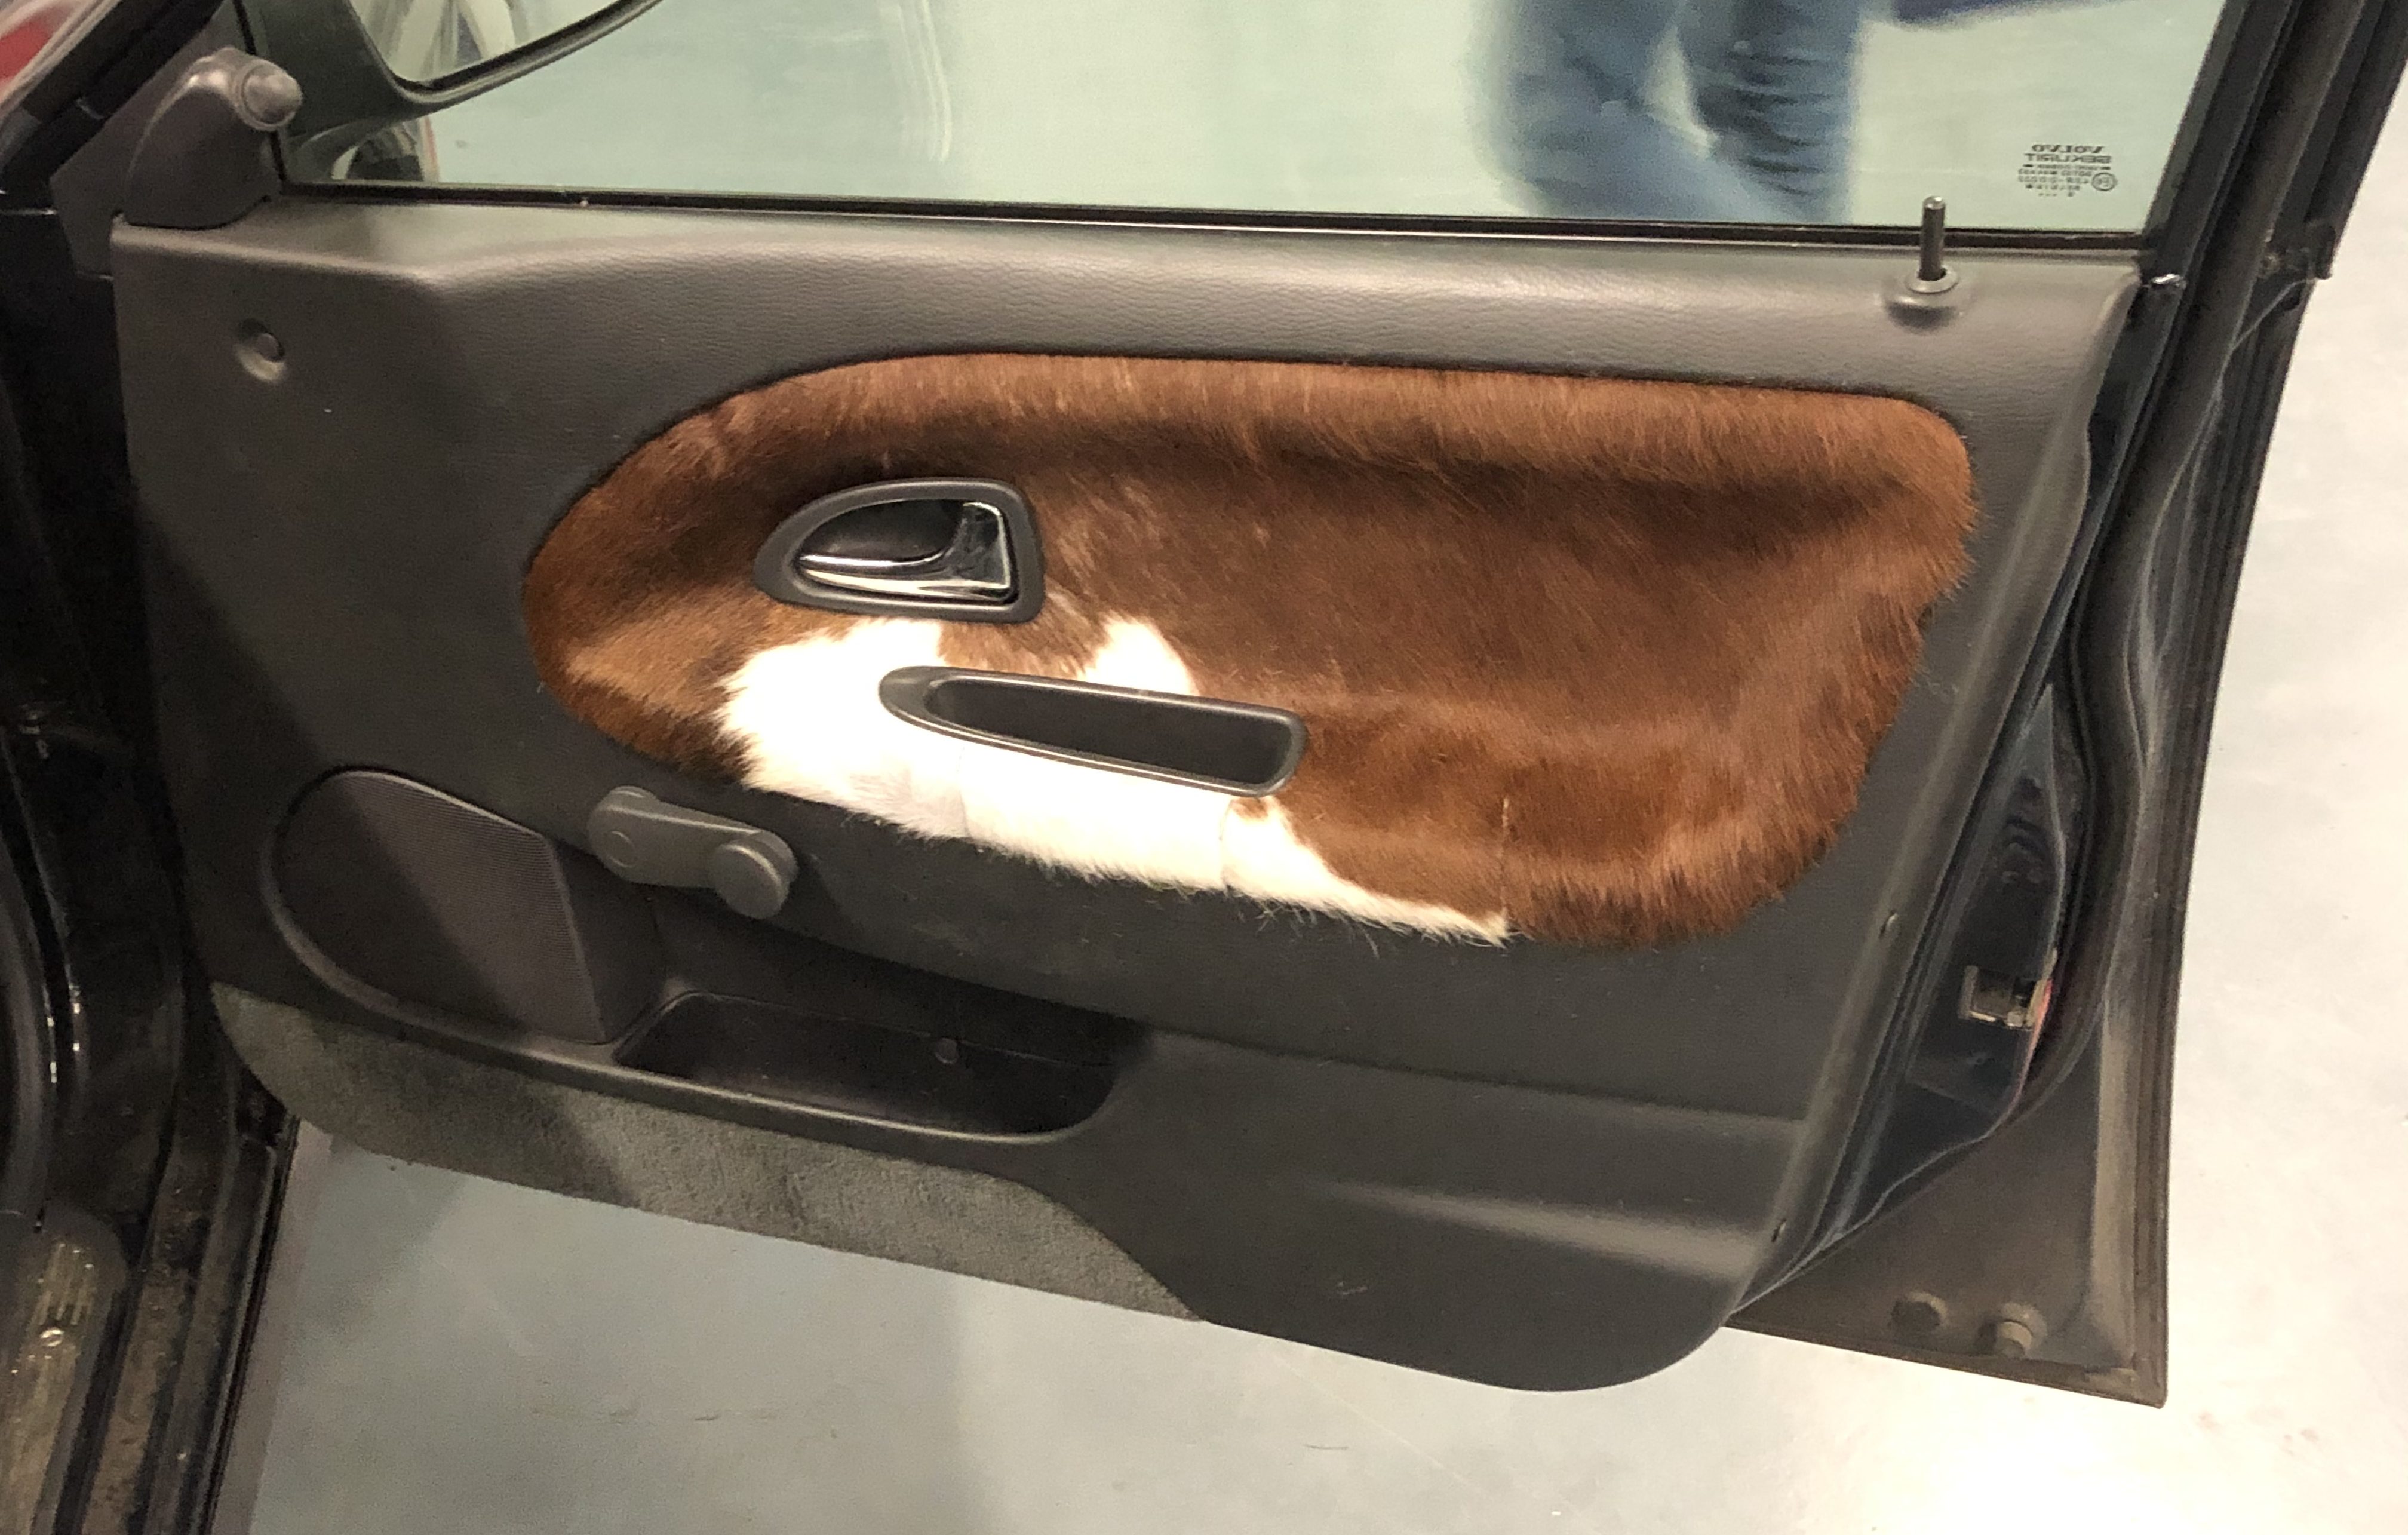
The upholstery on the doors of the Volvo was coming off. I mean litteraly disintegrating. The layer of foam between the door panel and the upholstery turned into sticky orange gunk. That needed to be replaced. We removed the door panels, the old upholstery, most of the gunk and replaced it with cowhide I picked up at a local home decor shop. We are team Fred & Wilma after all 🙂
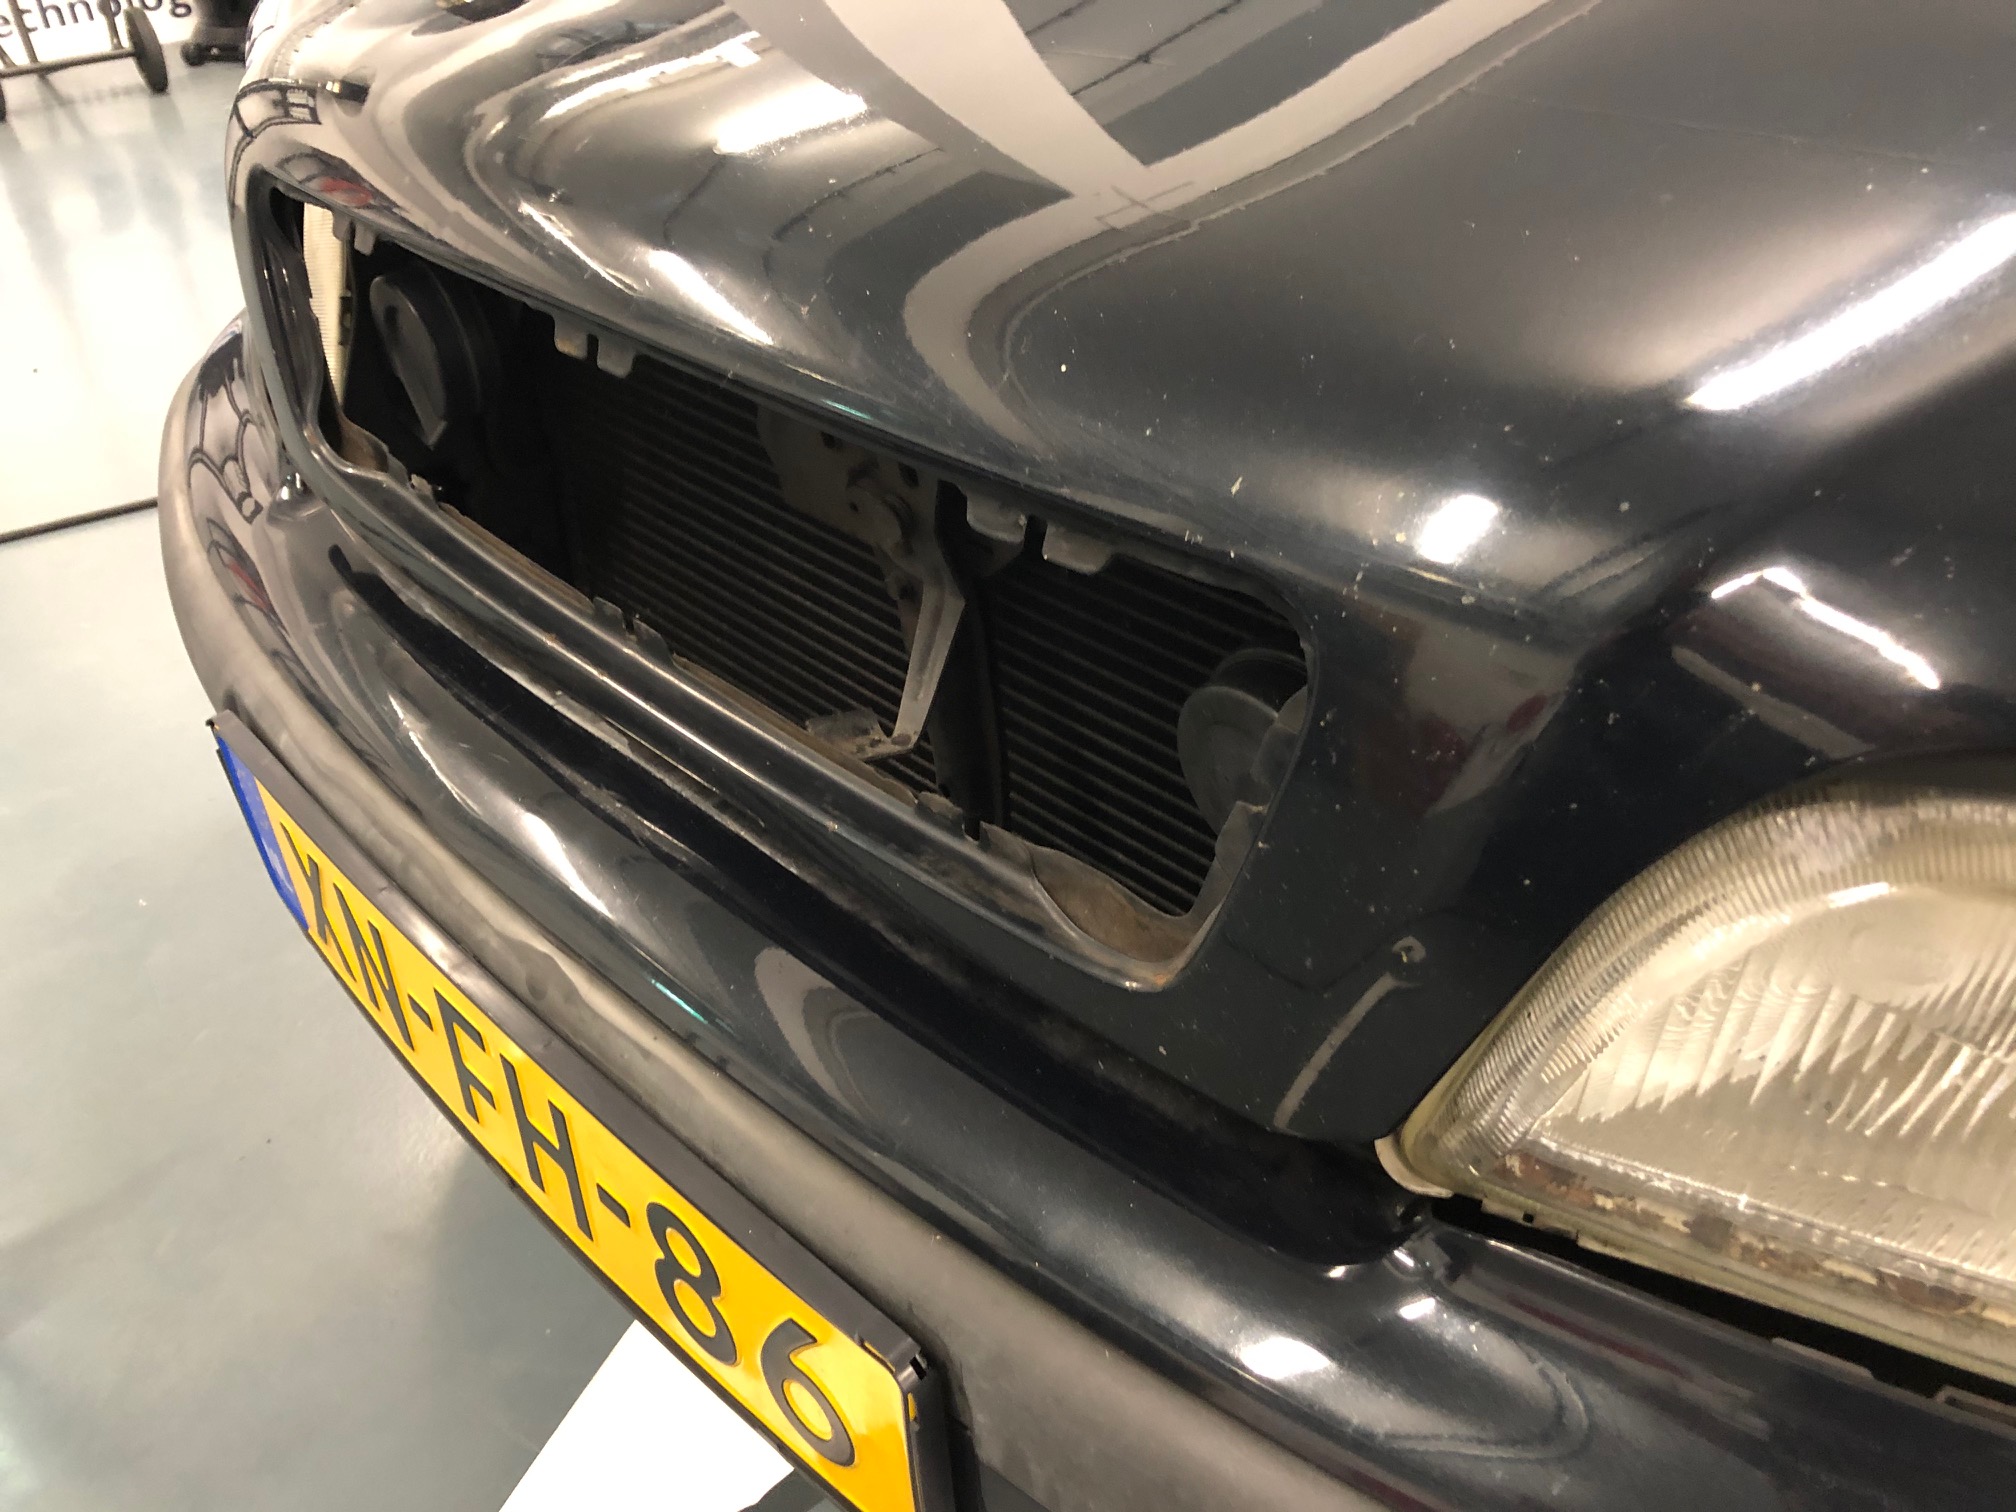
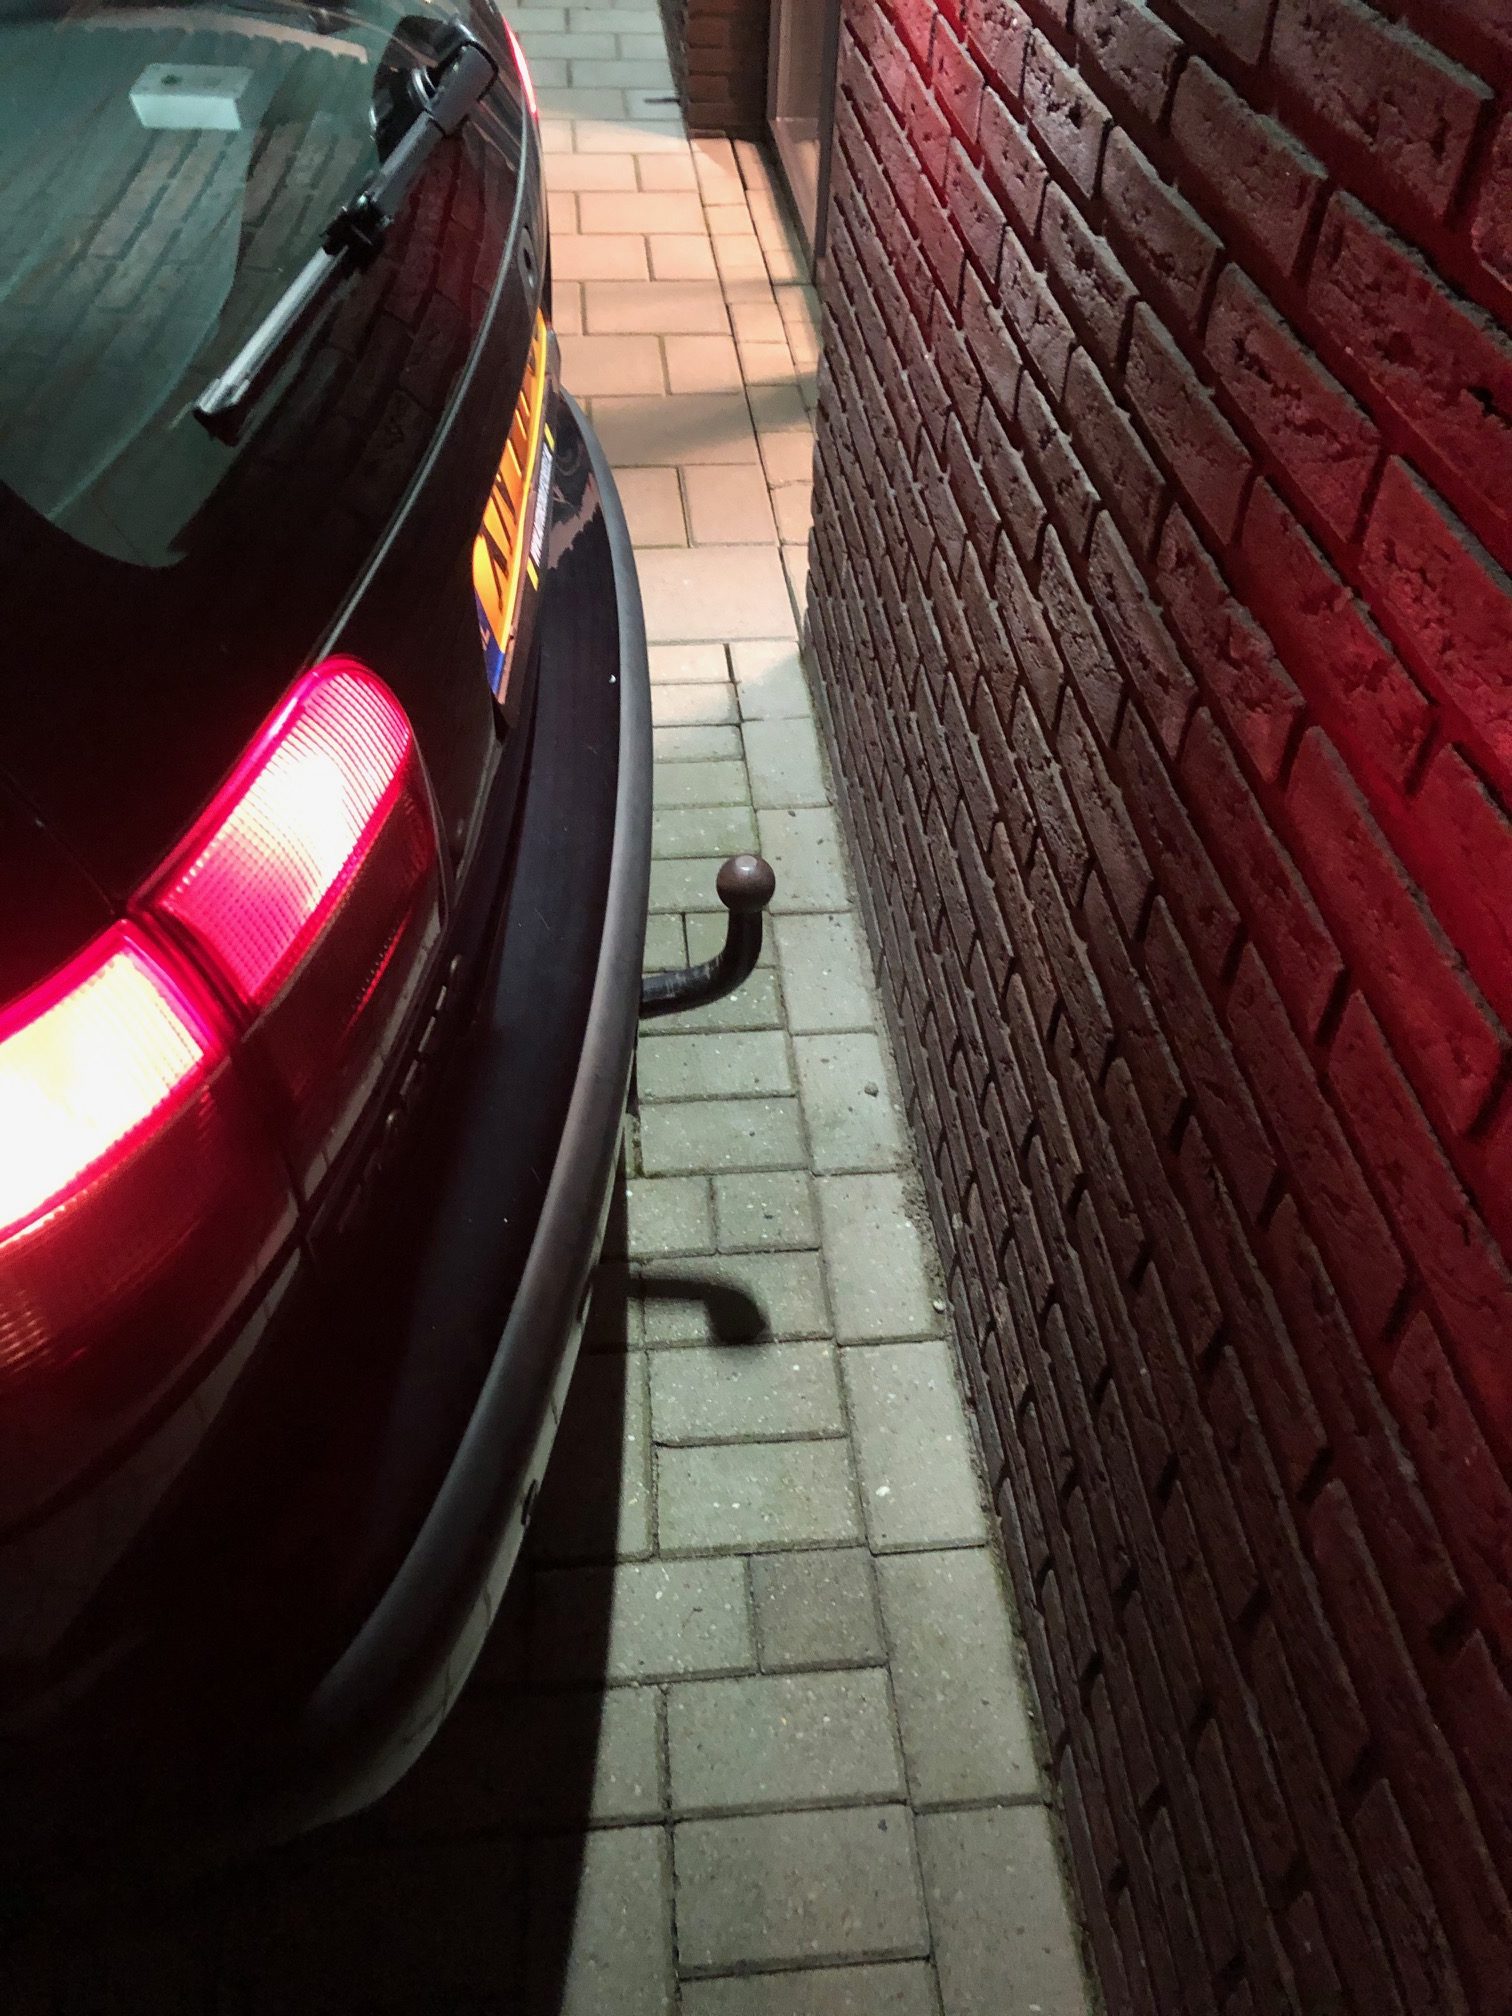
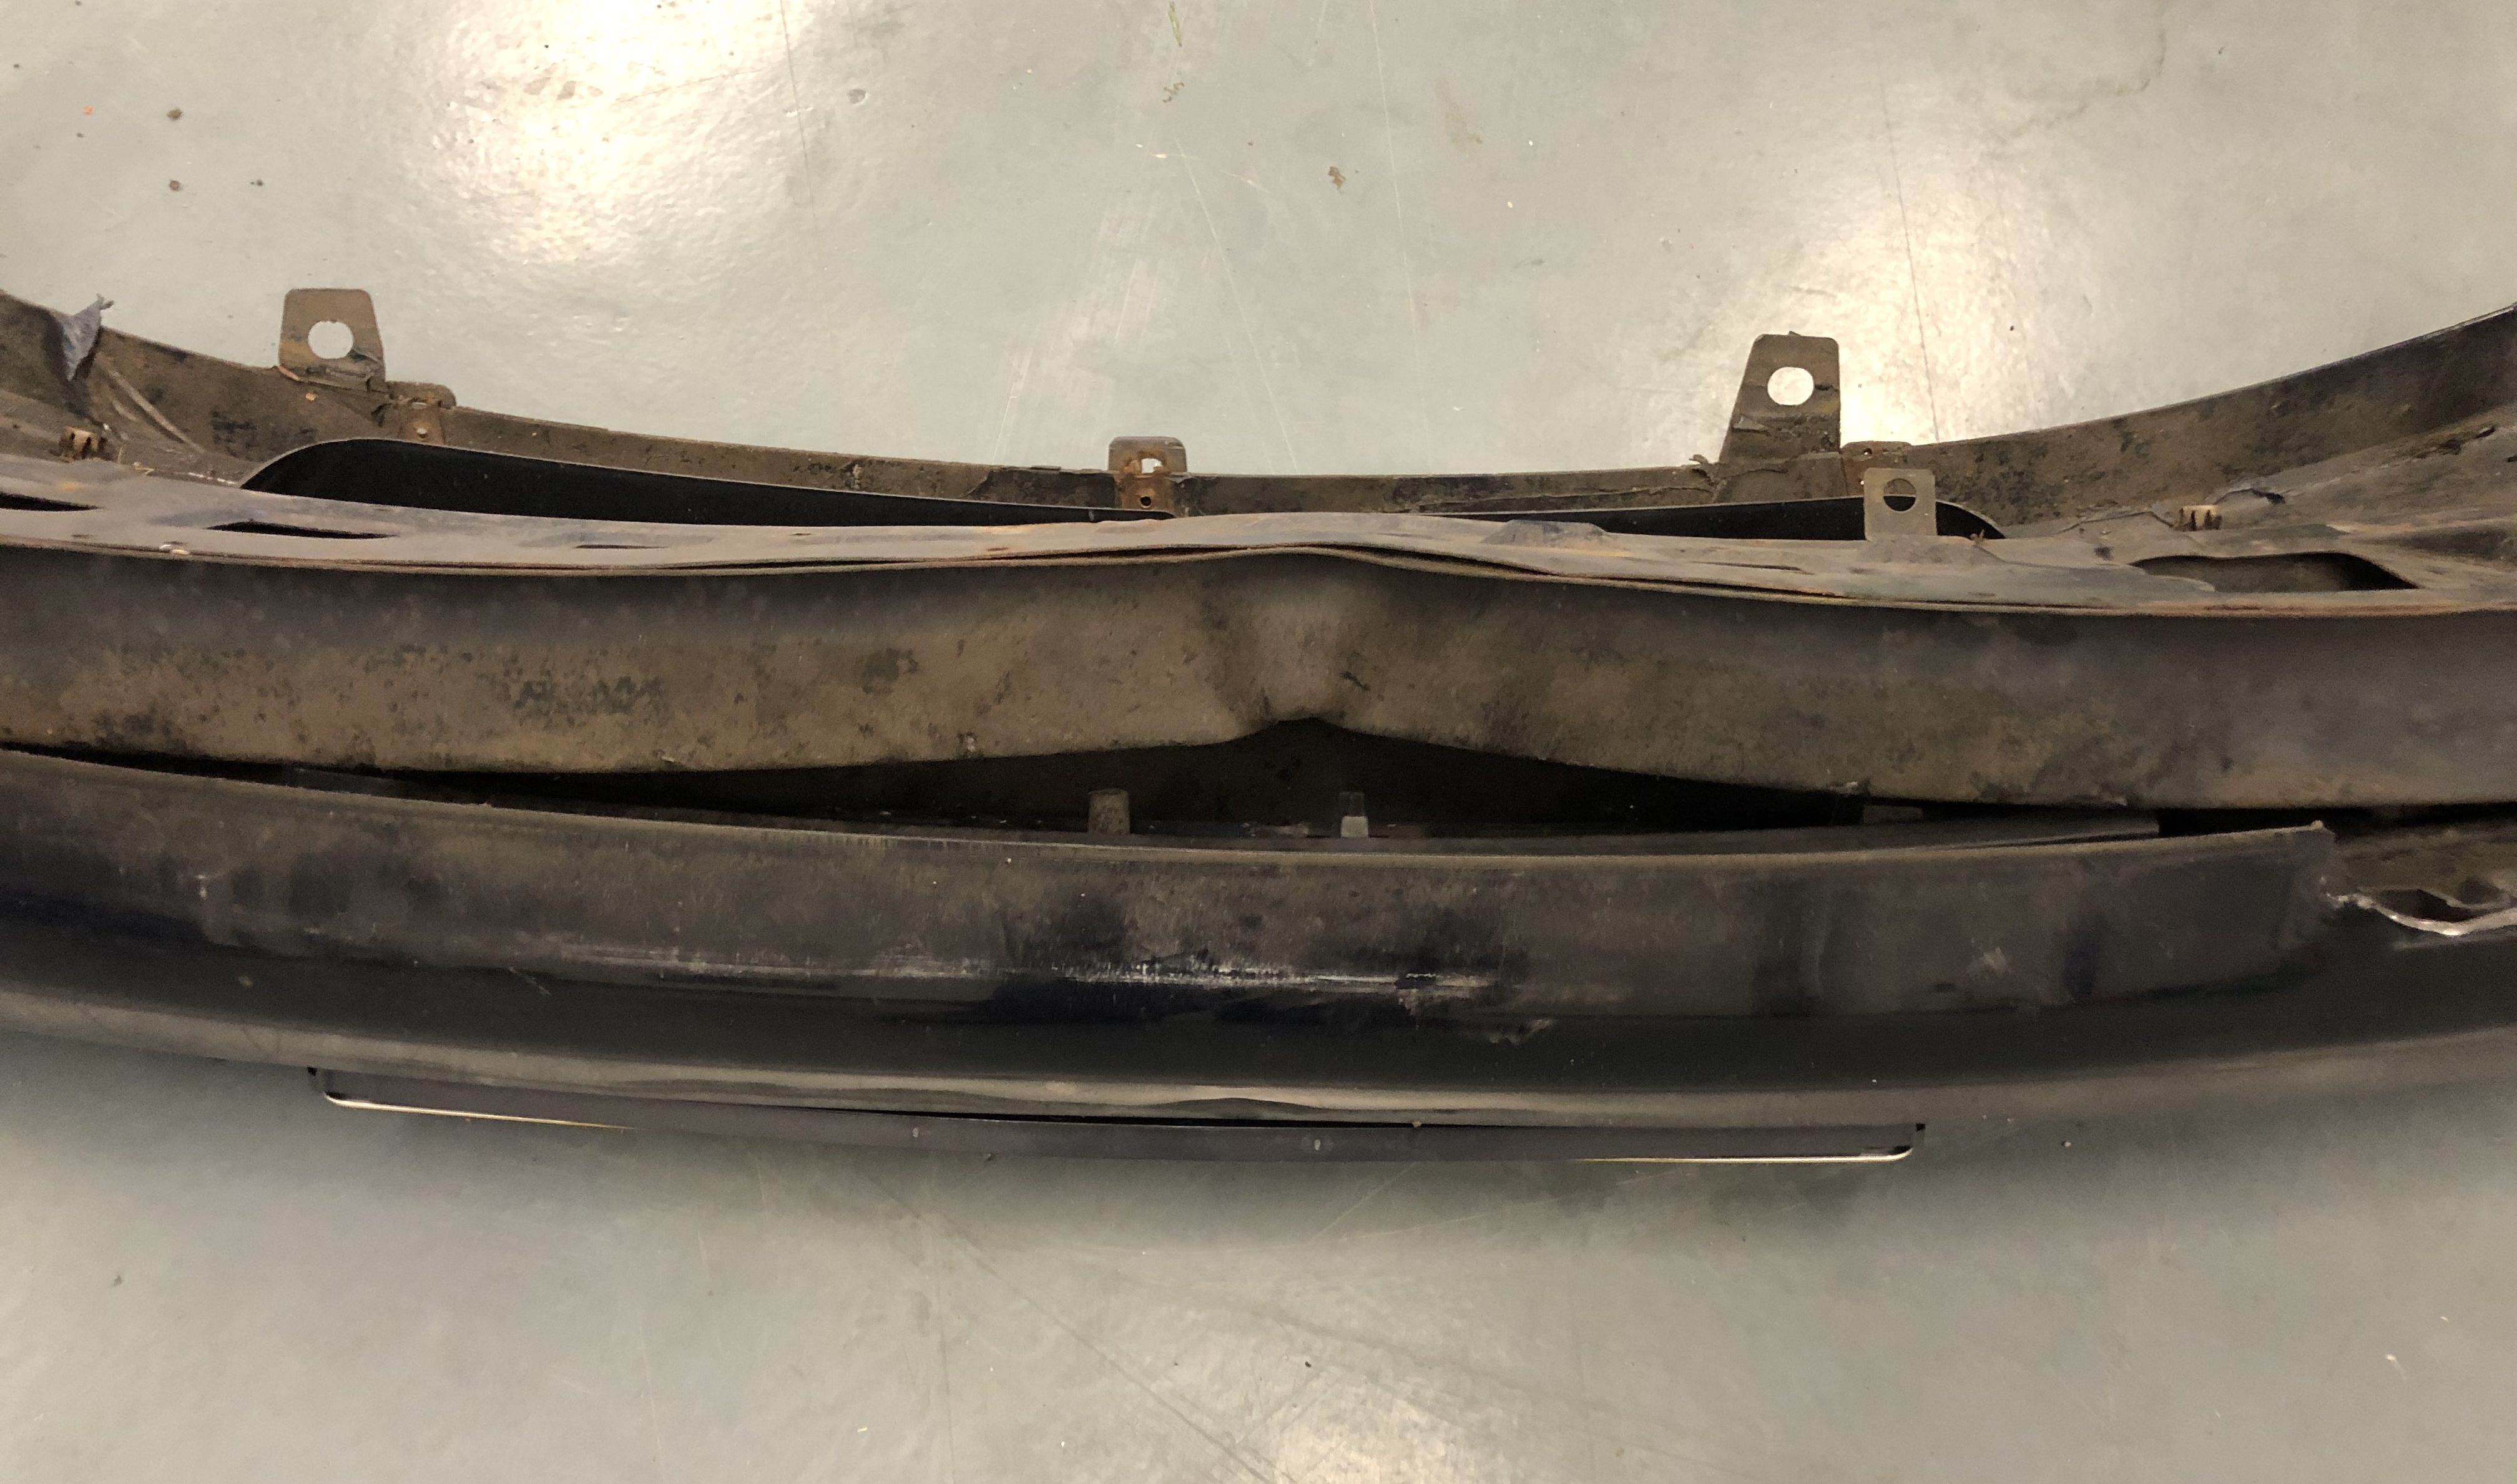
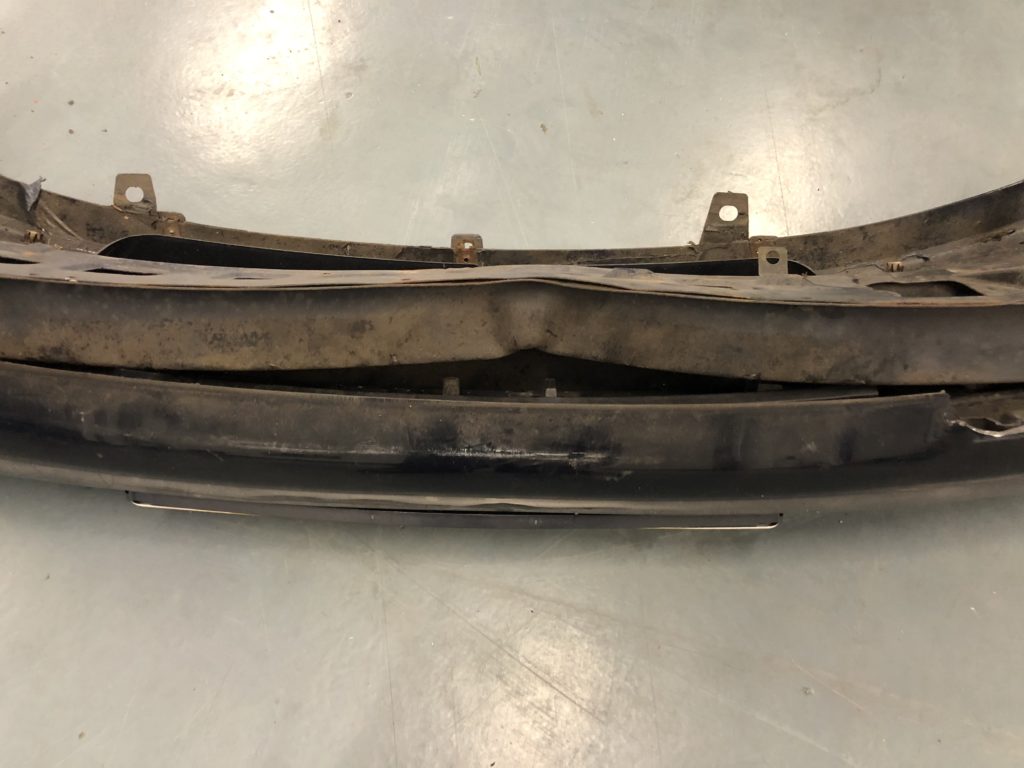
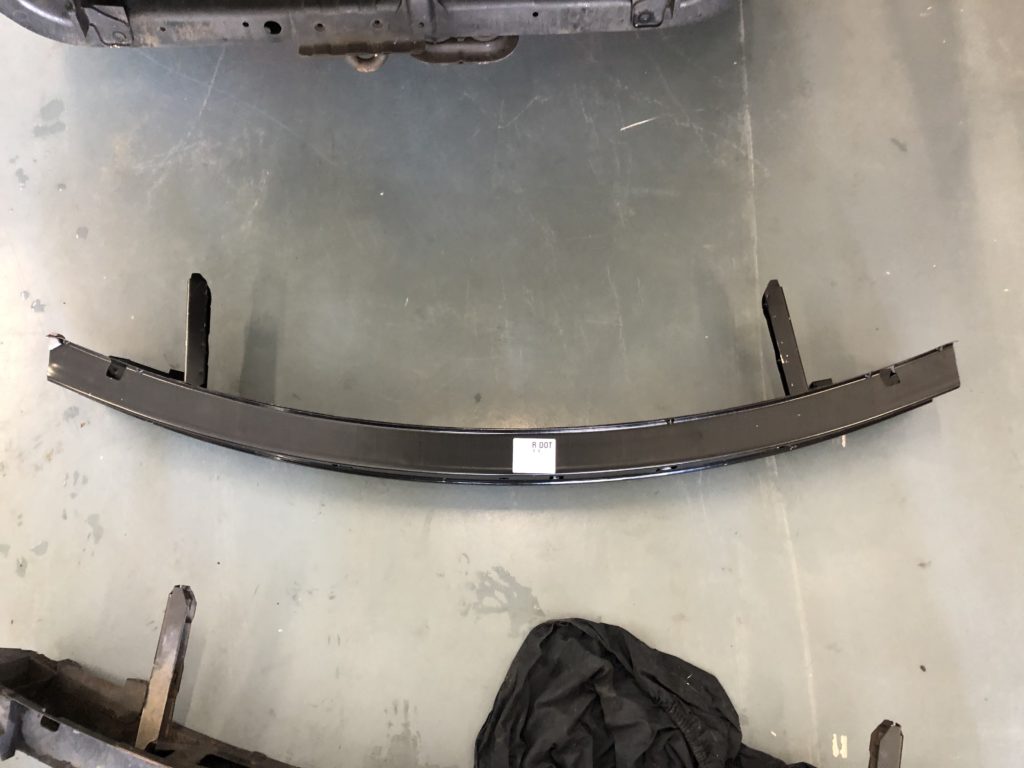
As mentioned earlier, the previous owner had a fender bender. Literally. The front bumper of the car is made out of Tupperware with some metal in it for strength. The plastic part didn’t break. It just bent and bent back afterwards. The shape seemed a bit distorted though, but I figured that was because the metal it was mounted to was bent. The picture shows the metal part with the plastic cover still attached to it.
Replacing the bumper turned out to be more work than expected. Before I could access the bolts that mount the bumper to the chassis of the car I had to remove a cover underneath the car, fixed with quite a number of screws and plastic rivets. On the other hand, getting the metal separated from the plastic was easier than expected. The new bumper turned out to be about 5mm too wide, but that was quickly fixed with an angle grinder.
Unfortunately, the plastic part is still a bit distorted, so it doesn’t completely fit the new metal piece. At least not on the right-hand side of the vehicle. Maybe I can fix that by applying some heat, but that’s something for another day.
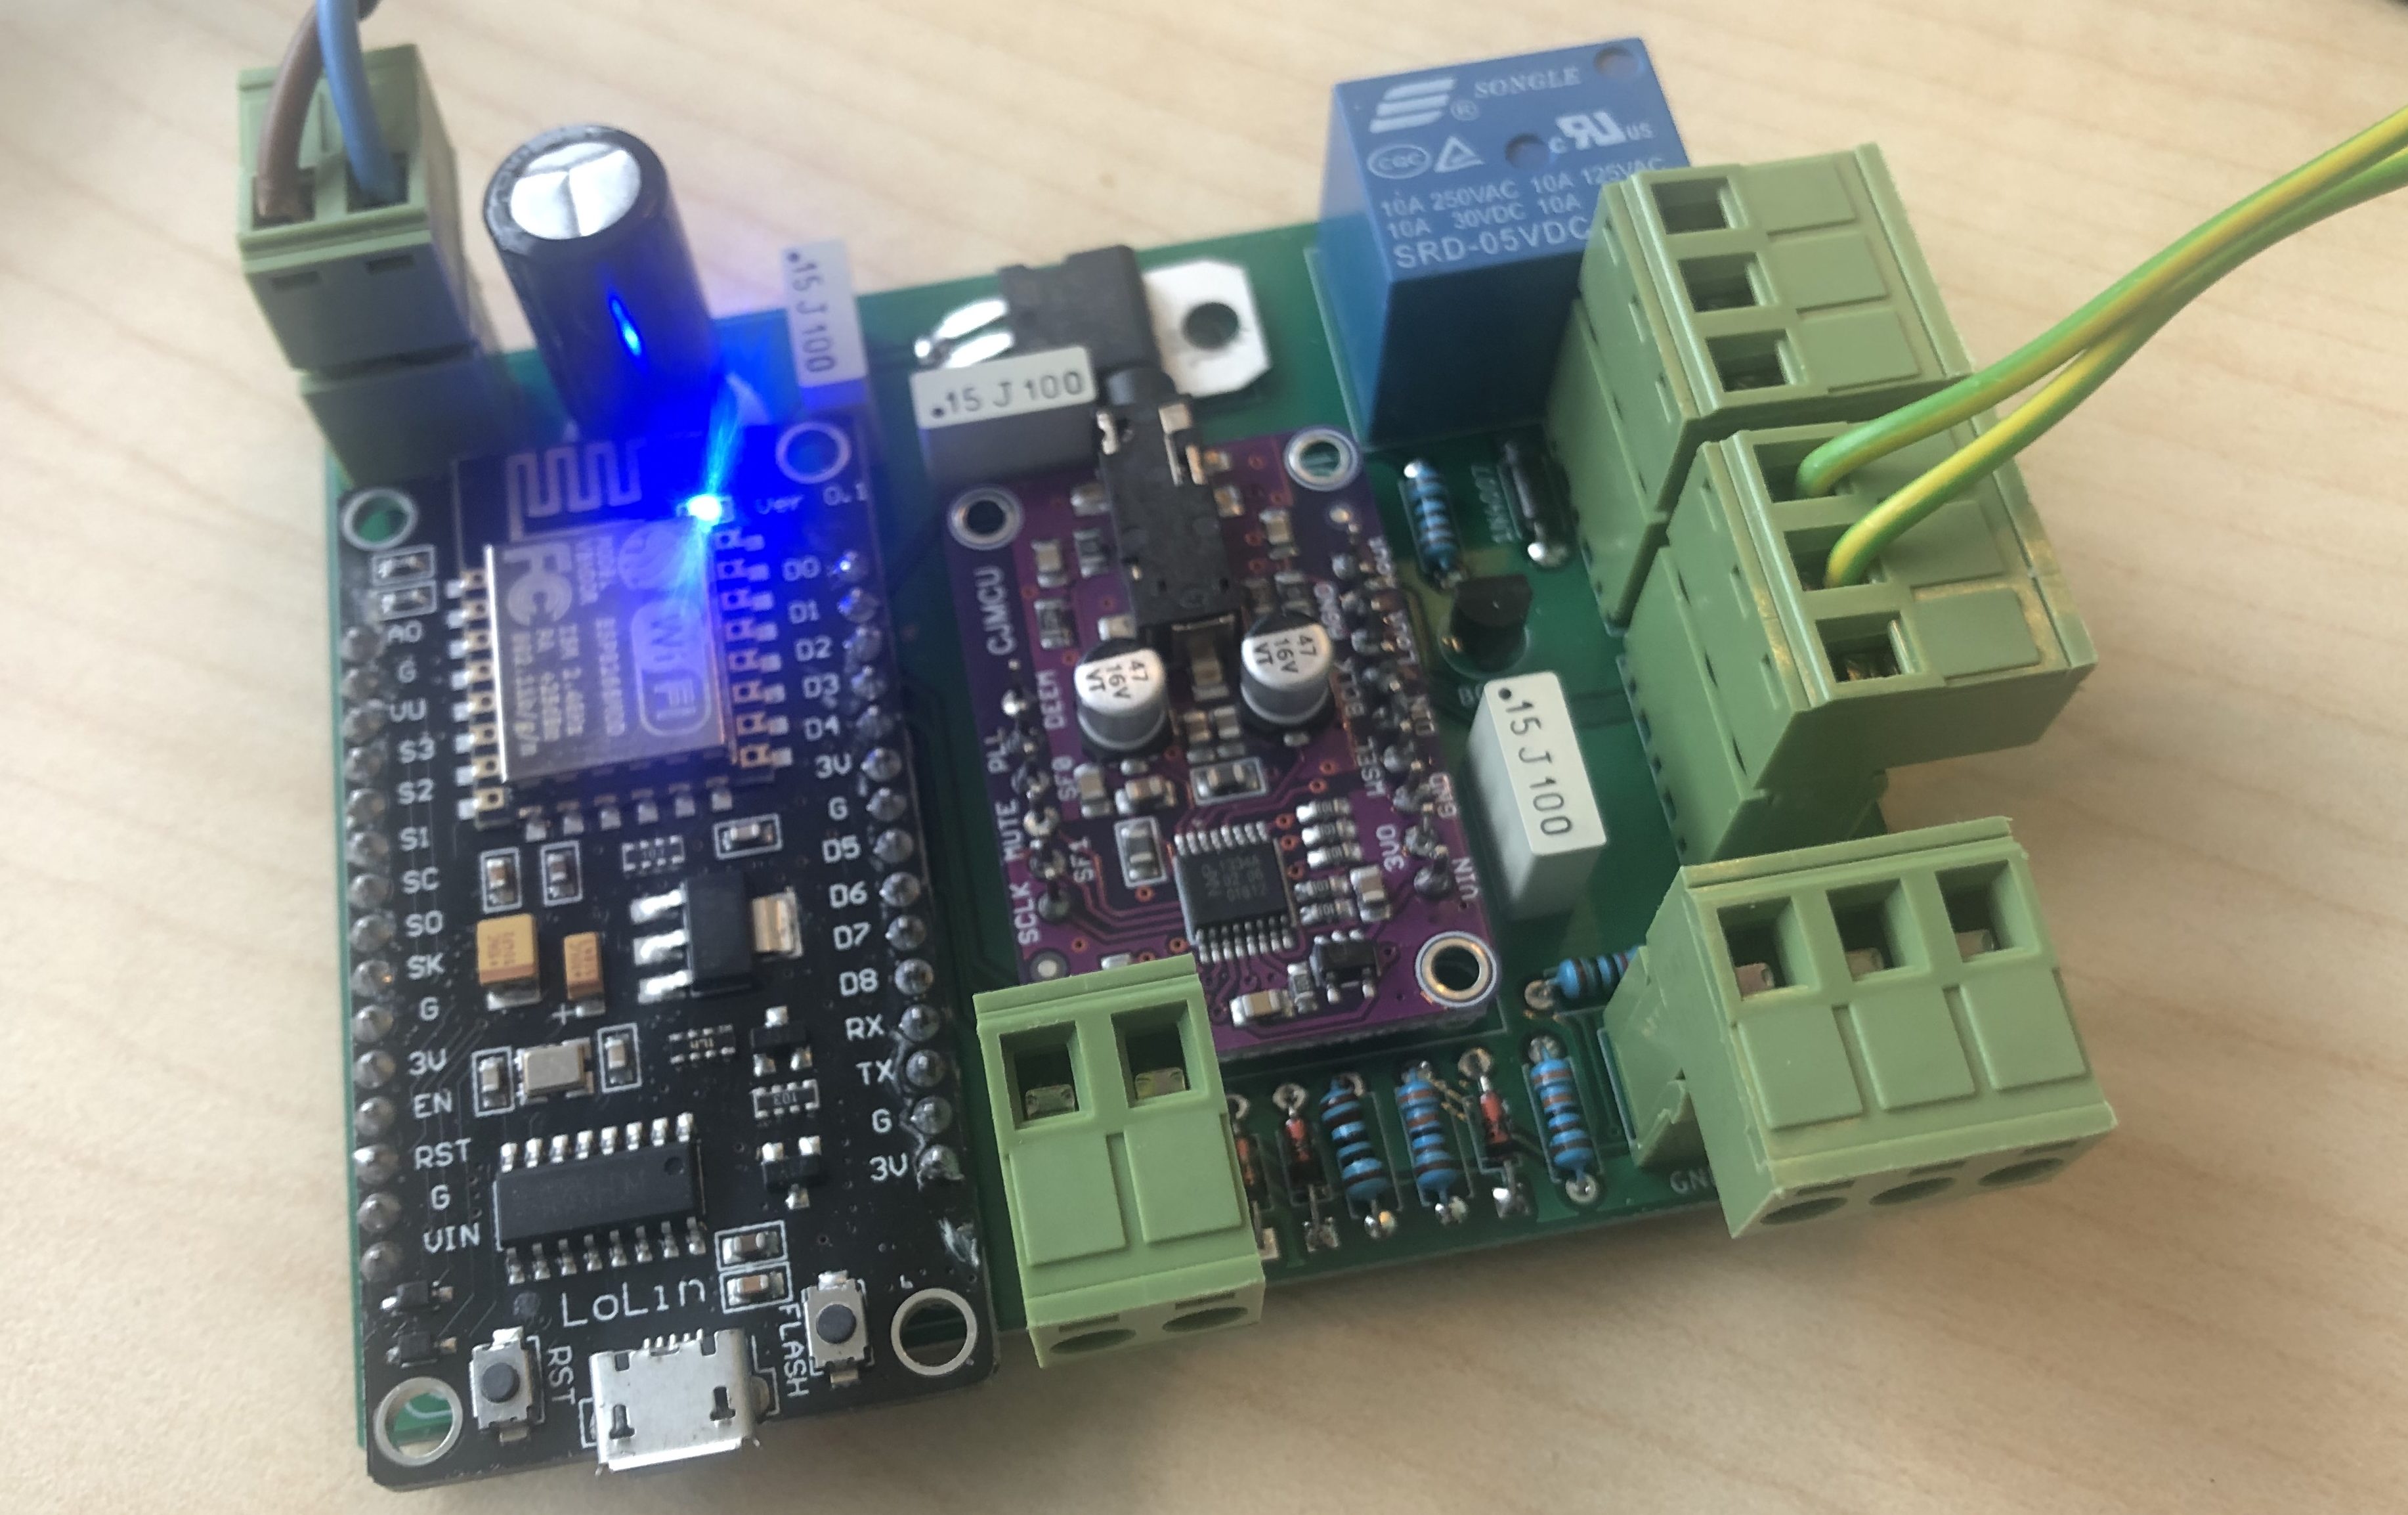
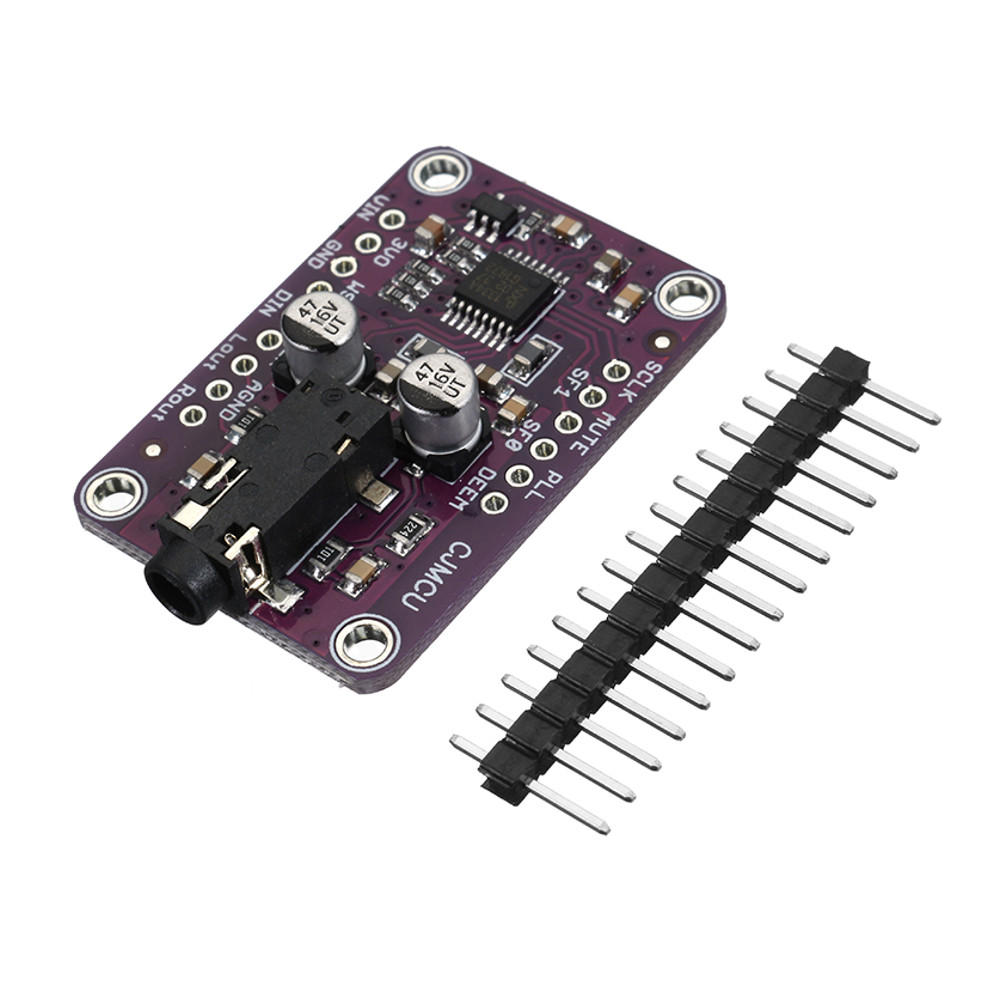
Since we’re carbage running as team Fred & Wilma, I figured we needed a soundboard. You know, Fred screaming “Wilmaaaa!”, the distinctive sound of Fred driving off in his car, Wilma laughing, etc. And some of these sounds should be played automatically, for instance when disengaging the handbrake.
I experimented with playing audio directly trough one of the ESP32’s DACs, but for some reason, I could not get the sound quality up to an acceptable level. If you want to take a shot at it: be my guest. You will find some pointers here. I choose a different solution: An external audio decoder board based on the UDA1334A chip. It takes data via I2S and can be bought from Aliexpress, eBay, Banggood, etc.
Here are the most important features:
Voltage regulator, so the board can be powered directly from the car battery (with reverse polarity protection).
Two 12V tolerant digital inputs. These can be used to trigger the playback of a sound if the lights are switched on, the handbrake is disengaged etc.
An analog input. This can be used to connect multiple switches. If every one of these switches has a resistor in series, the software can tell which one is pushed by reading the value of the analog input.
A relay. This may come in handy to power on an external amplifier or to switch on some light effects whenever a sound is being played.
Audio output, of course. In stereo.
ESP8266 MCU. Since the audio decoding is now done by a dedicated chip, there is no need to use the ESP32. The ESP8266 is fast enough. The NodeMCU boards have 4MB of flash memory. 1MB will be used for the software, the rest is available for audio samples.
I have a working proof of concept, I am still working on the software. Currently, the software plays only .WAV files and I would like it to handle .MP3 as well. After all, 3MB of SPIFFS is not a lot if you are using uncompressed audio files.
Carbage run soundboard PCB (back)
A few notes on the PCB design:
The NodeMCU dev board appears to be available in two variants. One has a square FTDI chip, the other one has a rectangular one. The footprint used in the design is for the smaller ones with the square FTID chip. The larger one will fit (and the connections are all in the same place), but the electrolytic capacitor is in the way. If you mount the NodeMCU board first, you can mount the capacitor a little bit to the side. As you can see in the picture above, that is what I did, because I didn’t realize the footprint I used was for a differend NodeMCU board than the one I had.
I used a cheap UDA1334A breakout board I got off eBay. It seems to be the same as Adafruit’s “UDA1334 I2S DAC”. The only difference I noticed is the color of the PCB. Both versions should work.
I used the breakout board rather than the chip itself (and some discrete components) in my PCB design to make it easier to assemble.
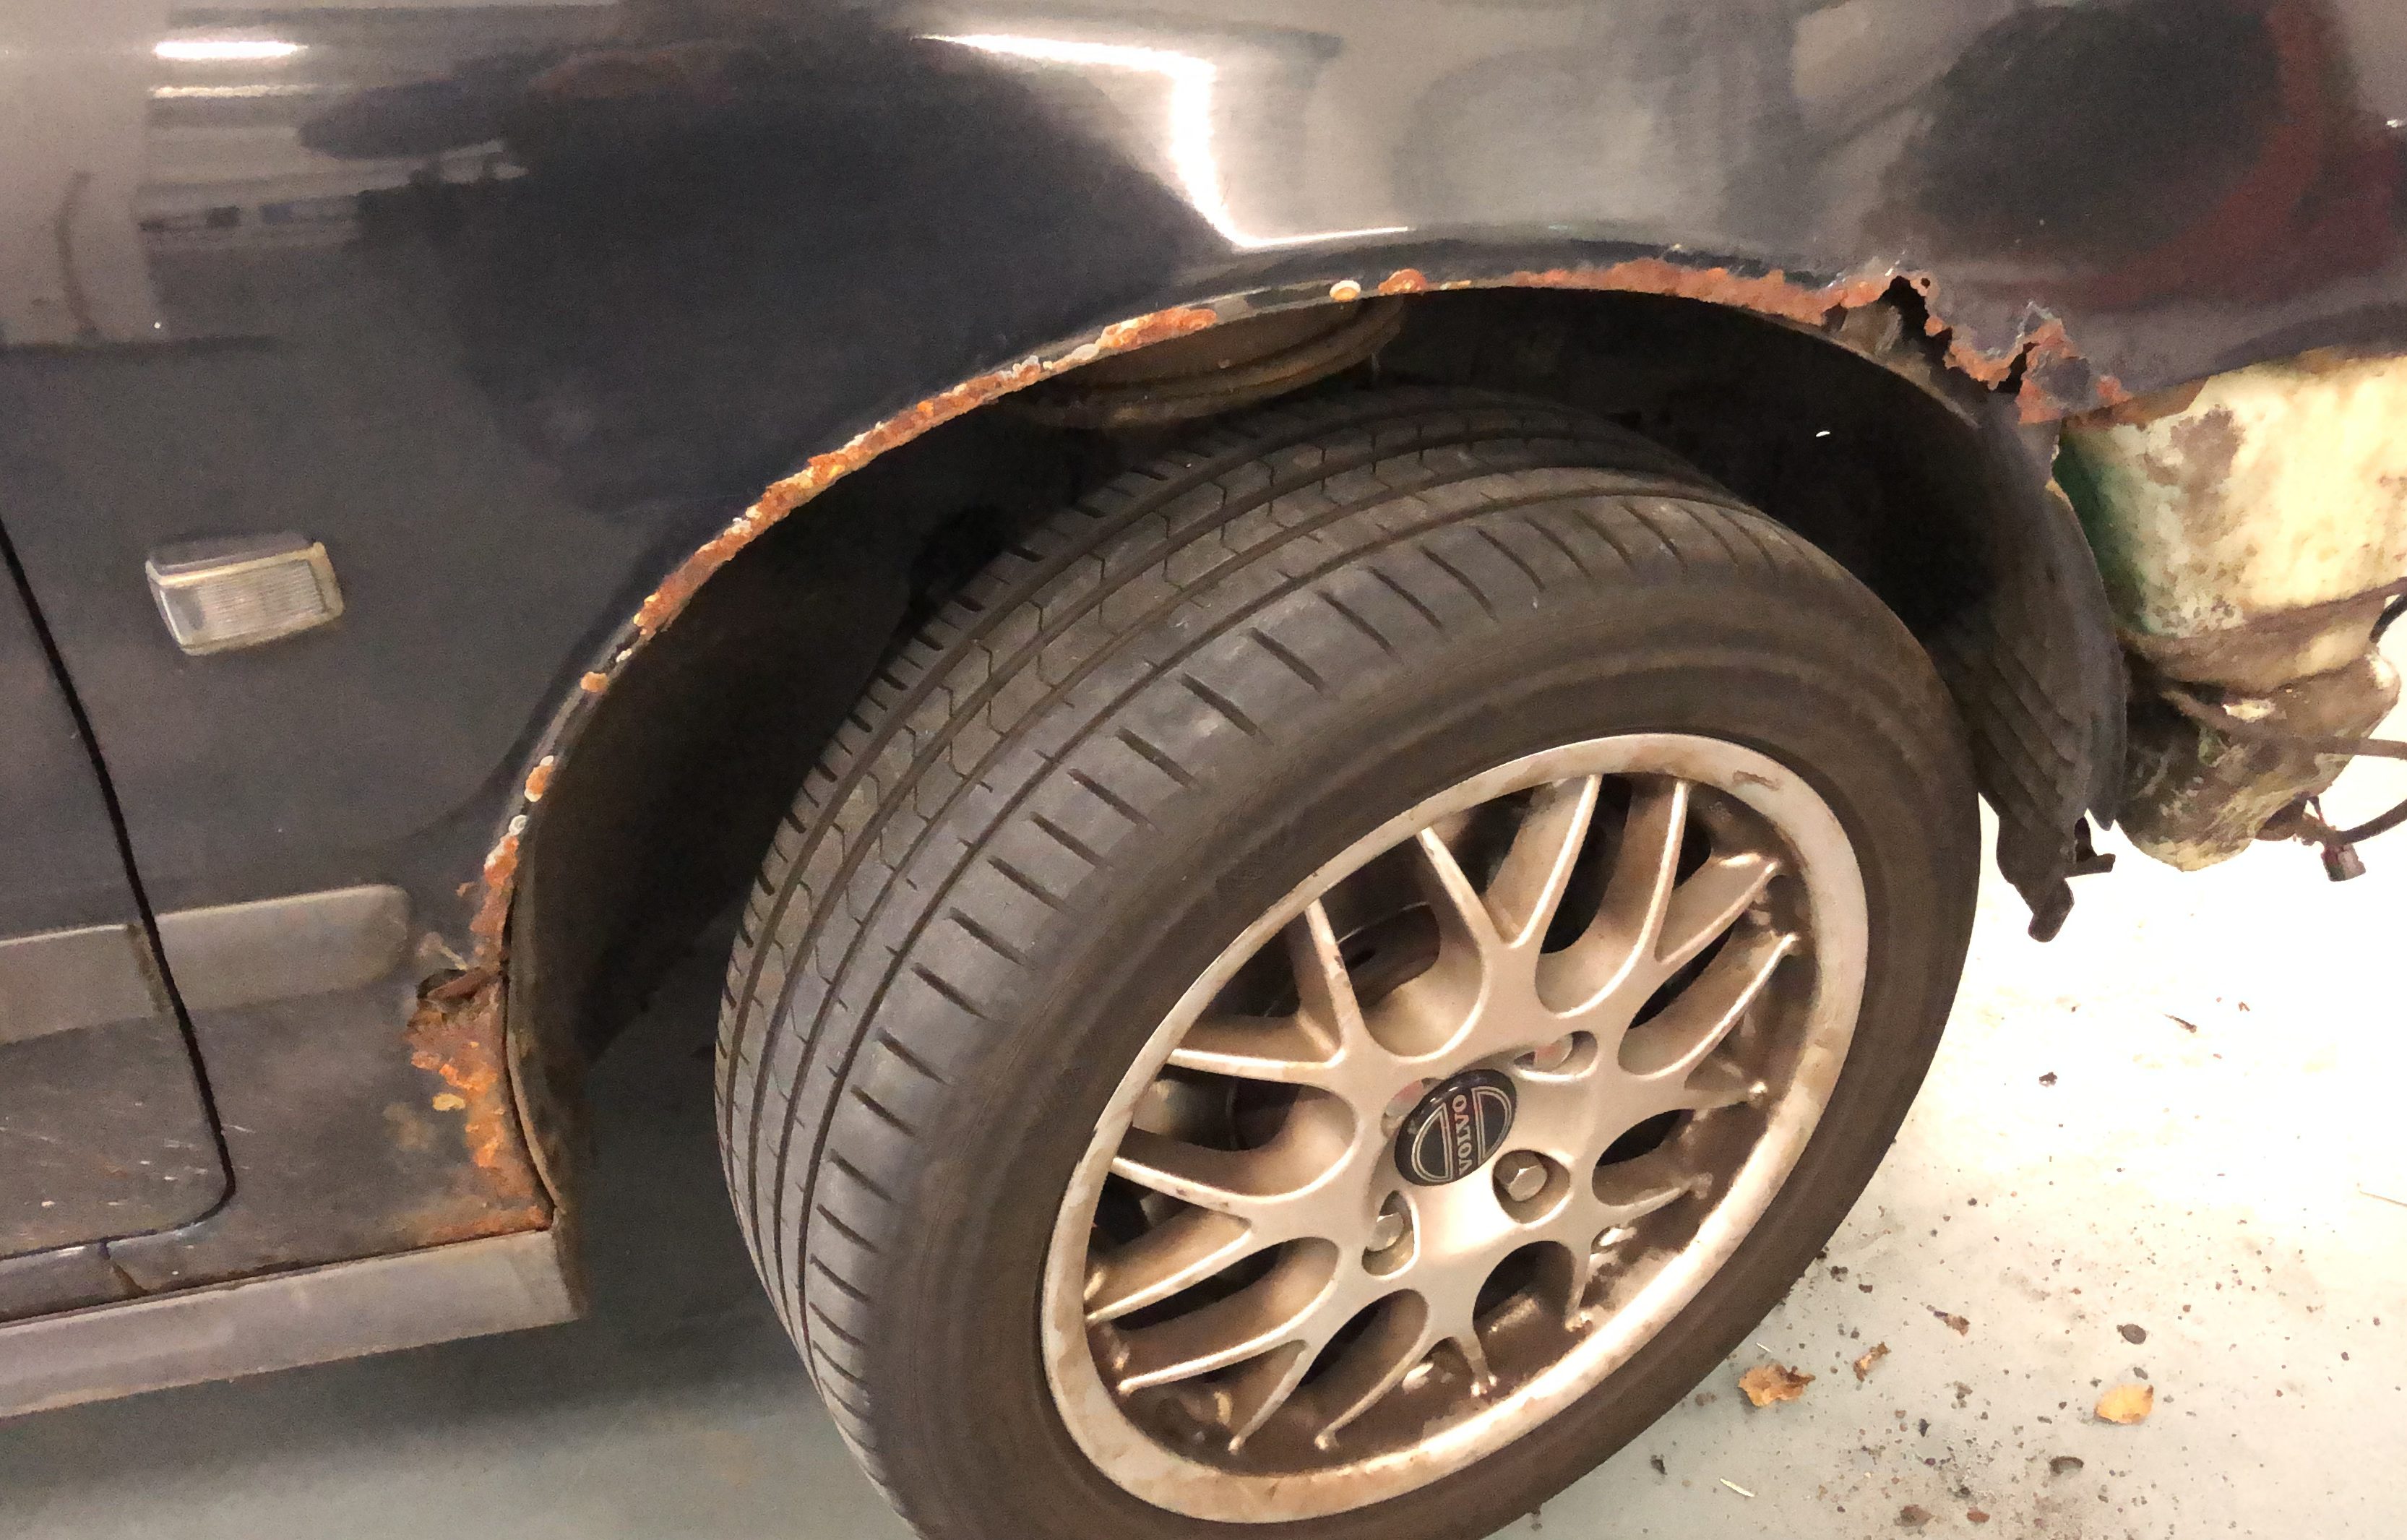
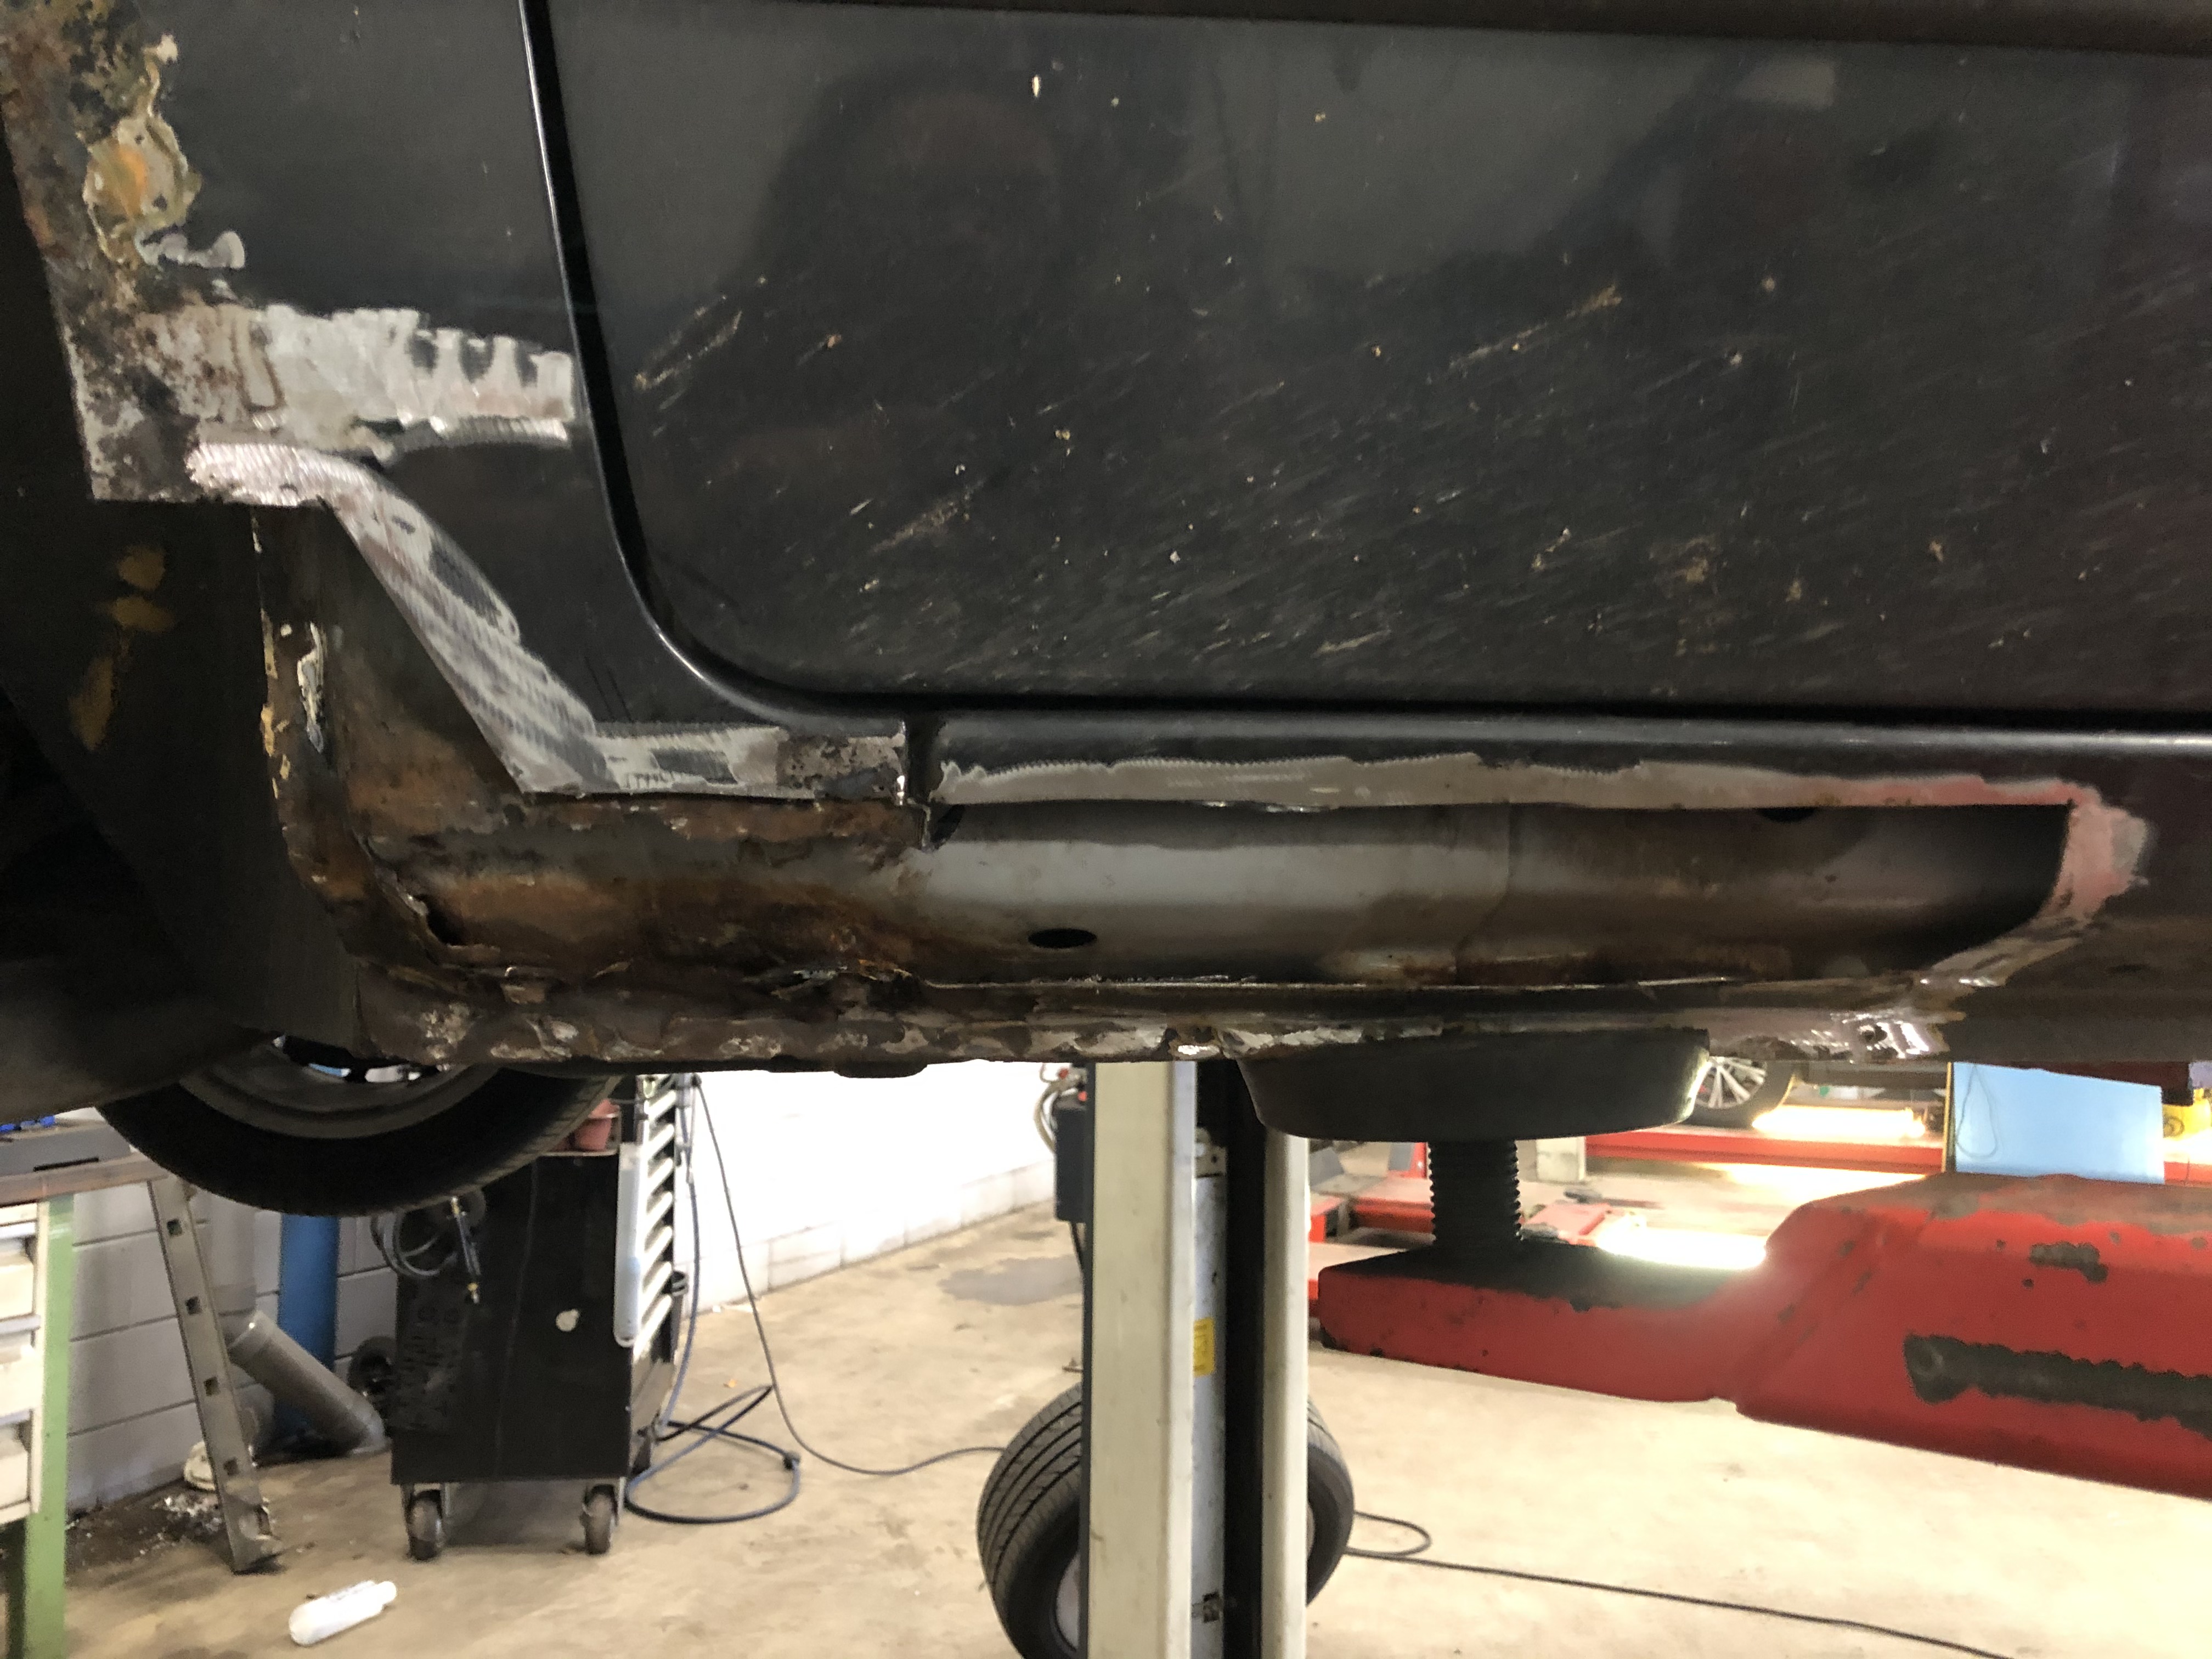
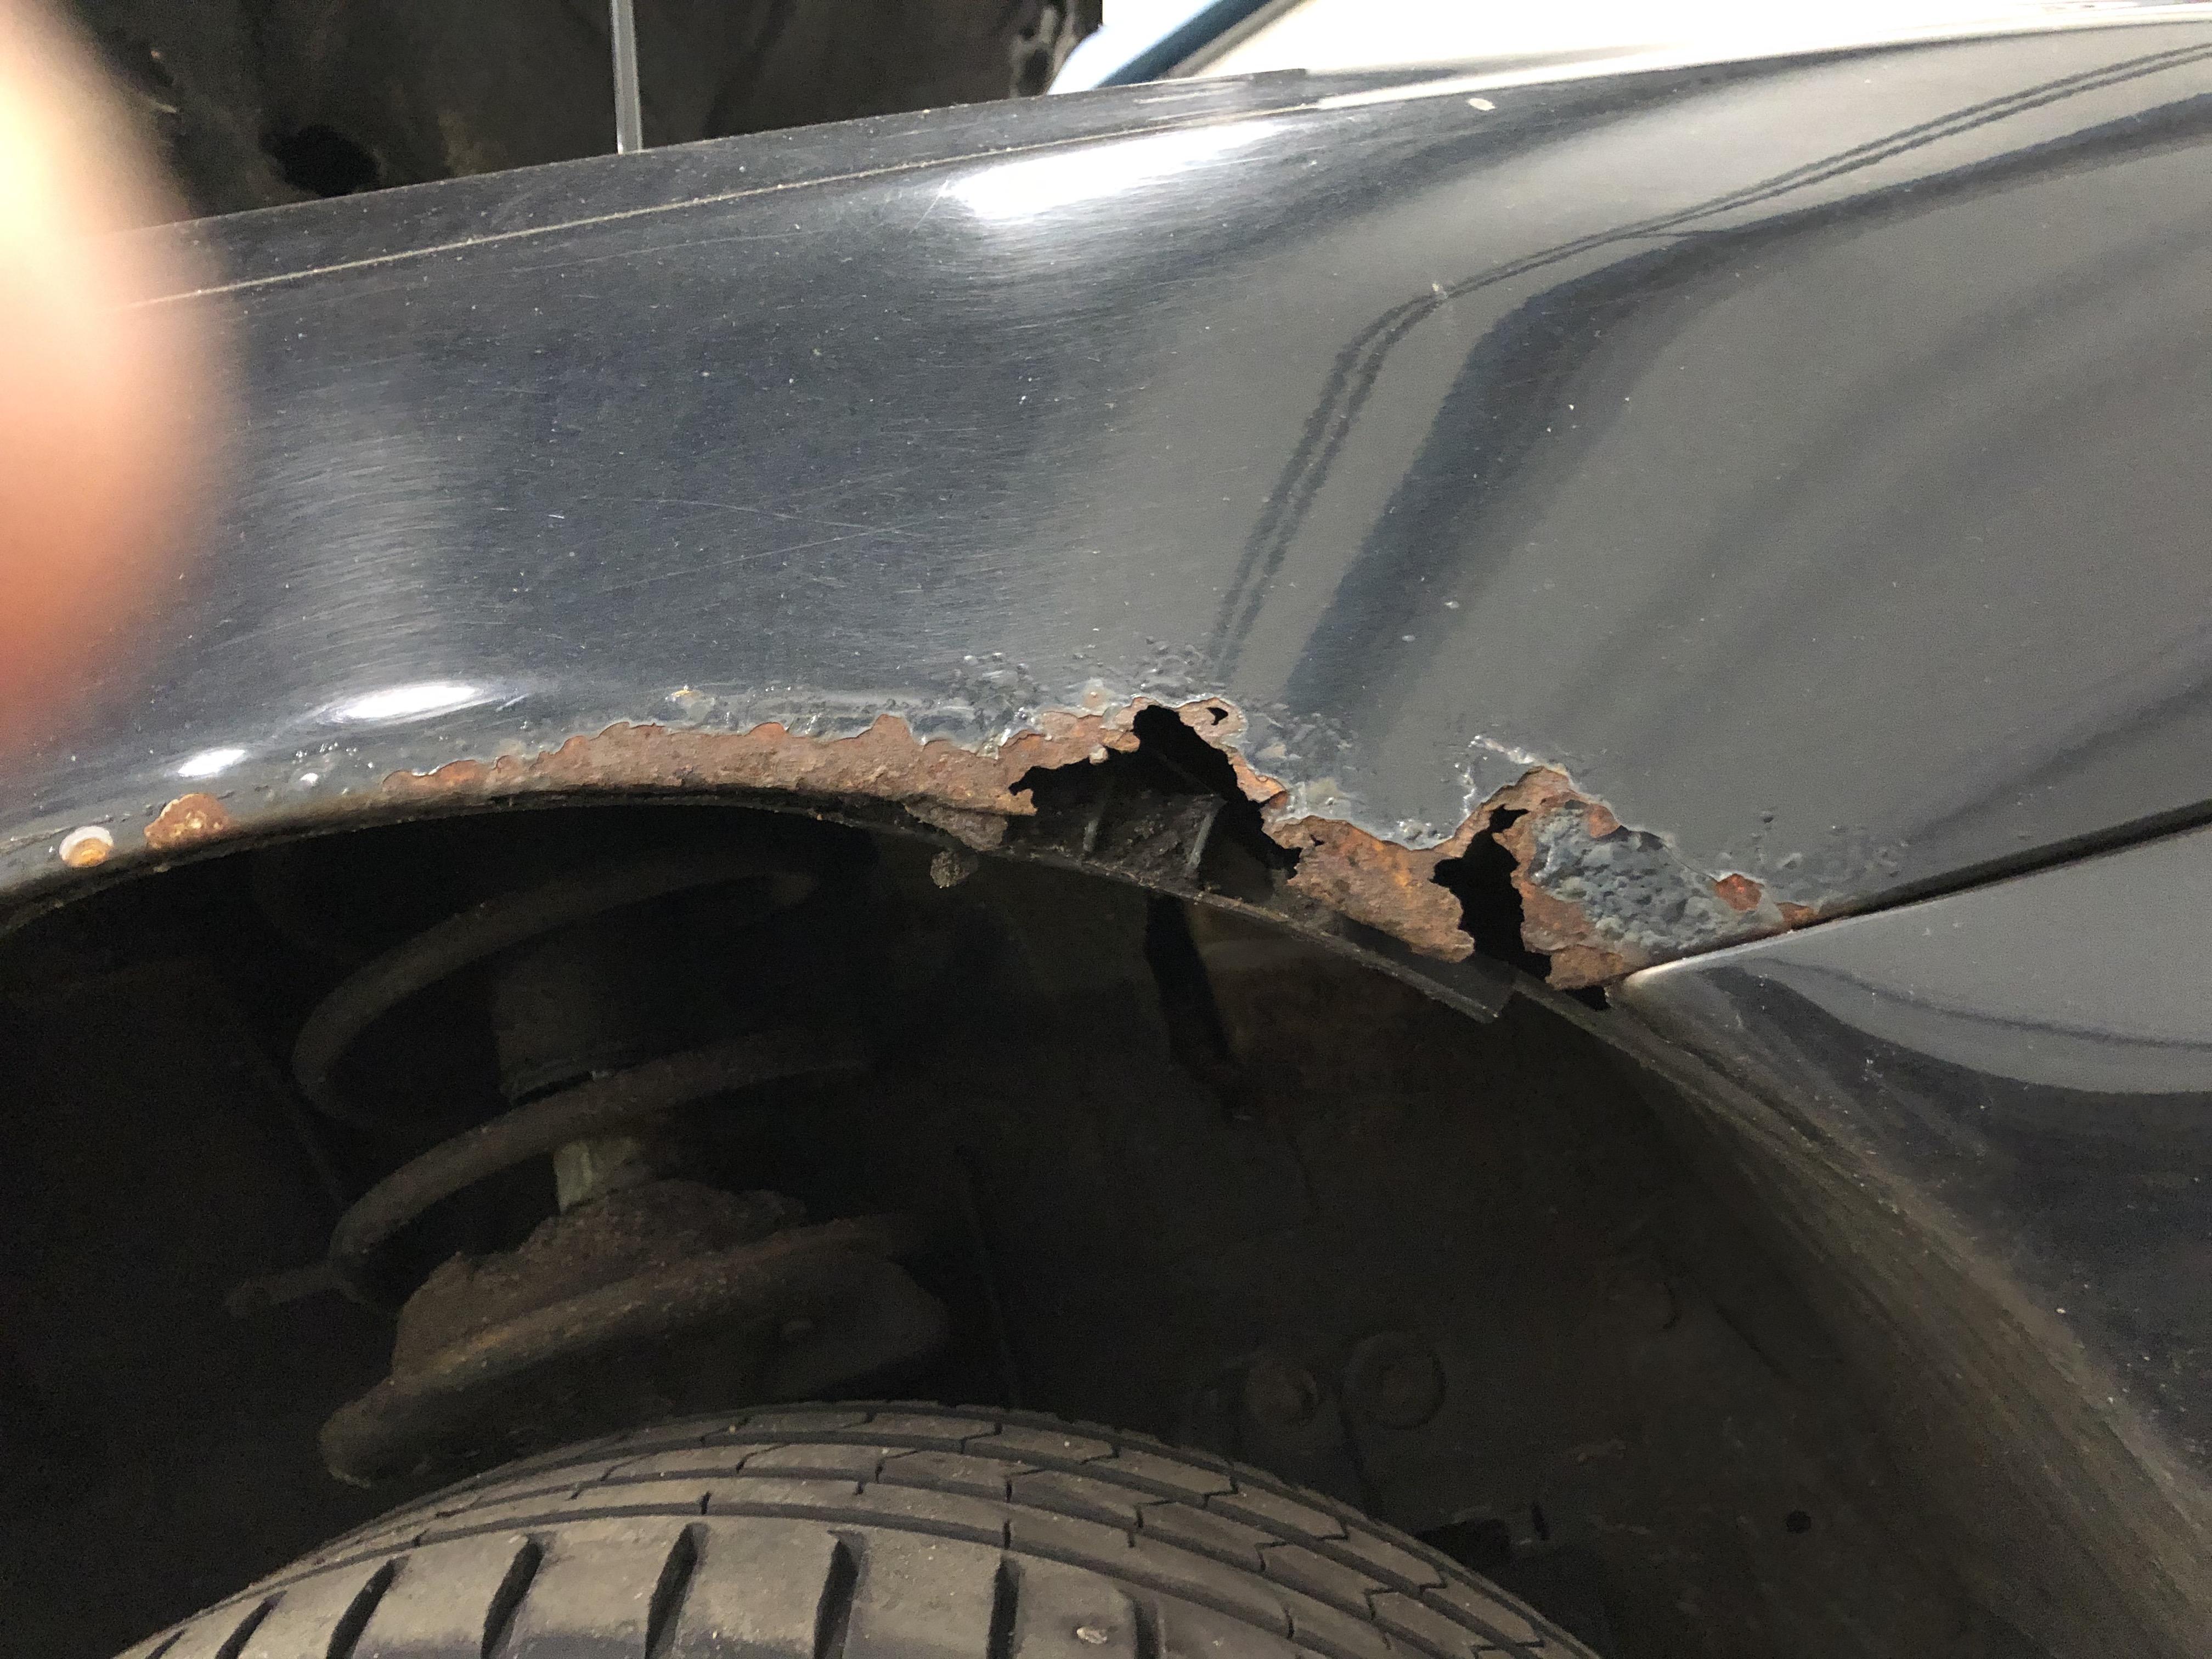
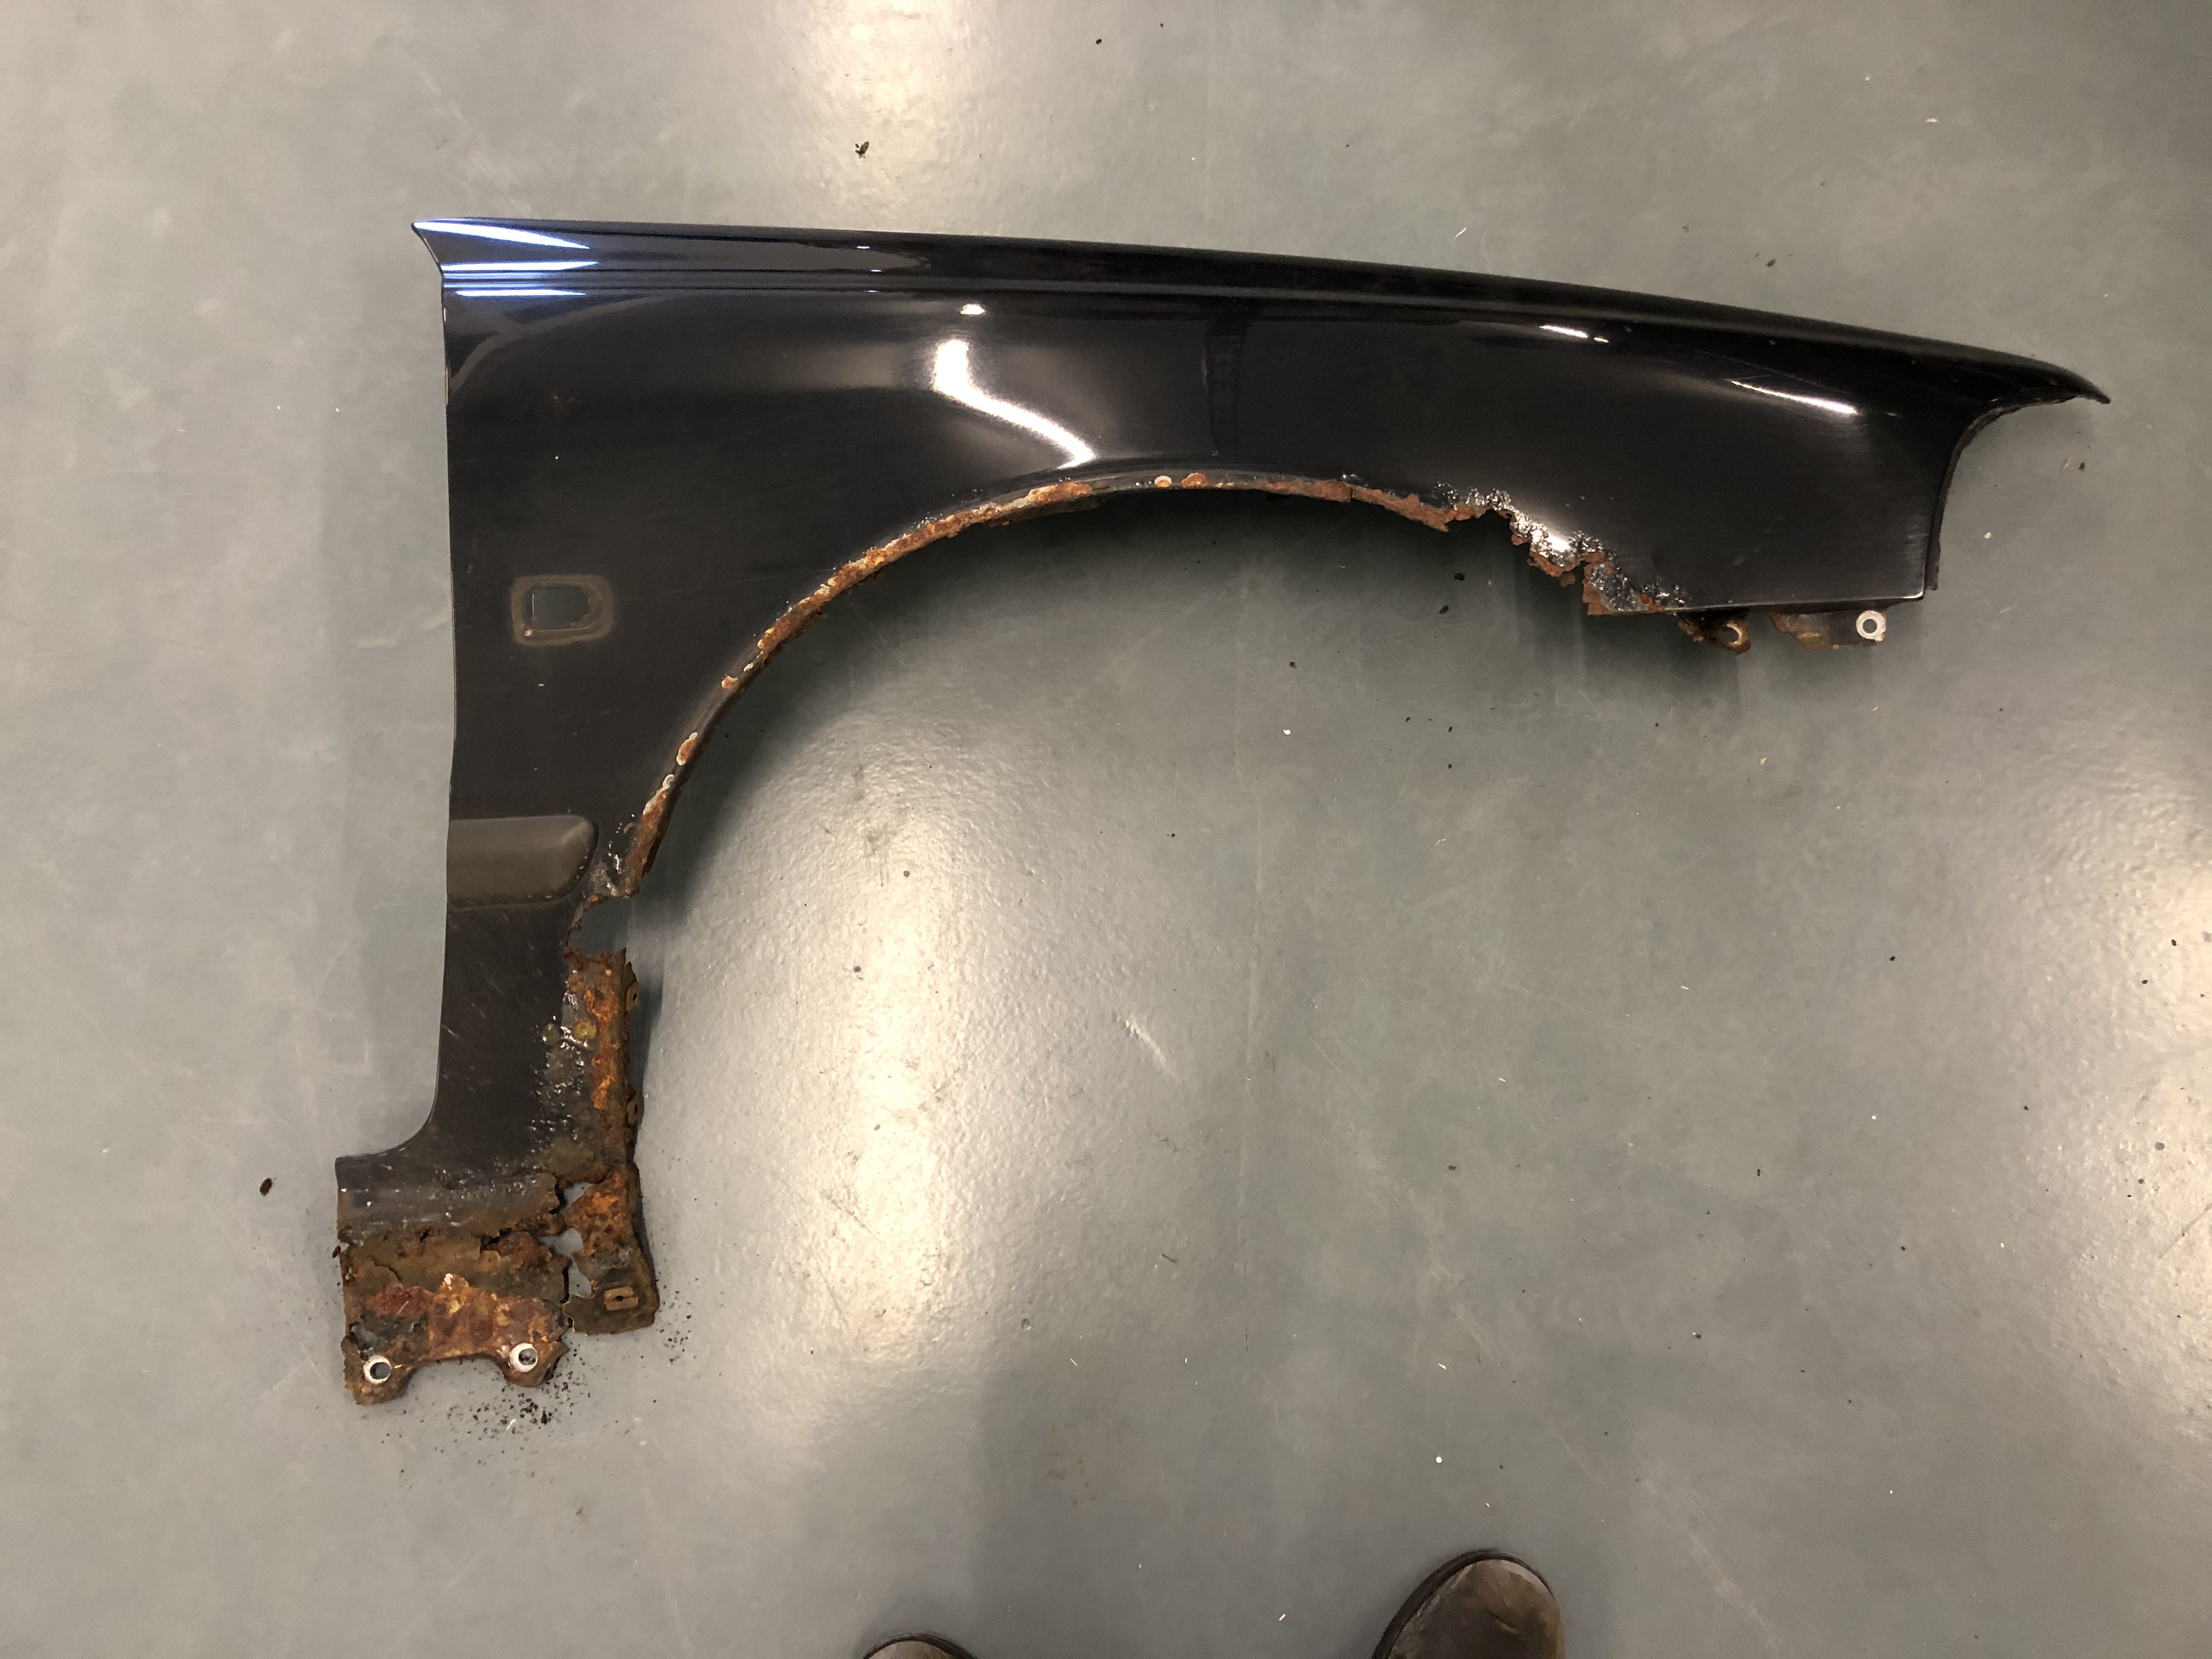
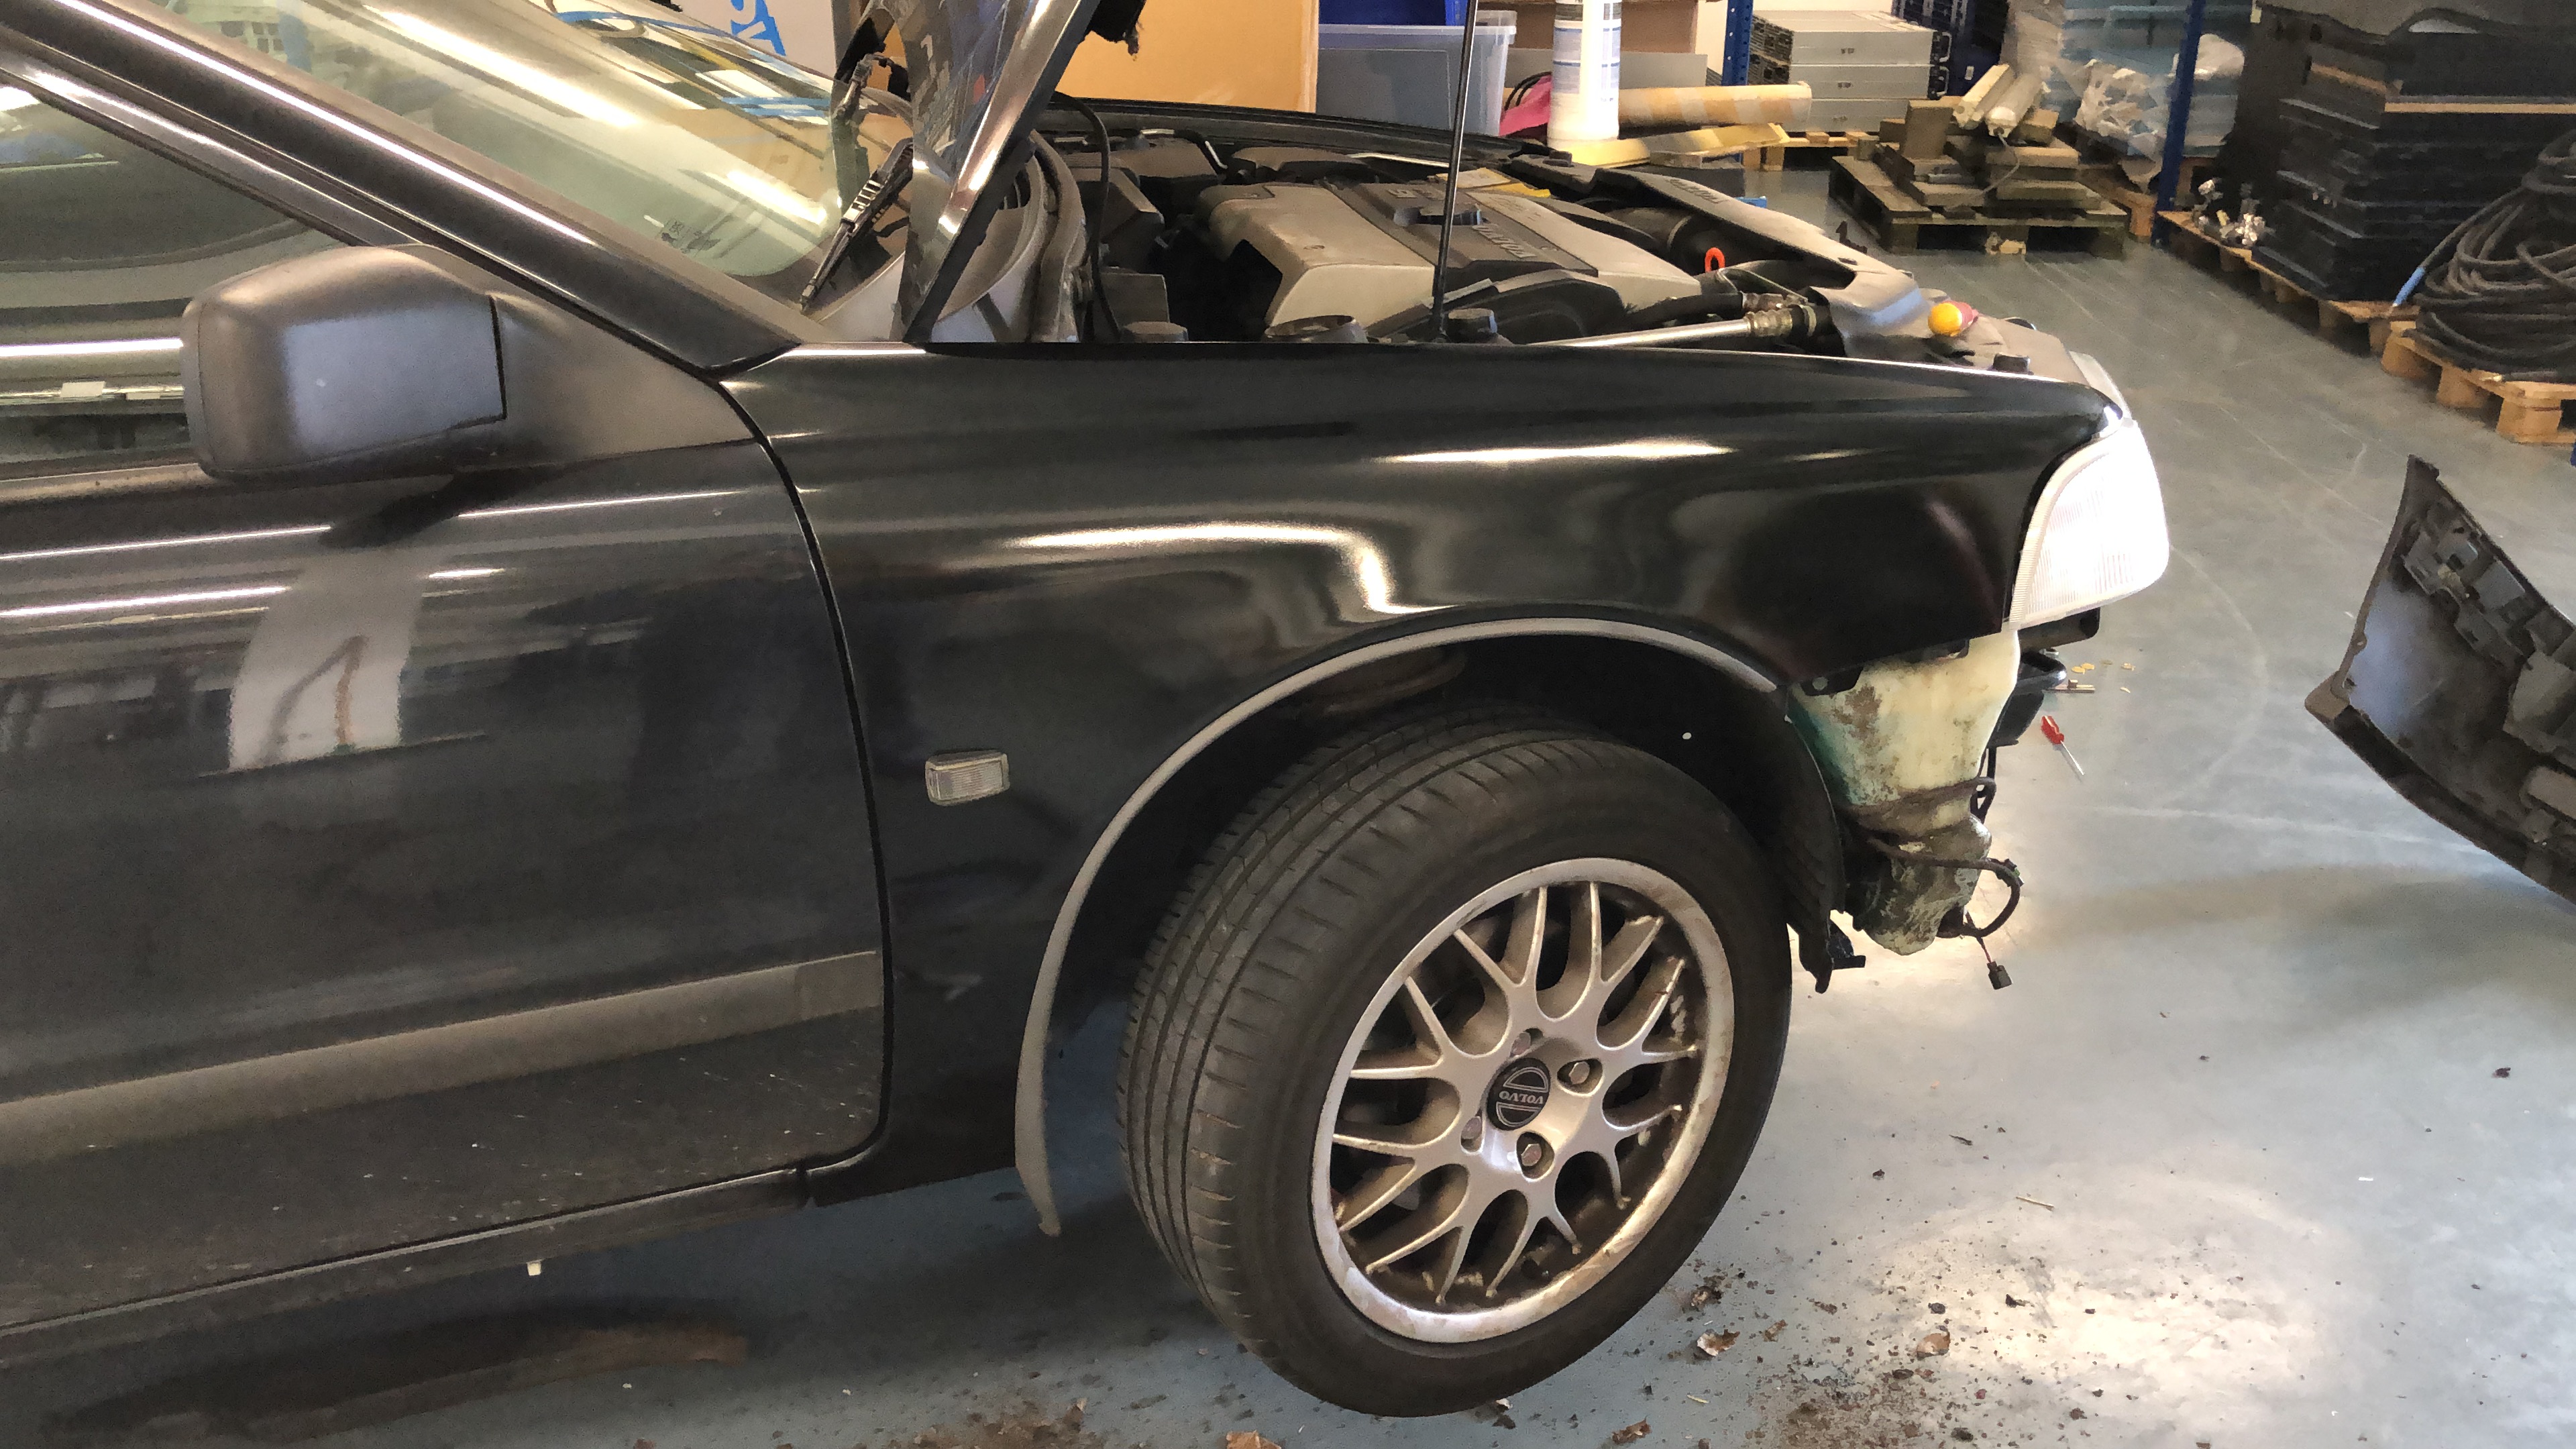
Just a quick update on the “getting rid of the rust” project. The sills are welded and I replaced one of the wings. I left the welding to a professional by the way. I can stick two pieces of metal together with a welder, but that’s not the same thing 🙂
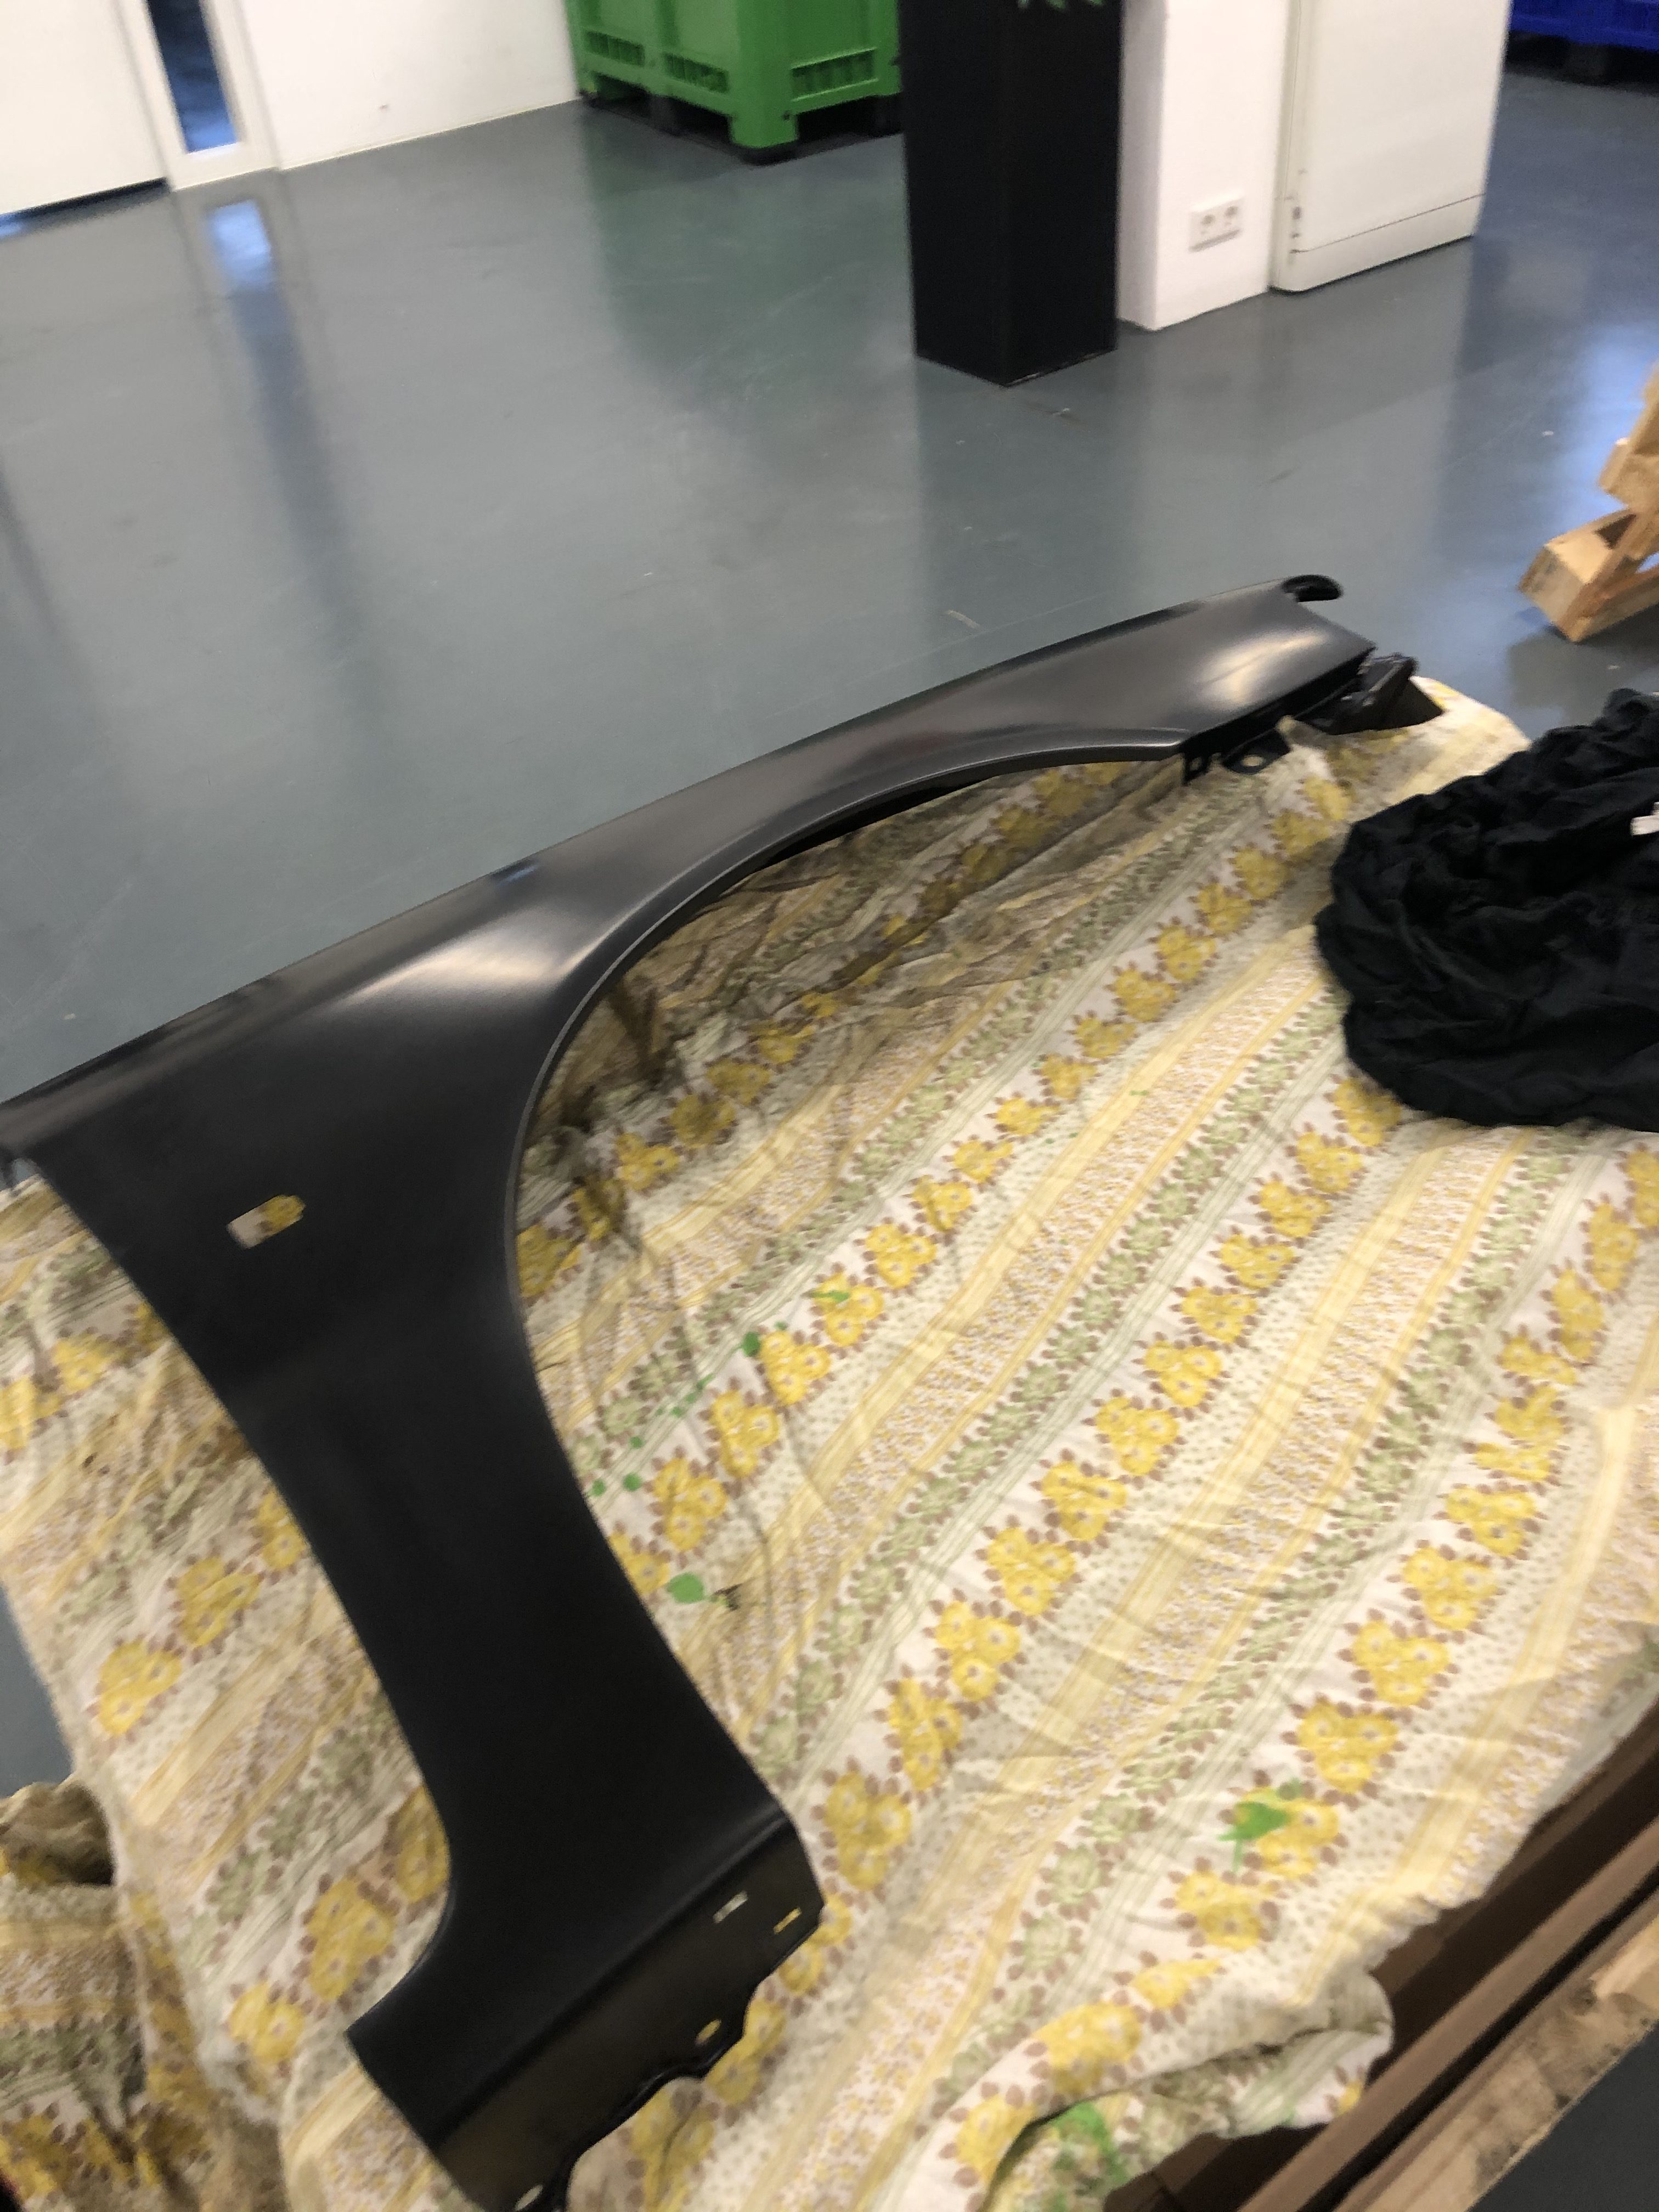
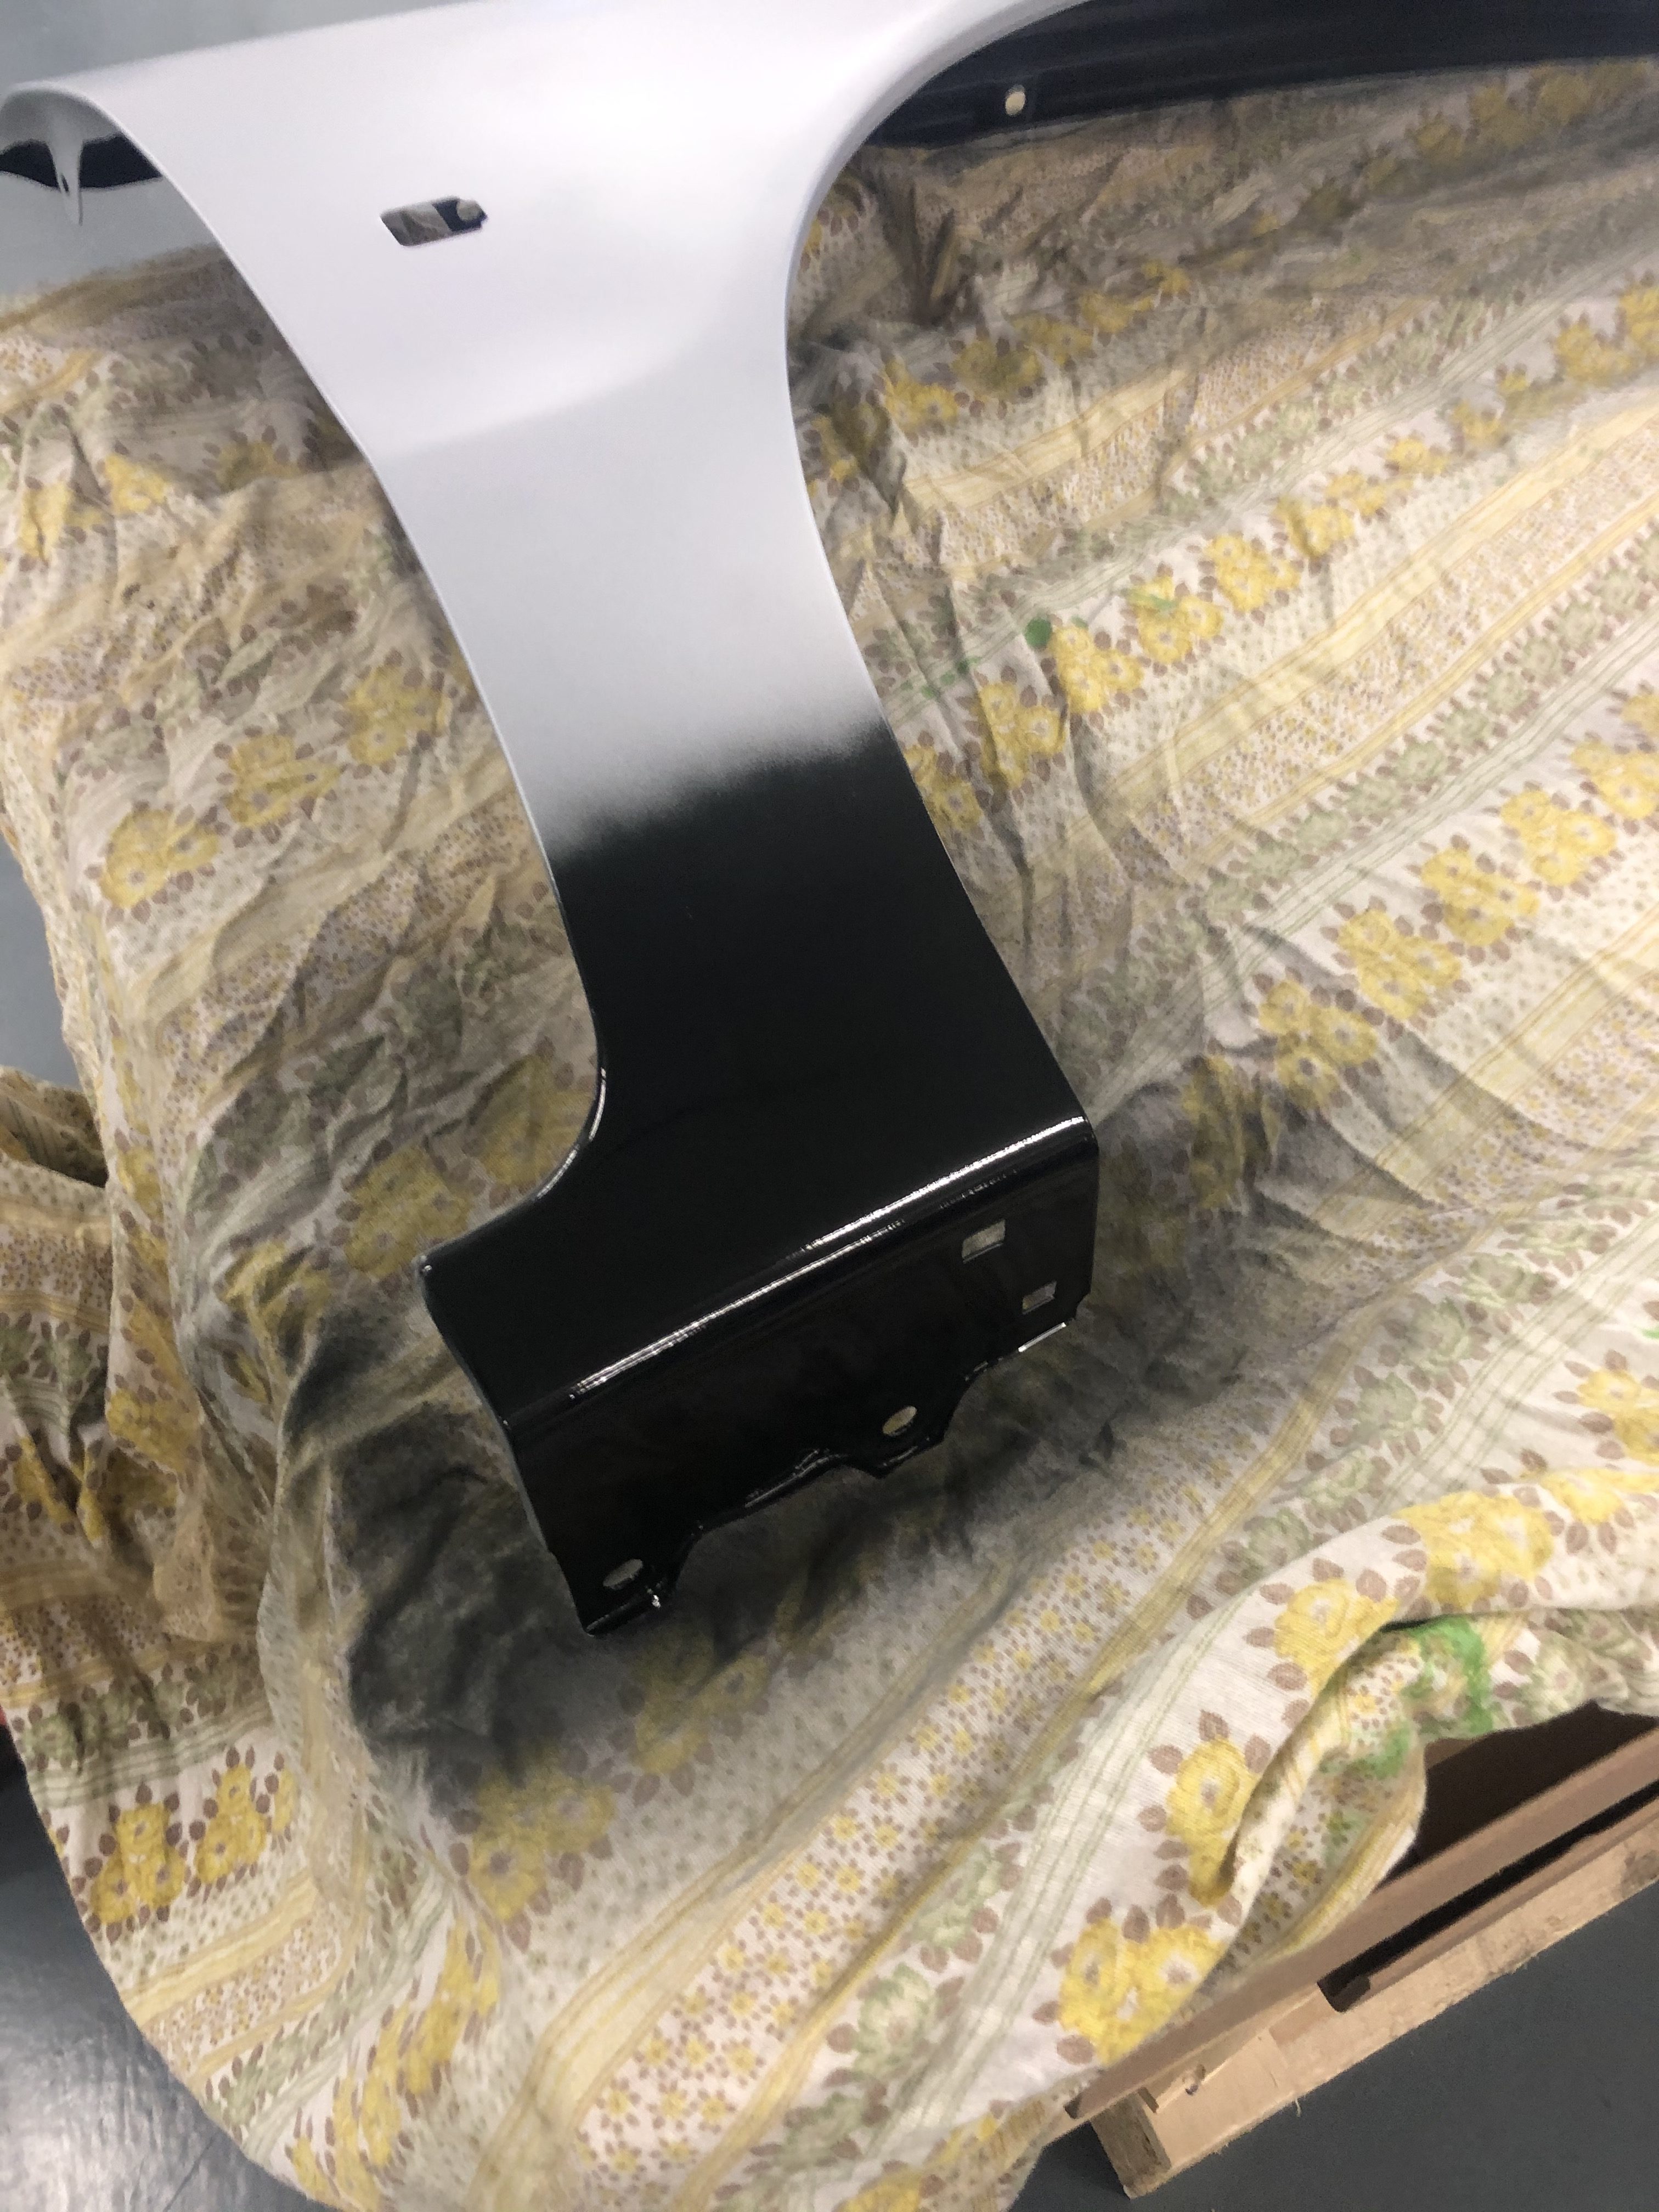
I decided to replace the front wing with a brand new one. Various manufacturers sell new wings dirt cheap (for like € 40) so it makes no sense to try to repair the old one nor to get one at the local scrapyard. I did have to spray paint it in the right color.
The only thing left to do before it will pass the next inspection is replacing the front bumper (the previous owner had a fender bender) and adjusting the headlights.
As mentioned in my previous post, we’re carbage running, so I needed a car. The criteria are simple:
It has to be from 1999 or before
It has to be worth € 500 or less
It has to bring us from The Netherlands to Ukraine and back.
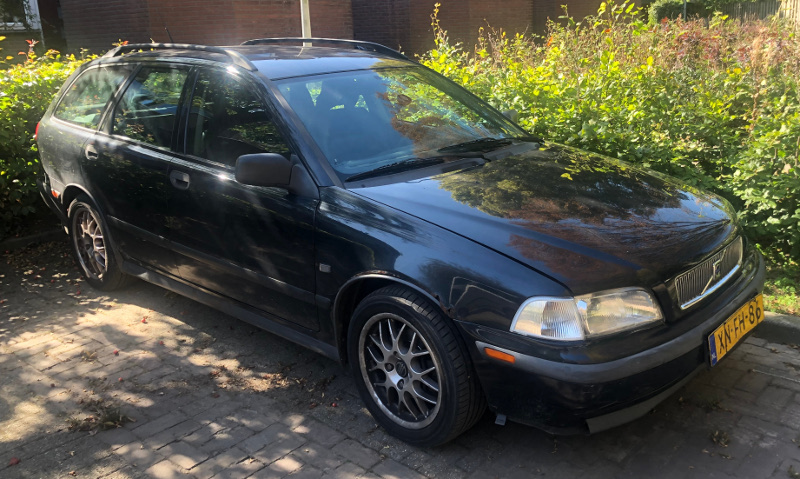
After a few weeks of searching the web, I found a ’99 Volvo V40 2.0T and bought it. As to be expected from a car that’s both cheap and old, it does indeed need some TLC. Regular maintenance is long overdue, the timing belt needs to be replaced, there is rust all over and a fender bender screwed up the alignment of the headlights. Apart from the maintenance and the timing belt replacement all of these issues would definitely be a problem at the next yearly inspection (which is due February ’20). And then there are some cosmetic issues like the upholstery coming loose/disintegrating, but more on that later.
We also picked a team name: Fred & Wilma. In memory of our cat Pebbles, who died earlier this year at the age of 20.
We decided we’re going to do the Carbage run next year. For those who don’t know: The Carbage run is a 5-day road trip in a car that’s at least 20 years old and is worth € 500 or less.
What does that have to do with making stuff, the topic of this blog?
Probably more than you might think. Apart from the fact that a 20-year-old might need some TLC before I trust it to bring us to Ukraine and back or even pass the yearly inspection, there is the tradition of pimping it up. Most (if not all) contestants will pimp their car with lots of lights, horns and a lot of useless crazy stuff too. There is € 500 to be won in the originality contest. But I’m quite sure most people just pimp their ride because it’s fun. It will definitely lead to some maker projects. Stay tuned!