As you may or may not know, I have a bus that I use as an RV. I use two large lead-acid batteries with a capacity of 280Ah each to power the lights, the fridge, the coffee maker, etc. The batteries are wired in series to give me 280Ah at 24V. As the batteries are starting to degrade to the point that it’s getting annoying and prices for Lithium-based batteries are coming down, I decided to ditch the lead-acid batteries and go for lithium instead. More specifically, Lithium iron phosphate (LiFePO4)
You can’t just wire up a couple of lithium cells in series and go camping. They need some additional stuff to keep them happy and safe. Since I like to fiddle with electronics and I certainly don’t mind saving some money in the process, I’m building the battery myself.
In this post I will explain which components I’ll use and why.
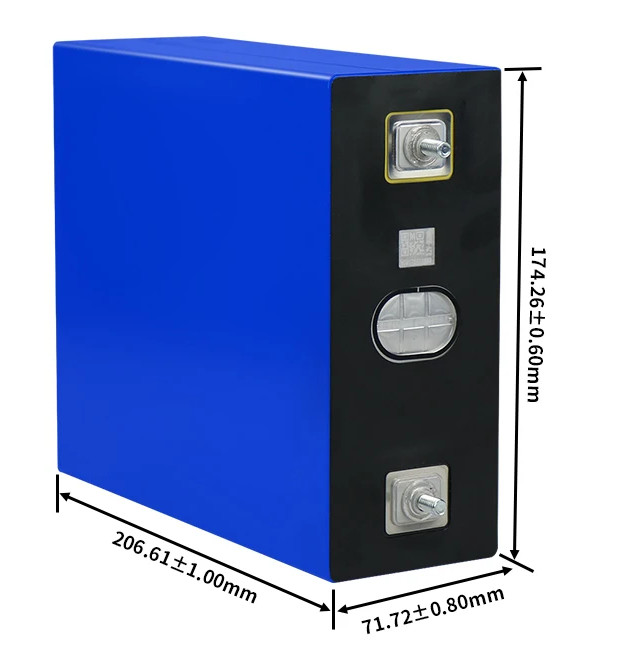
The cells
Lithium-based batteries can be discharged almost completely without damaging them, while lead-acid-based batteries need to be kept above 50% state of charge (SOC). Disobeying this rule will decrease the number of usable charge/discharge cycles. Lithium-based batteries also have the advantage of being lighter, smaller, and more efficient.
Lithium batteries come with some disadvantages as well. They’re more expensive, require additional electronics, some types can be dangerous if mishandled, and you can’t charge most types below freezing temperatures.
There are three main types of lithium batteries: Lithium-ion, lithium-iron-phosphate (LiFePO4), and lithium-titanate-oxide (LTO). All three types have their own characteristics, pros and cons.
- Lithium-ion is relatively cheap. The life expectancy is the lowest of all lithium-based battery chemistries at 300 to 500 full cycles, making the cost per cycle not that great. The real showstopper for me is the fire hazard though. Lithium-ion batteries are infamous for their tendency to spontaneously catch on fire if mishandled. To make it worse: A lithium-ion fire is very hard to put out because li-ion cells produce their own oxygen while burning. Not something I want to be using in my RV.
- Lithium-titanate-oxide (LTO) cells have a great life expectancy, as much as 20000 cycles. They can be charged in freezing temperatures and are almost impossible to set on fire. Sounds like the ideal battery chemistry, right? Unfortunately, all these advantages come at a cost. LTO cells are about four times as expensive as LiFePO4 cells. Even though the price per cycle is OK, the long life expectancy is not really an advantage as these cells would probably outlive my RV (and me).
- Lithium-iron-phosphate (LiFePO4) cells have a life expectancy of up to 6000 cycles. Prices have come down significantly over the last year or so, and last but not least: They don’t ignite or explode. There are some more nerdy advantages like their stable output voltage, but that’s not really important.
One disadvantage all lithum-based batteries have is the need to protect them from high/low voltages, and high/low temperatures. You must also keep all individual cells in the pack at the same voltage. Fortunately, all this is now easily taken care of by one of the many battery management systems (BMS) you can now buy at reasonable prices. More on that topic later.
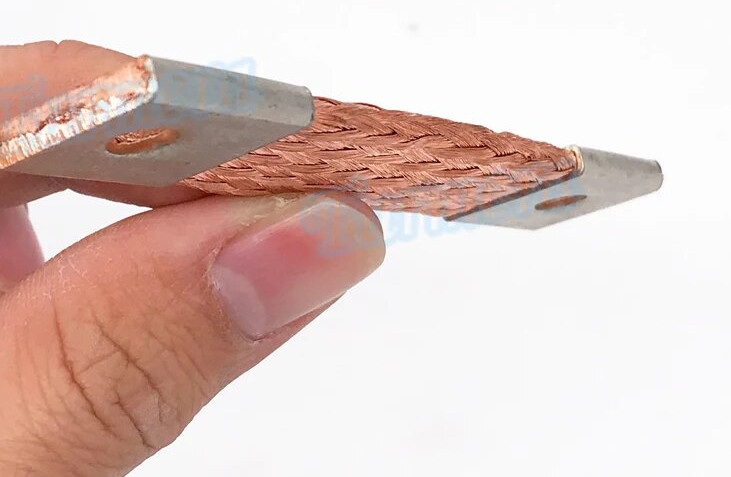
I ordered 8 320Ah LiFePO4 cells and some flexible busbars to connect them in series.
The BMS
A BMS is responsible for the well-being of the individual cells in a battery. In the case of LiFePO4 cells, this means:
- Make sure the battery can’t be charged below freezing. It’s okay to draw power from cold cells, but an attempt to charge them while frozen will damage the cells instantly.
- Protect the cells from overheating.
- Protect the cells from over-discharging by switching off the load if the cell voltage drops below 2,5V.
- Protect the cells from overcharging by switching off the charger if the cell voltage reaches 2,65V.
- Balance the cell voltages to make sure all cells are equally charged.
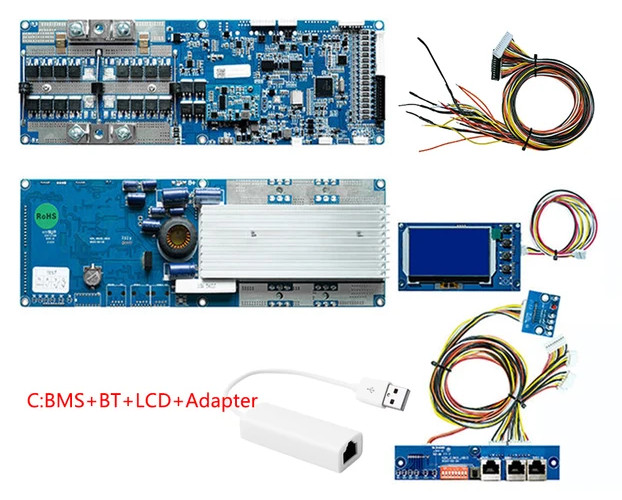
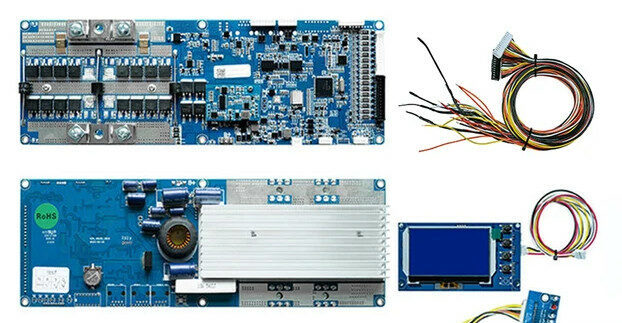
There are many BMS-es that offer these features. The main reason I chose the Seplos BMS V3, is because it can communicate with my Victron Cerbo GX. This allows me to really integrate the battery into my energy system and let it control my MPPT solar charge controller, among other things. It’s affordable, able to handle a decent amount of current (150A) and according to Andy over at the Off-grid garage, it works great if you use the latest software.
This BMS should also be able to control a battery heater. I have to figure out how to hook that all up when it arrives. The BMS will only turn on the heater if the cells are too cold and an attempt is made to charge the battery. Heating up the battery when it’s not going to be charged anyway is just a waste of energy. That’s why I didn’t want to use a thermostat.
Heaters
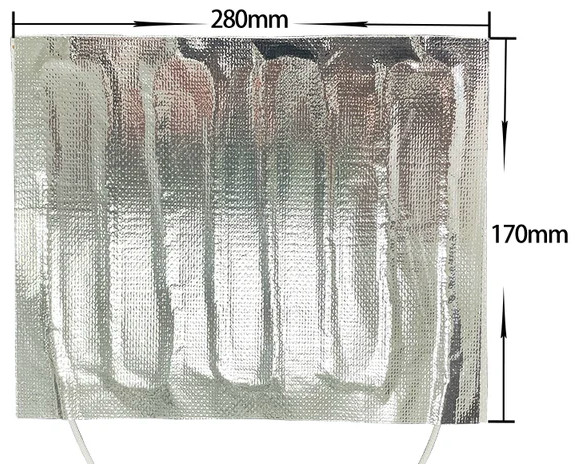
I already mentioned that LiFePO4 cells can not be charged below freezing. I’m adding a couple of heaters to the battery pack to overcome that limitation. The heaters will be hooked up to the BMS, which switches them on if an attempt is made to charge the battery while it’s frozen. When the battery is heated up sufficiently, the BMS will automatically switch off the heaters and allow charging.
Breaker
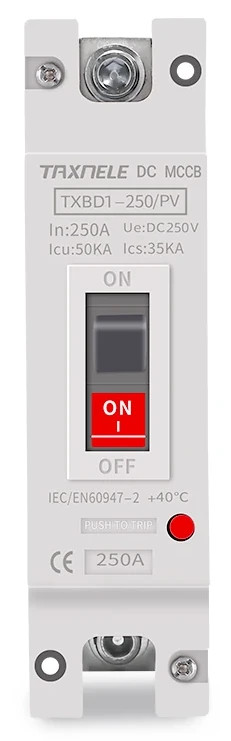
Lithium cells can deliver enormous amounts of current: The maximum allowed discharge current is 300A, although the BMS I chose is limited to 150A. The impedance of each cell is less than 0.25mΩ according to the specifications, which means that the short circuit current of a charged cell can be thousands of amps. That’s not good 🙂 I’ve ordered one of these breakers to make sure the current stays below 150A.
Terminals
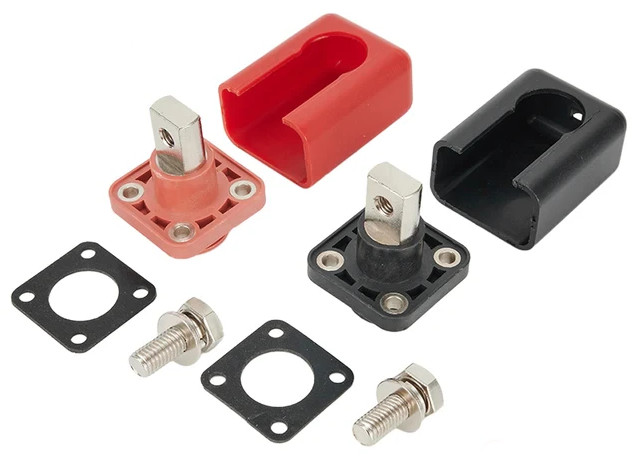
I wanted to have some neat battery terminals to mount in the box. I have to connect the finished battery one way or another. These ones can carry 200A and come with covers.
Torque wrench
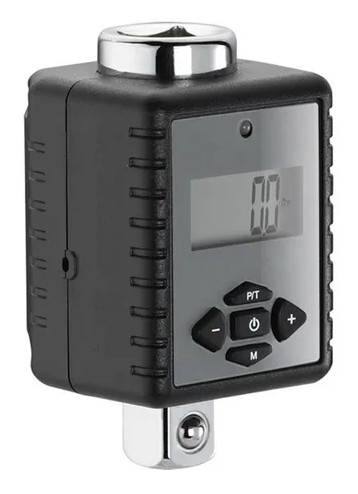
The nuts on the cells need to be torqued to specification. No more than 8nm (5.9 lbf · ft) it says in the manual, so 5nm (3.7 lbf · ft) should be fine. I don’t want to over-tighten the nuts. The studs in the cells are aluminum. I’ve already seen people (on YouTube) rip the threads out. I own a torque wrench, but it’s a big one. It’s not suitable for small nuts like this. That’s why I ordered this one.
That’s it!
Well, almost. There’s some small stuff I’ve ordered like self-adhesive foam pads, but nothing really worth mentioning. So now it’s time to practice my patience and wait for all the parts to be delivered.
In the meantime, I will think about the mechanical part of this project. How to build the casing, where to position the terminals, the BMS display, the breaker, etc.